Announcement

Collapse
No announcement yet.

The Druids Duck Hunt

Collapse
X
 
  • Filter
  • Time
  • Show
Clear All
new posts

  • #31
    Originally posted by Stock View Post
    What I've done with this type of bucket previously was modified ordinary tips to fit as in weld some square bars together ground them and drill them to take CAT 215 teeth,then weld them in to the cutting edge,
    Poclain had a two piece set up with an insert to go in to the formed cutting edge,and replaceable tooth.

    The most recent was just sent it out to have the cutting edge replaced and new CAT 225 carriers and tips put on.

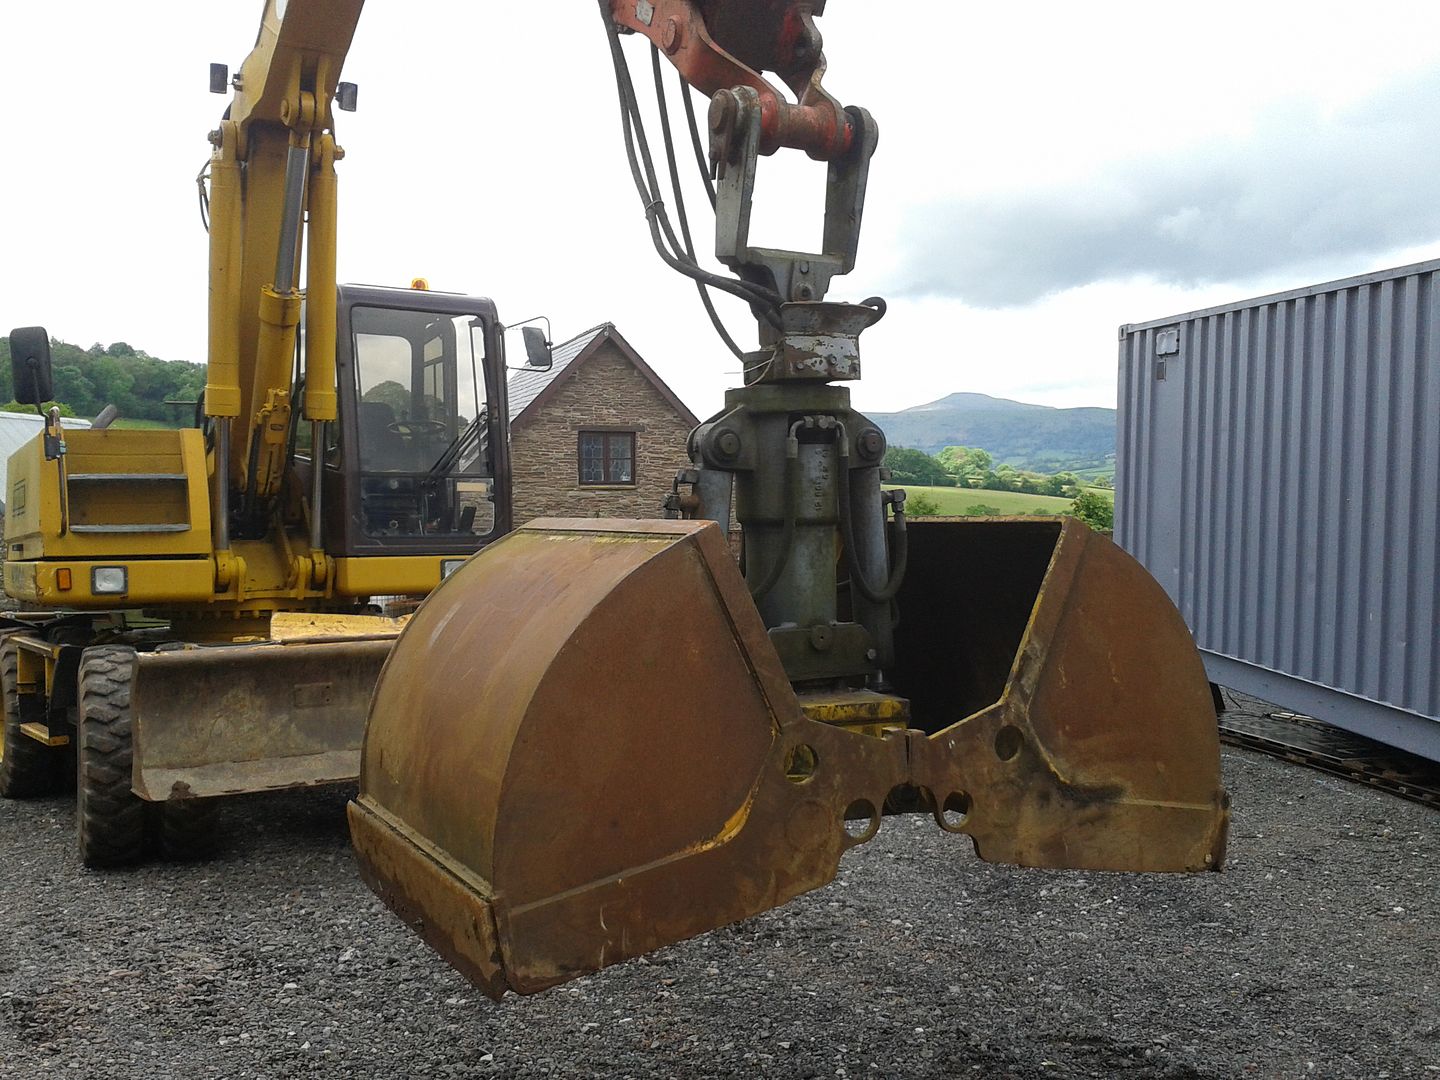
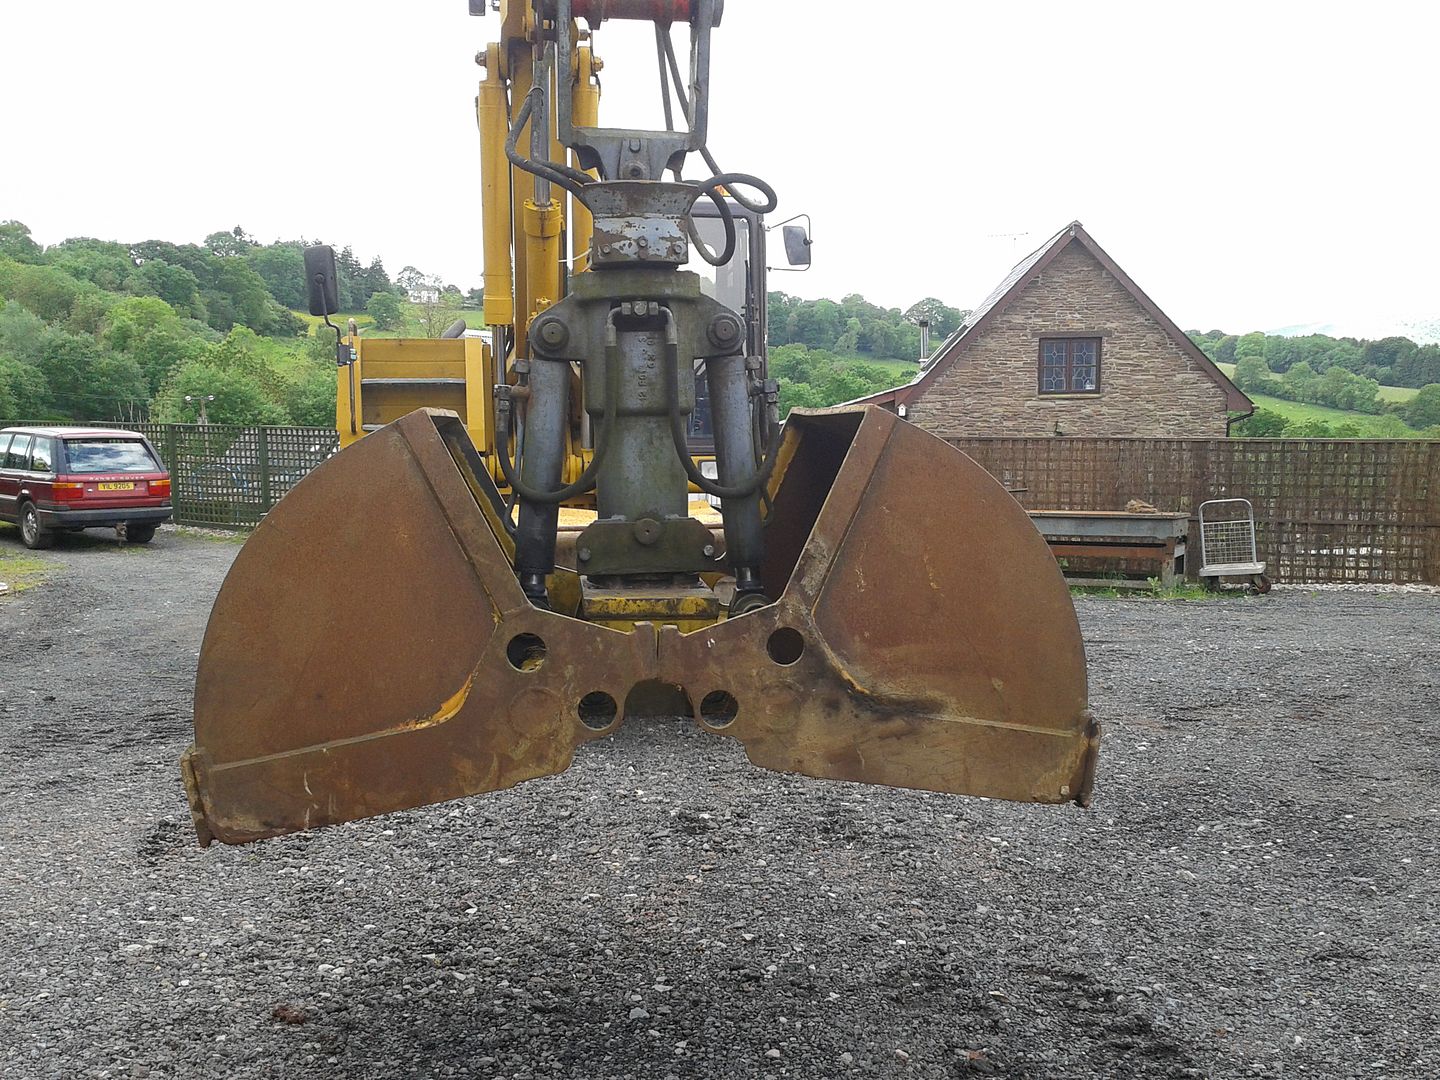
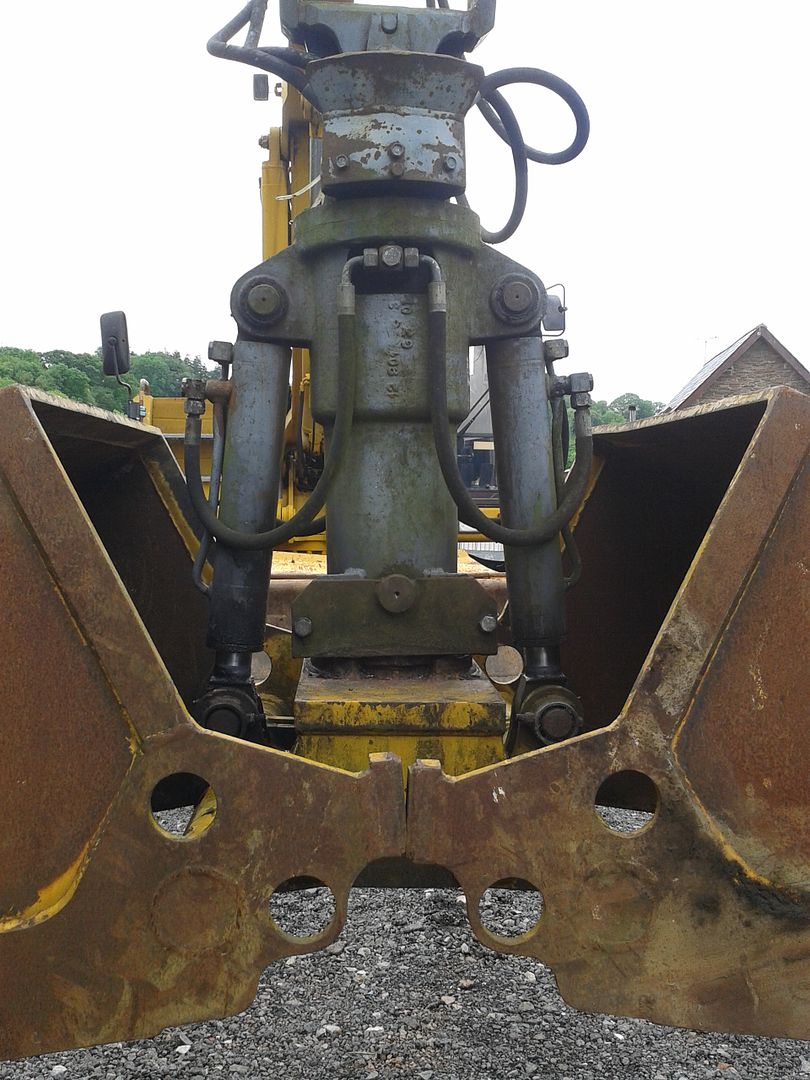
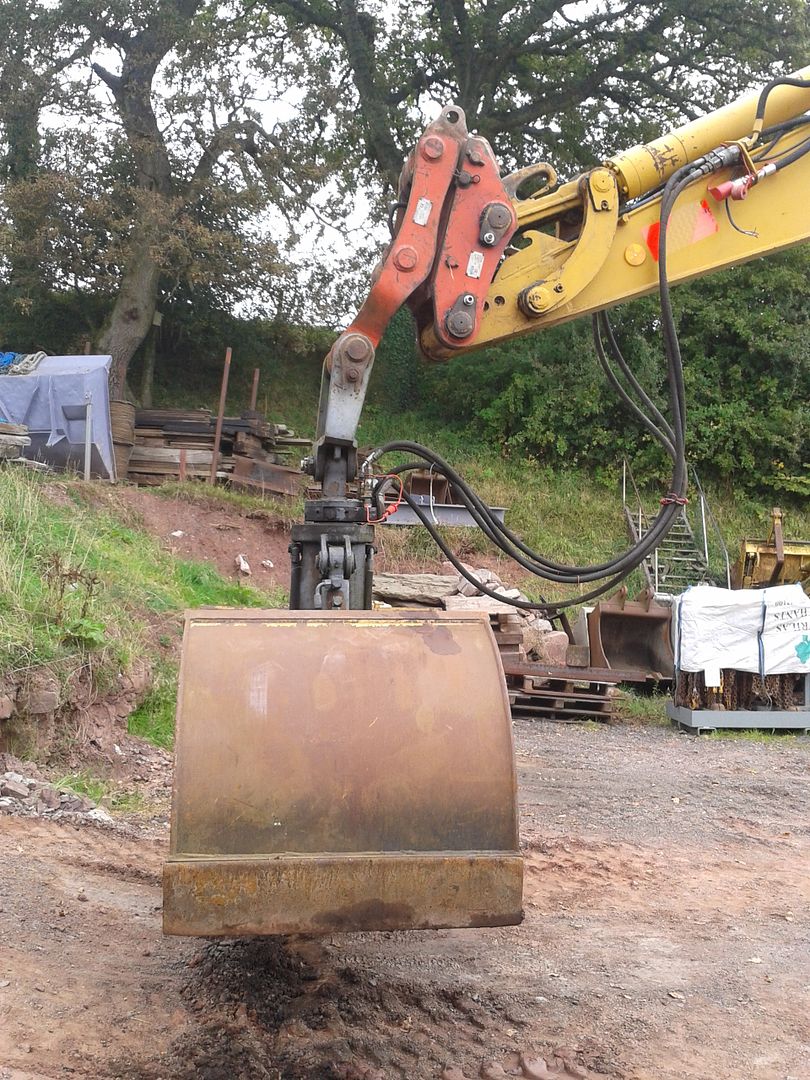
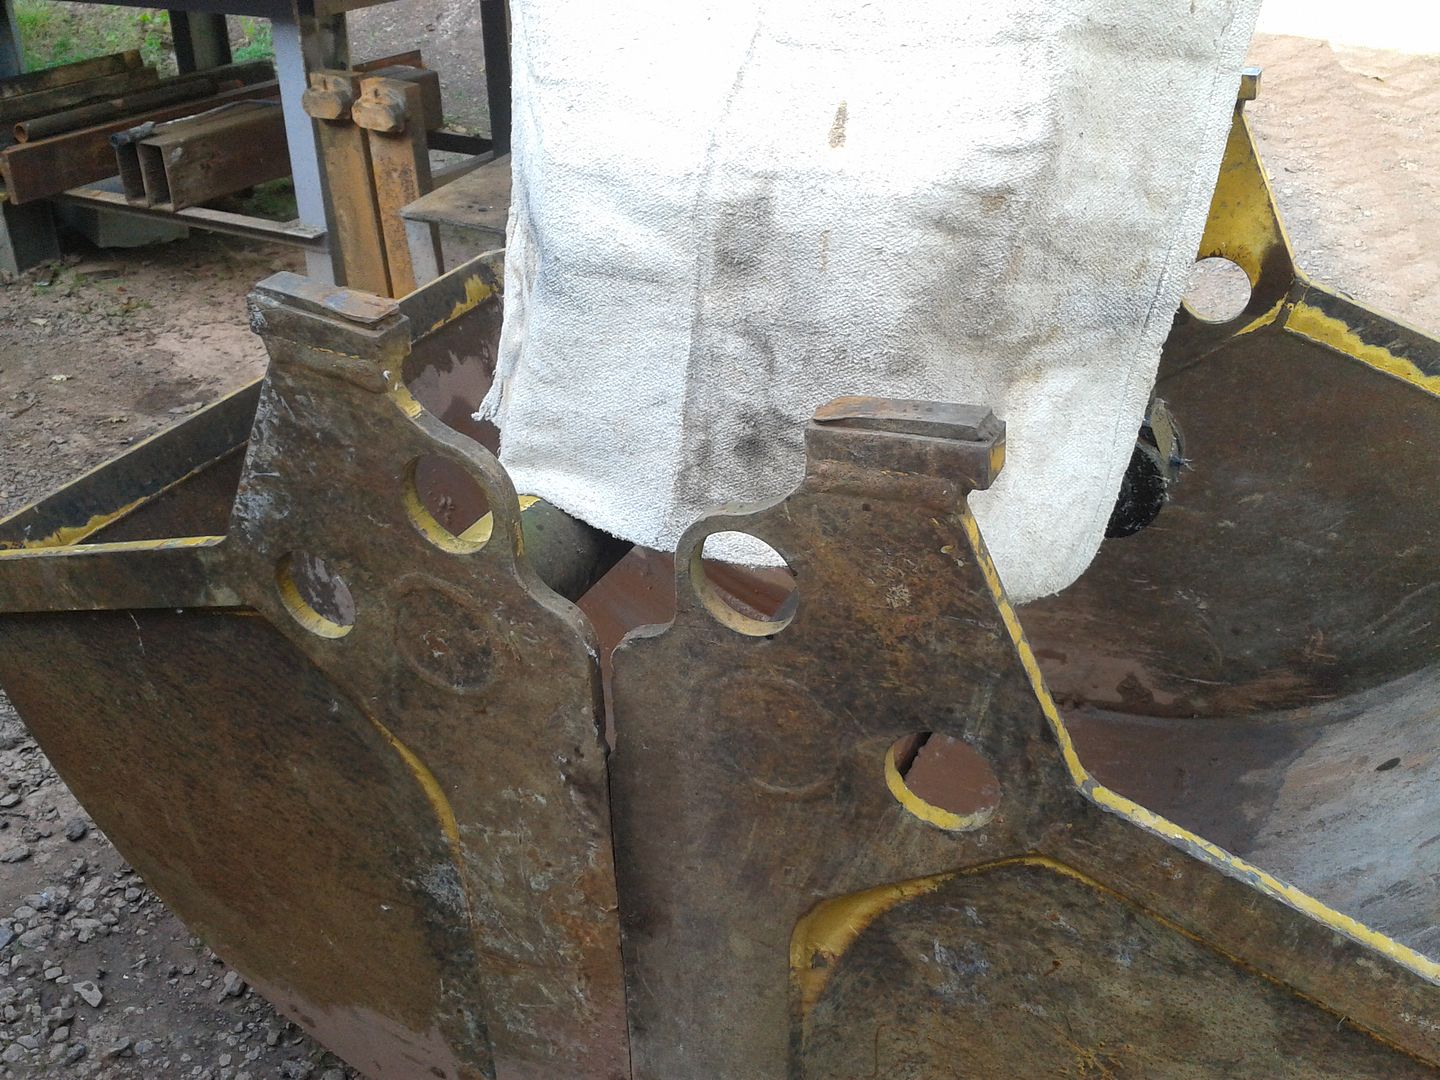
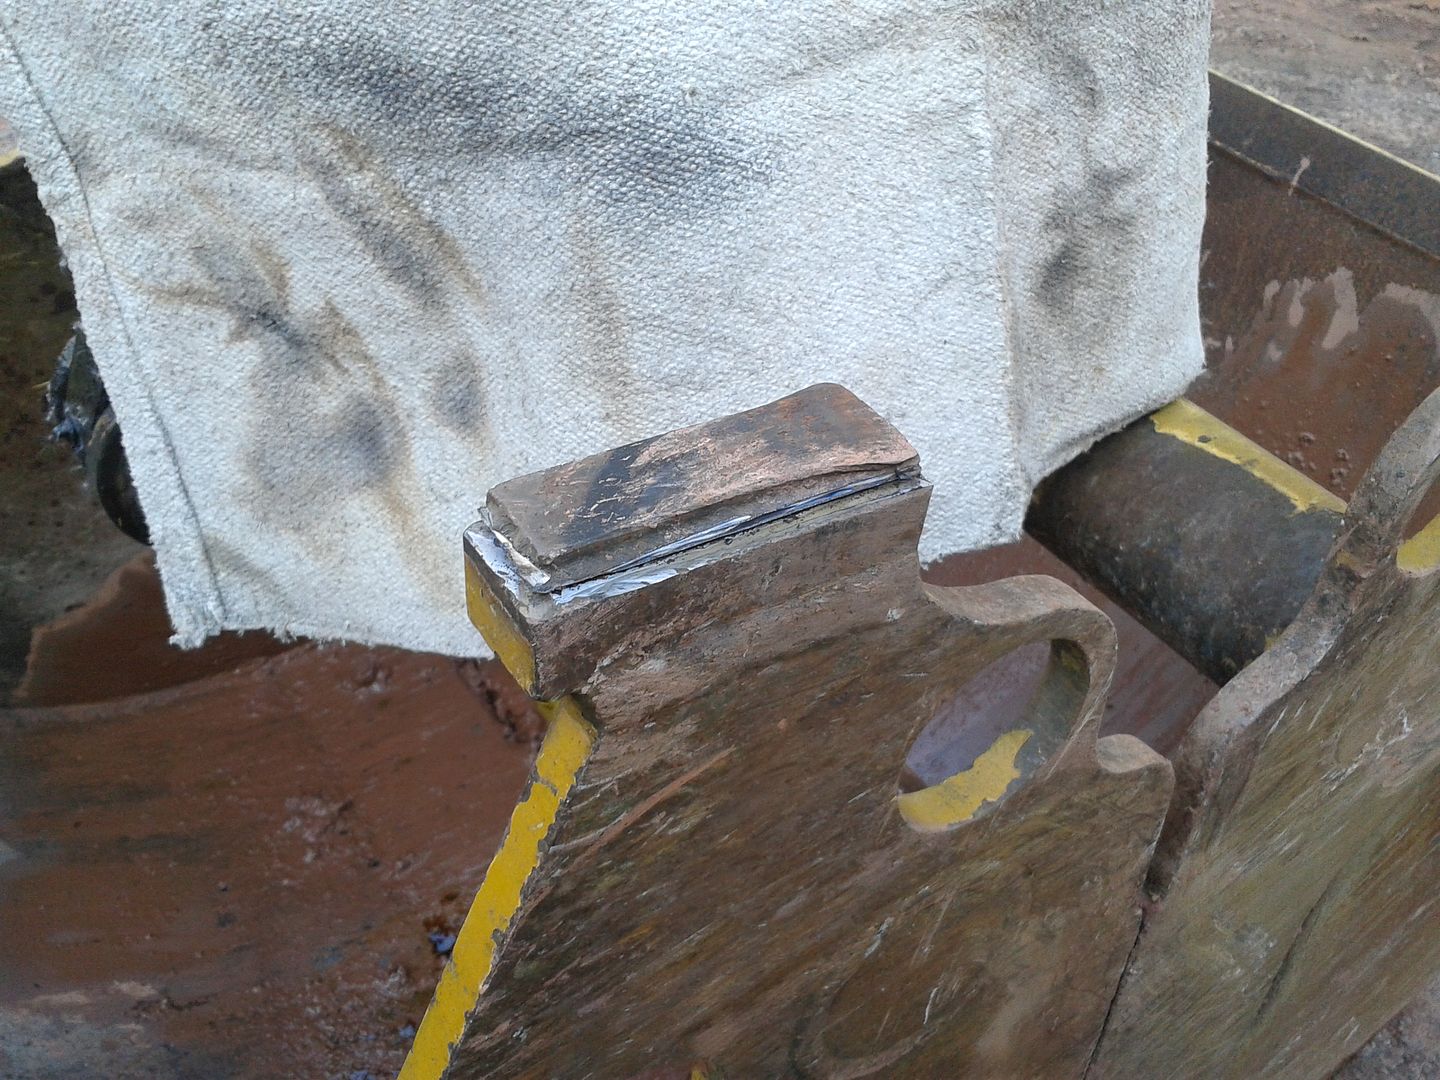
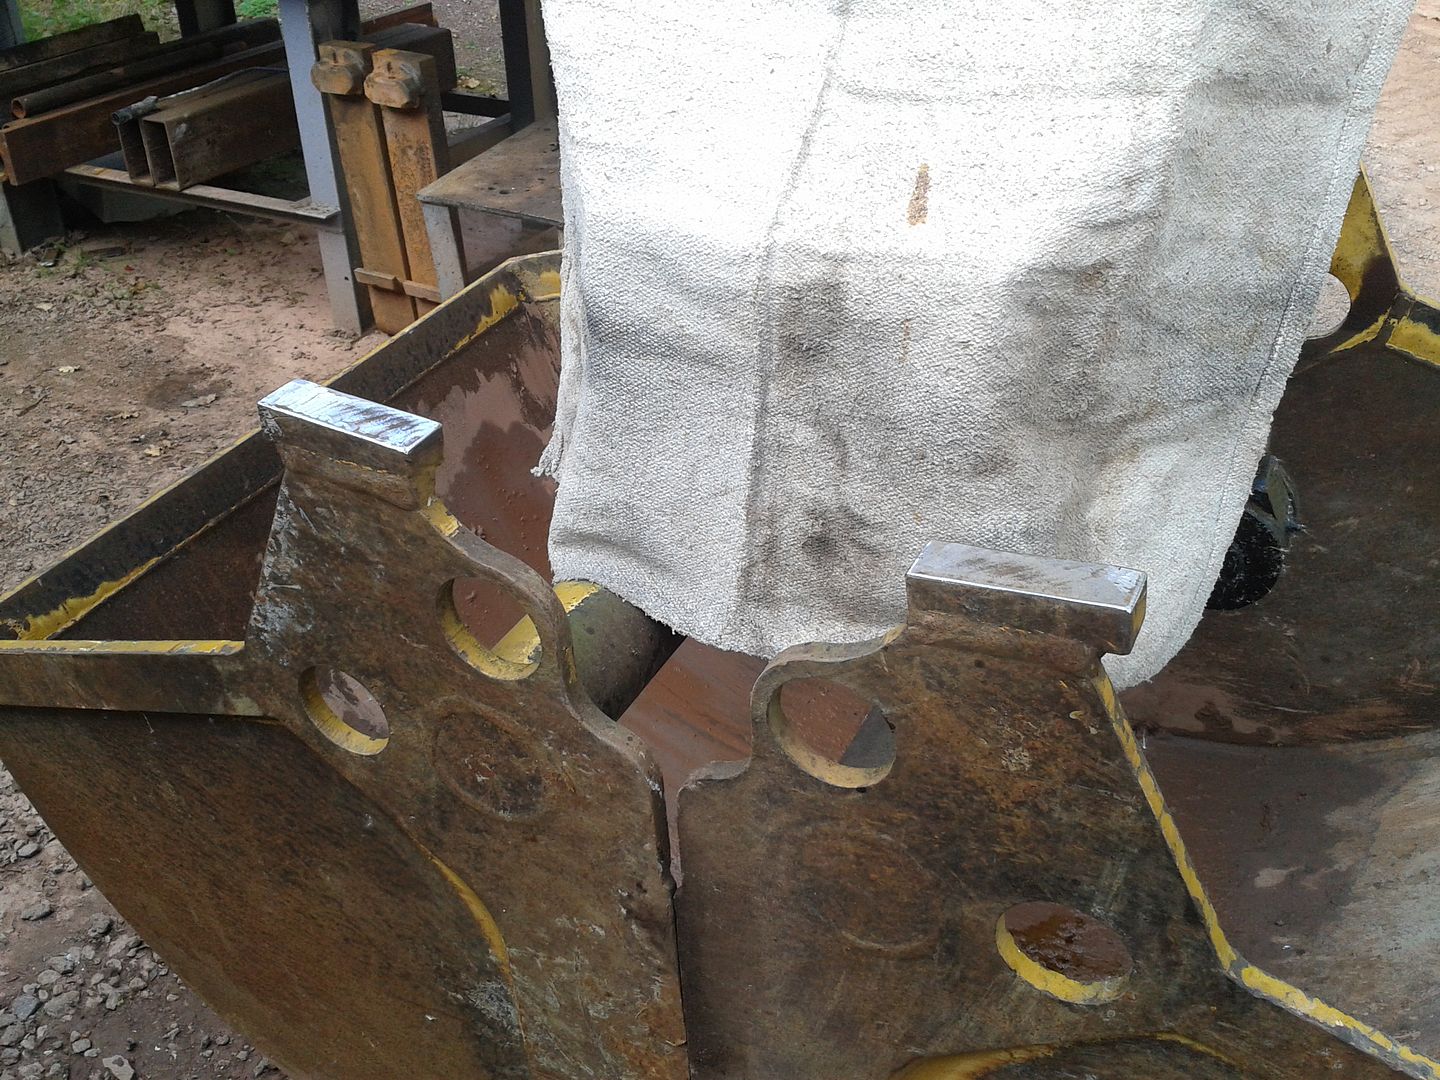
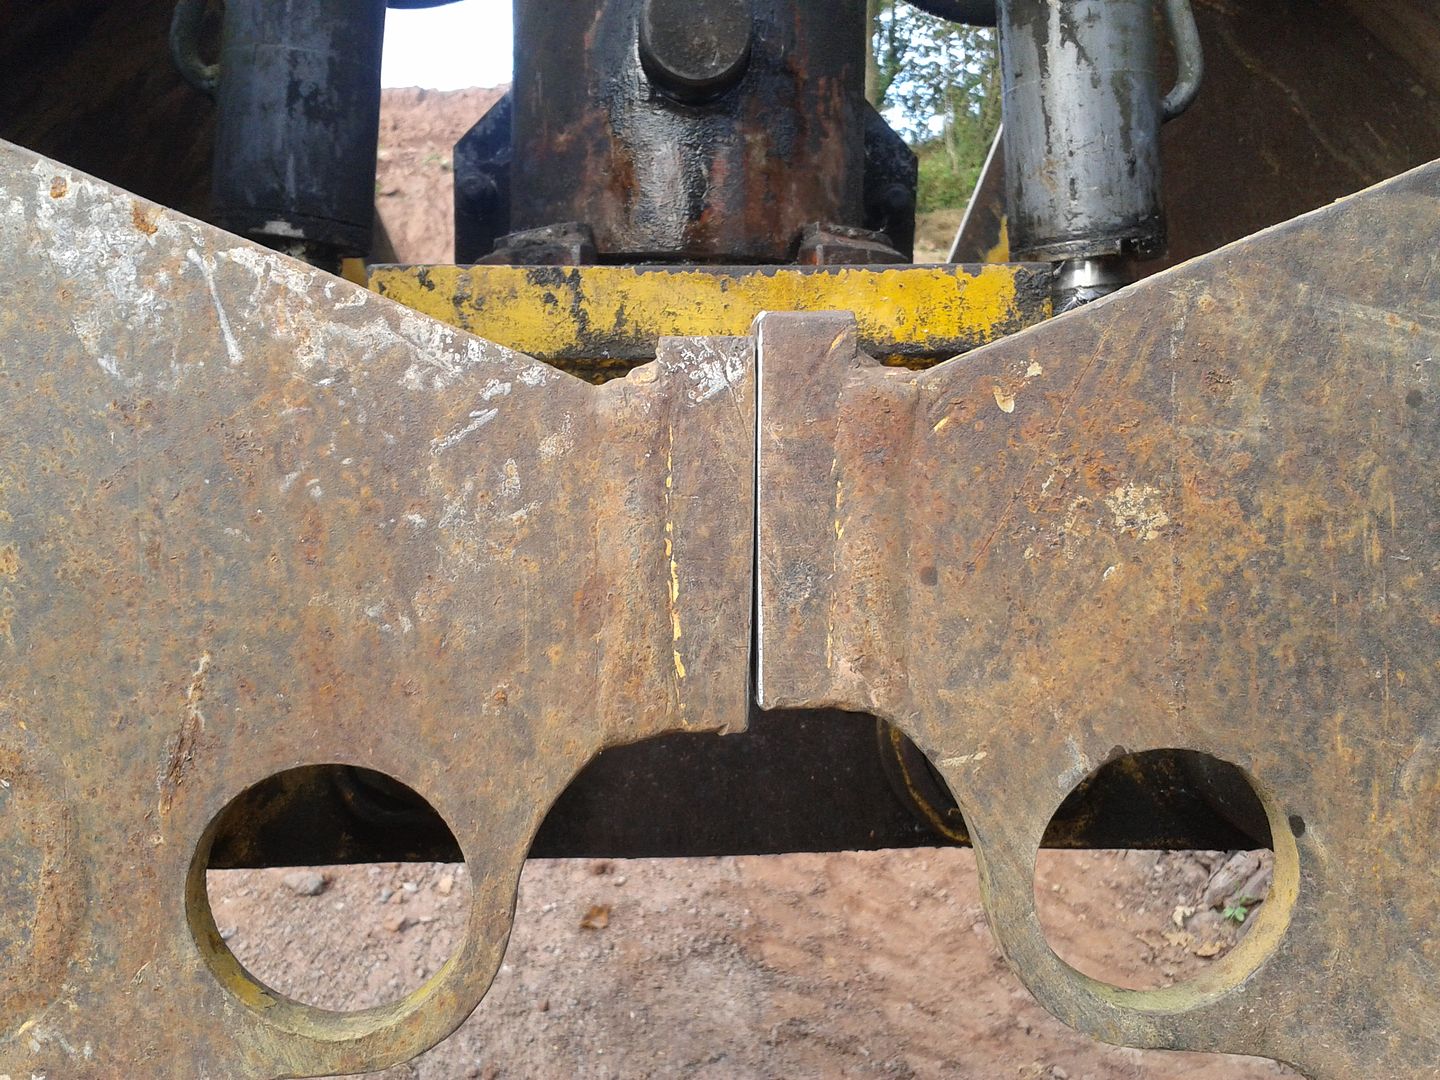
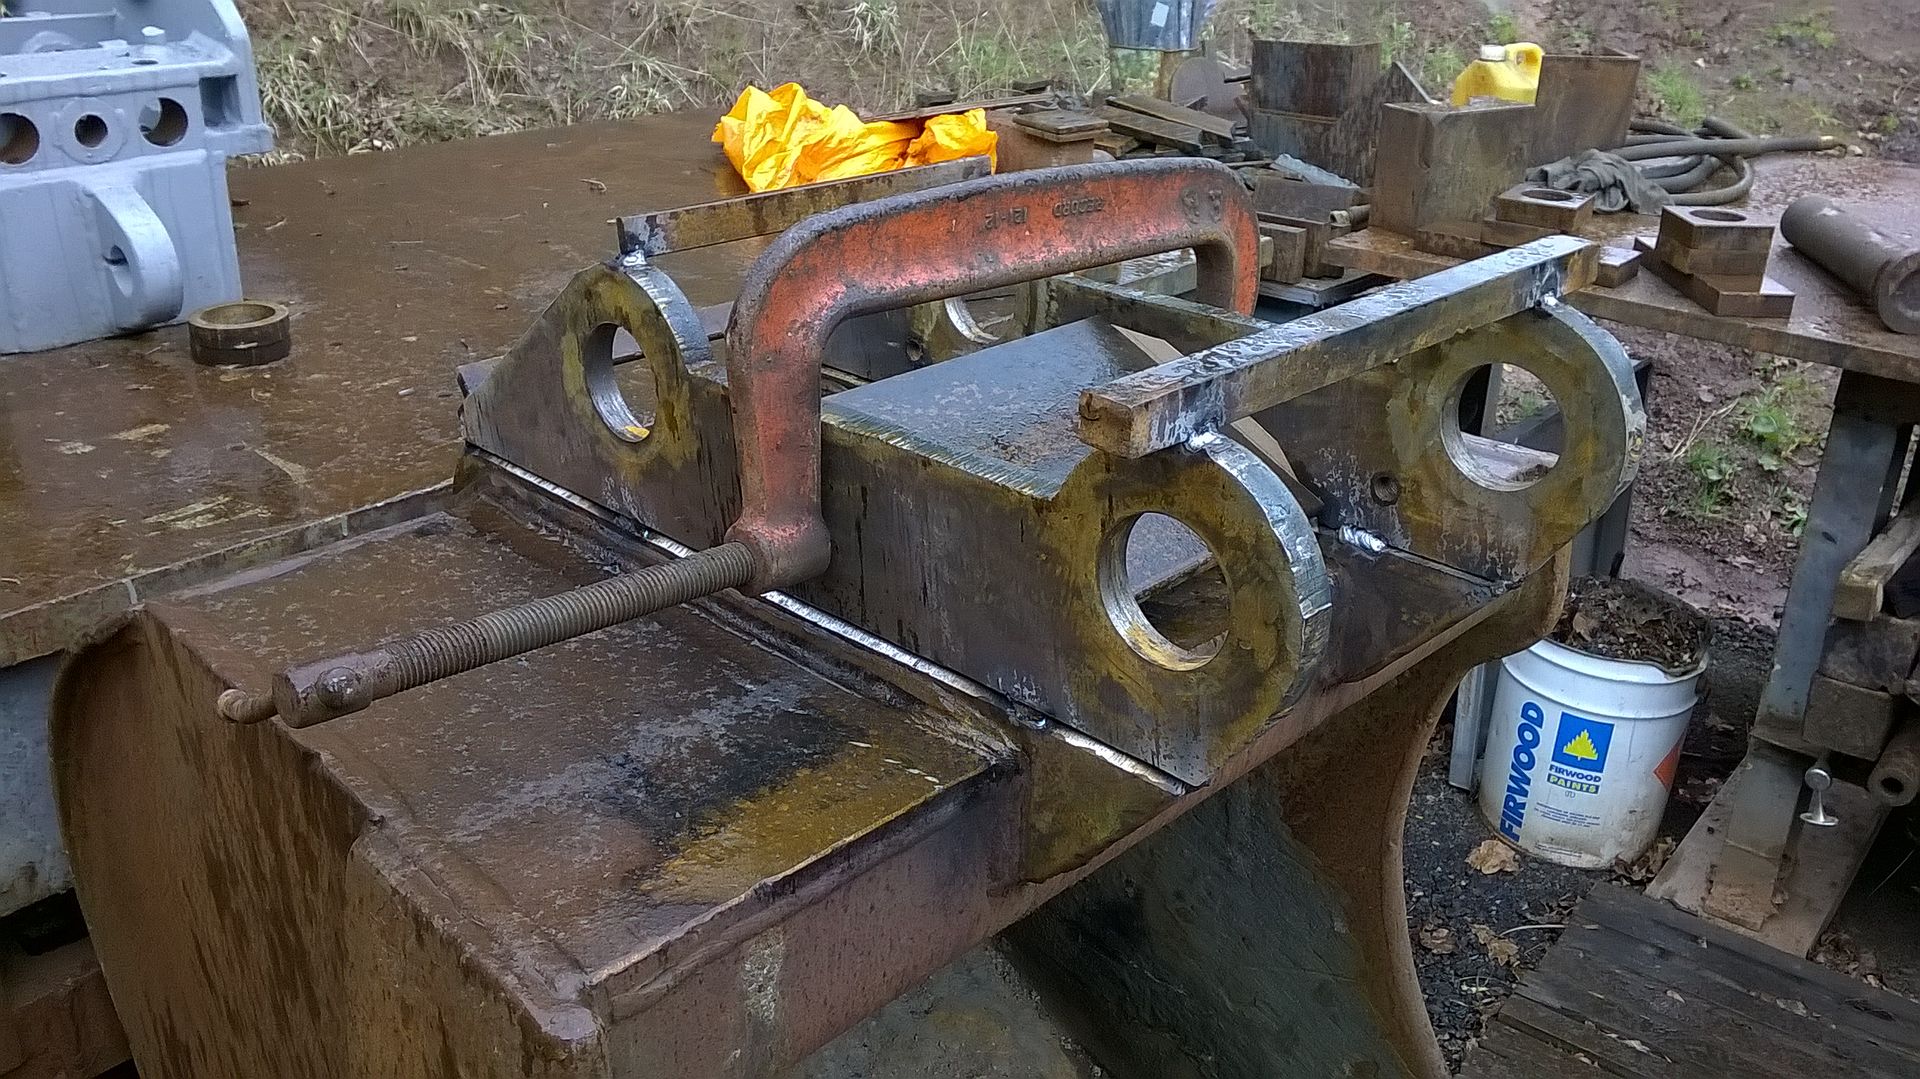
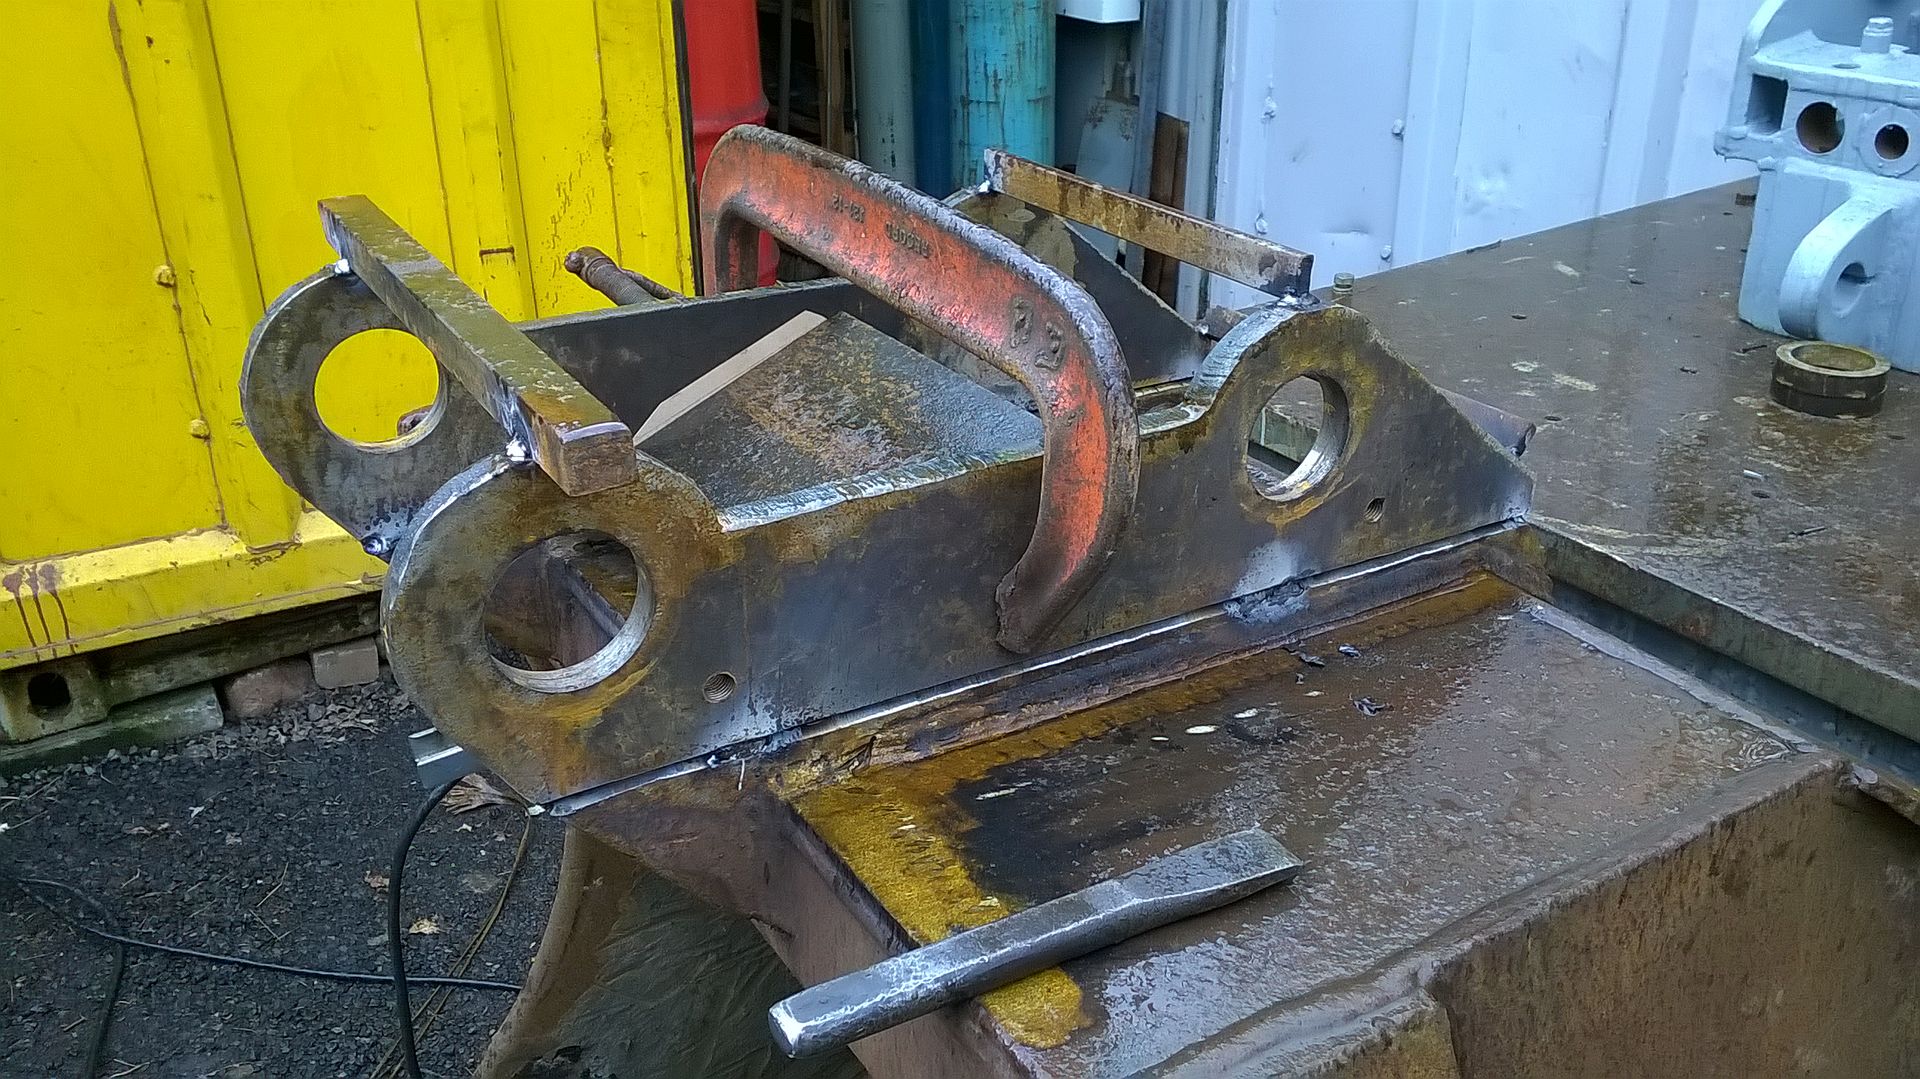
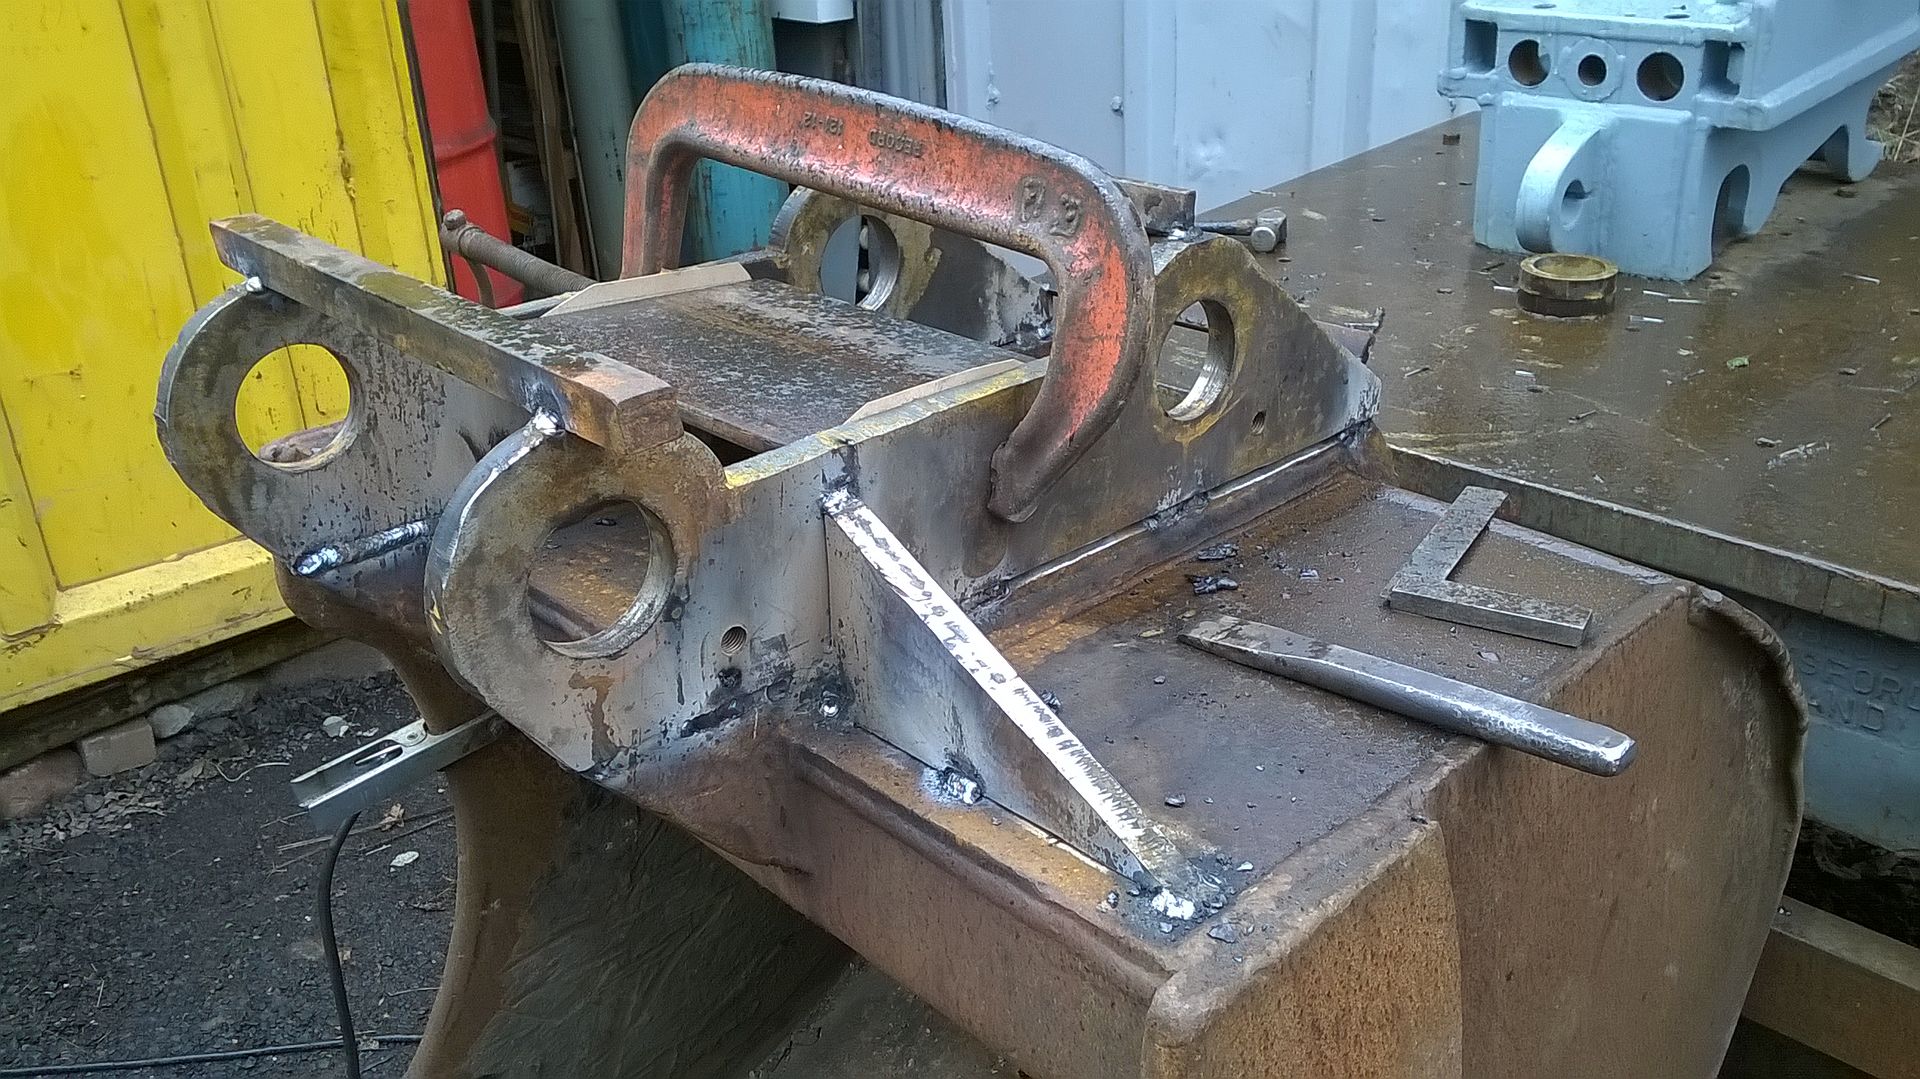
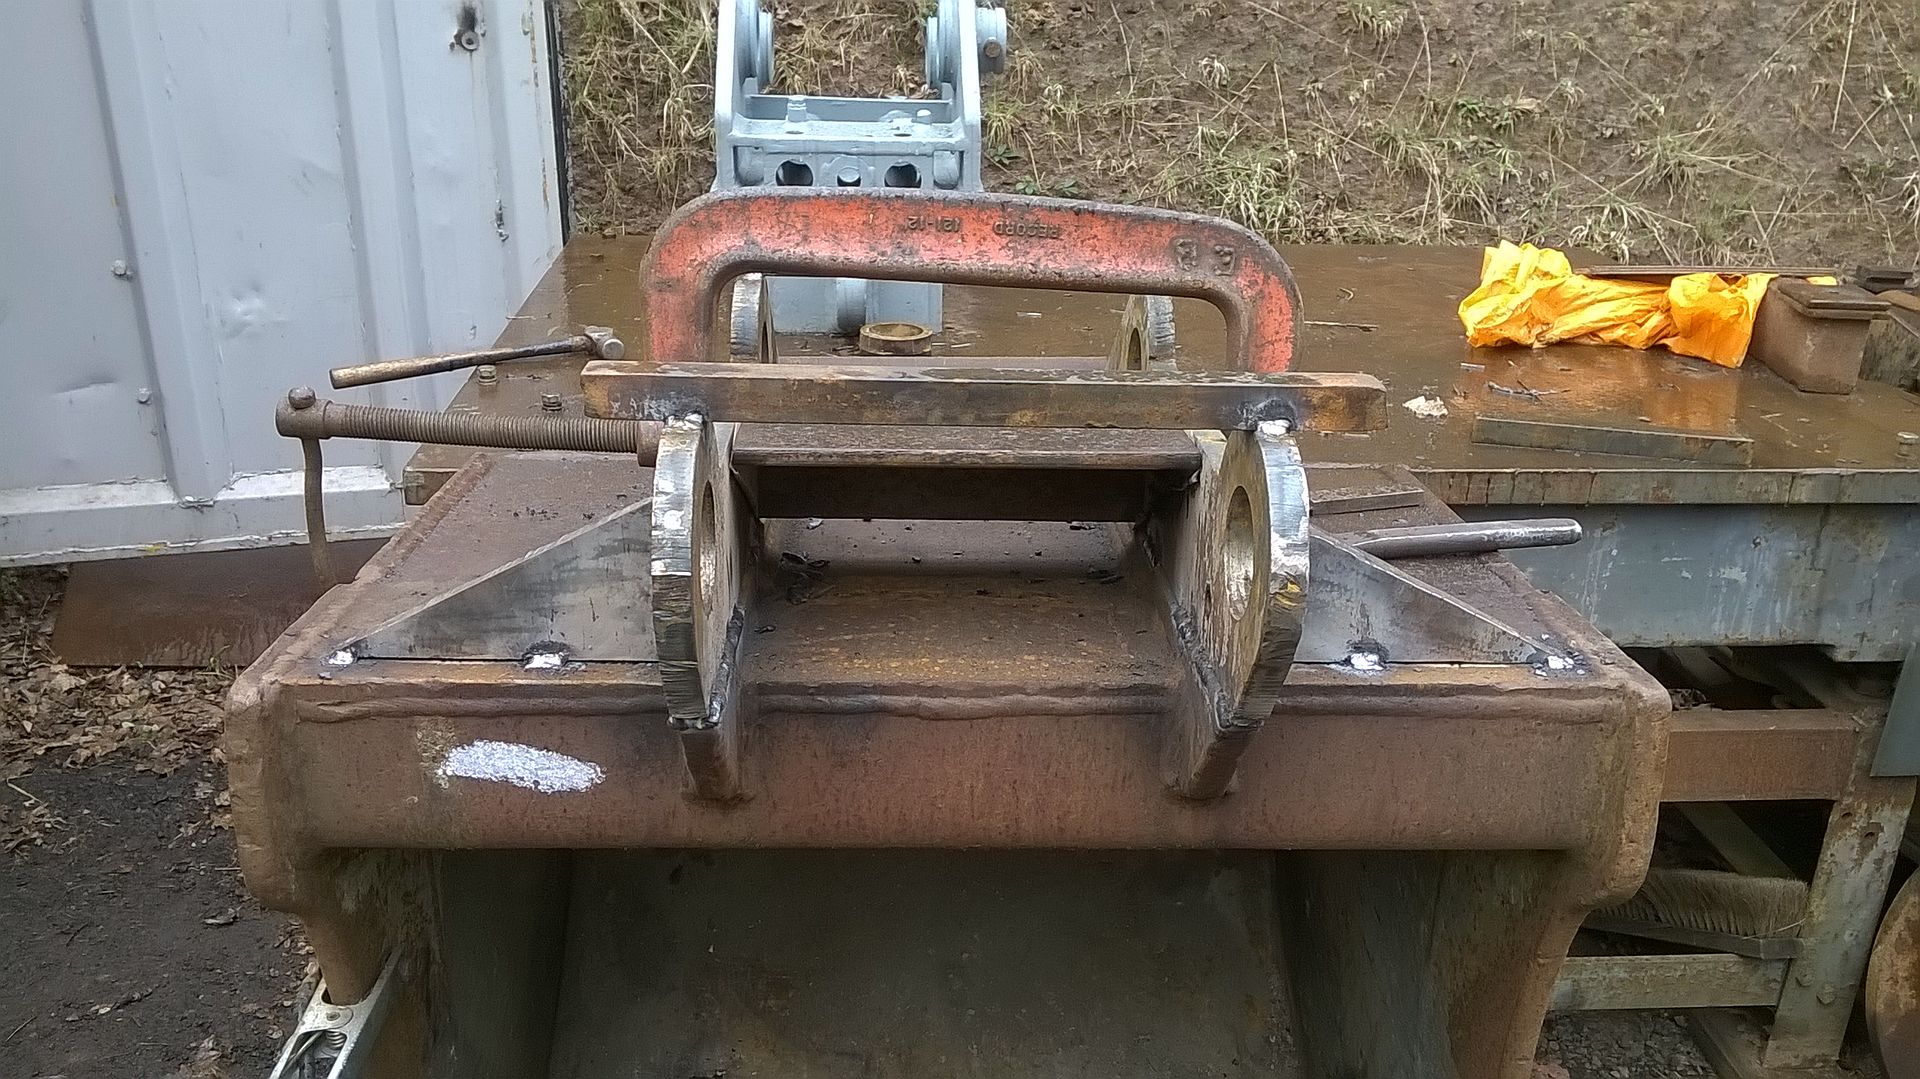
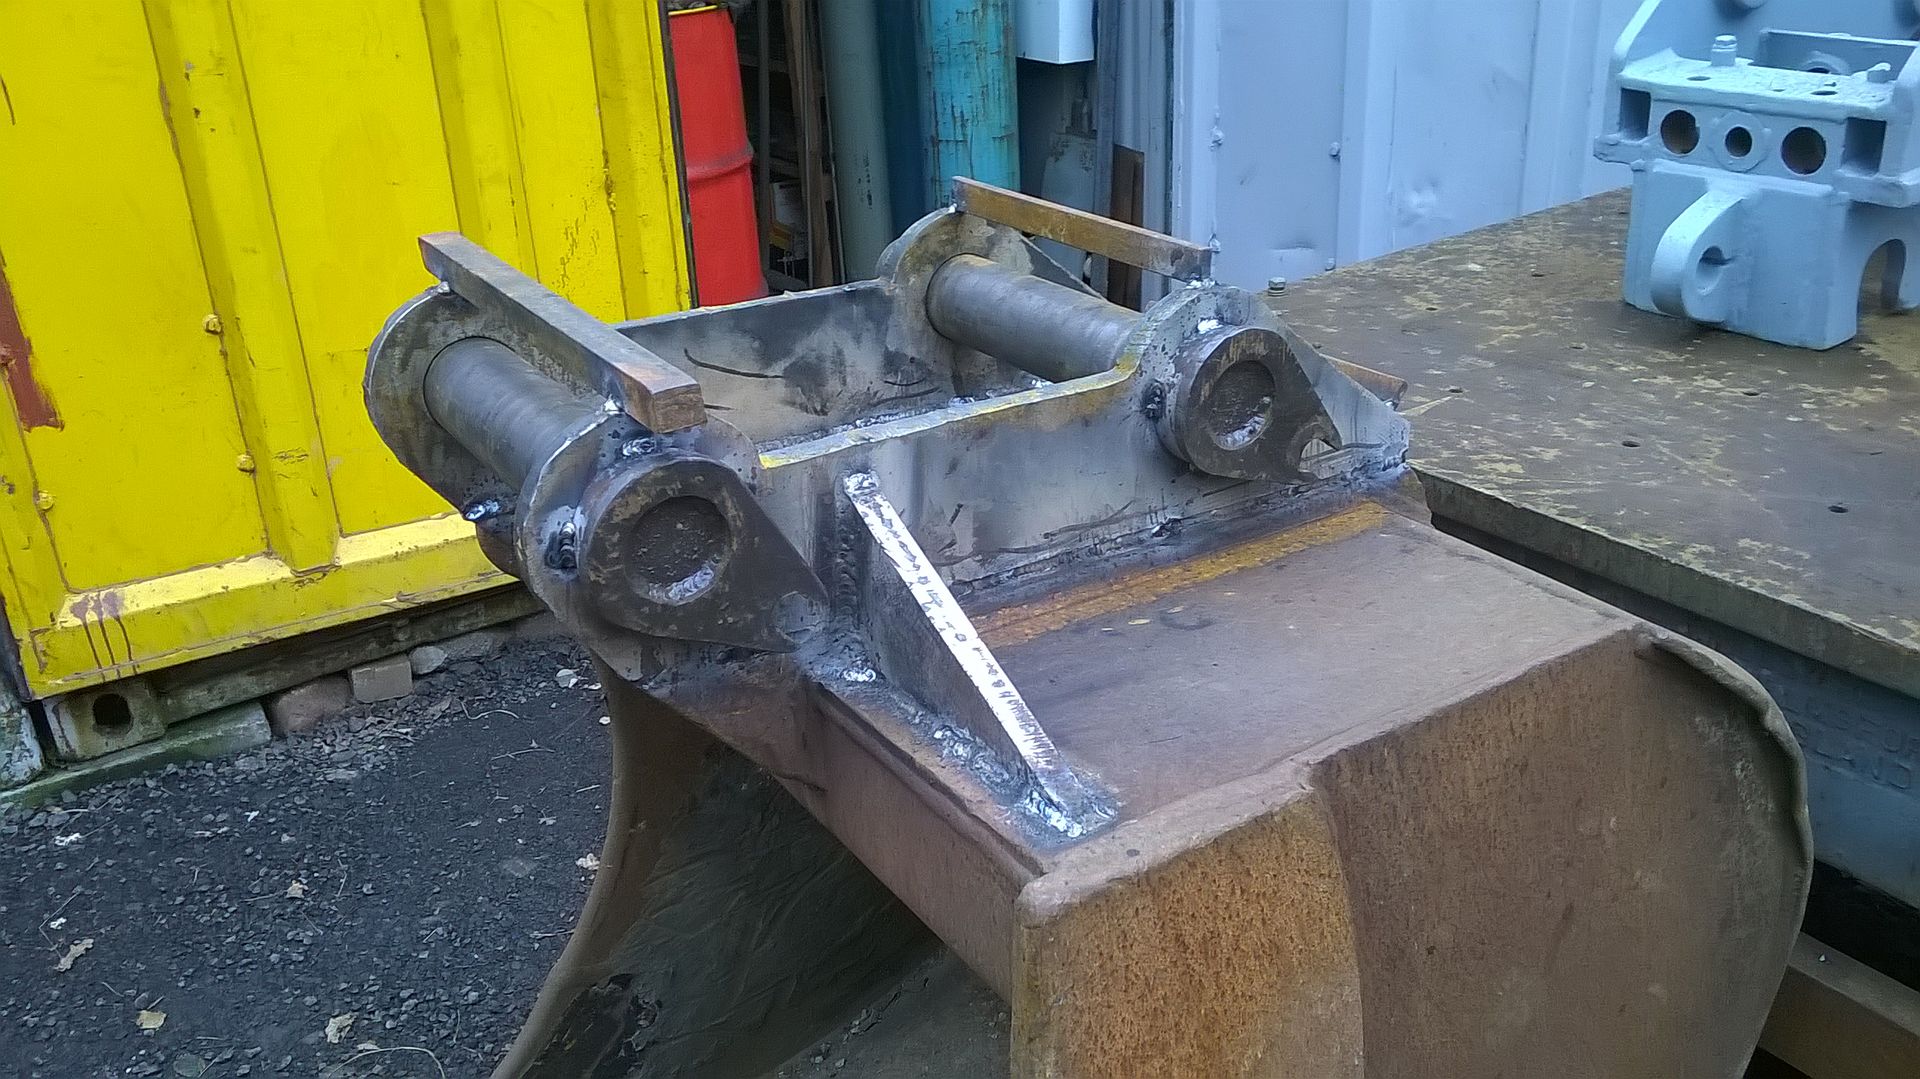
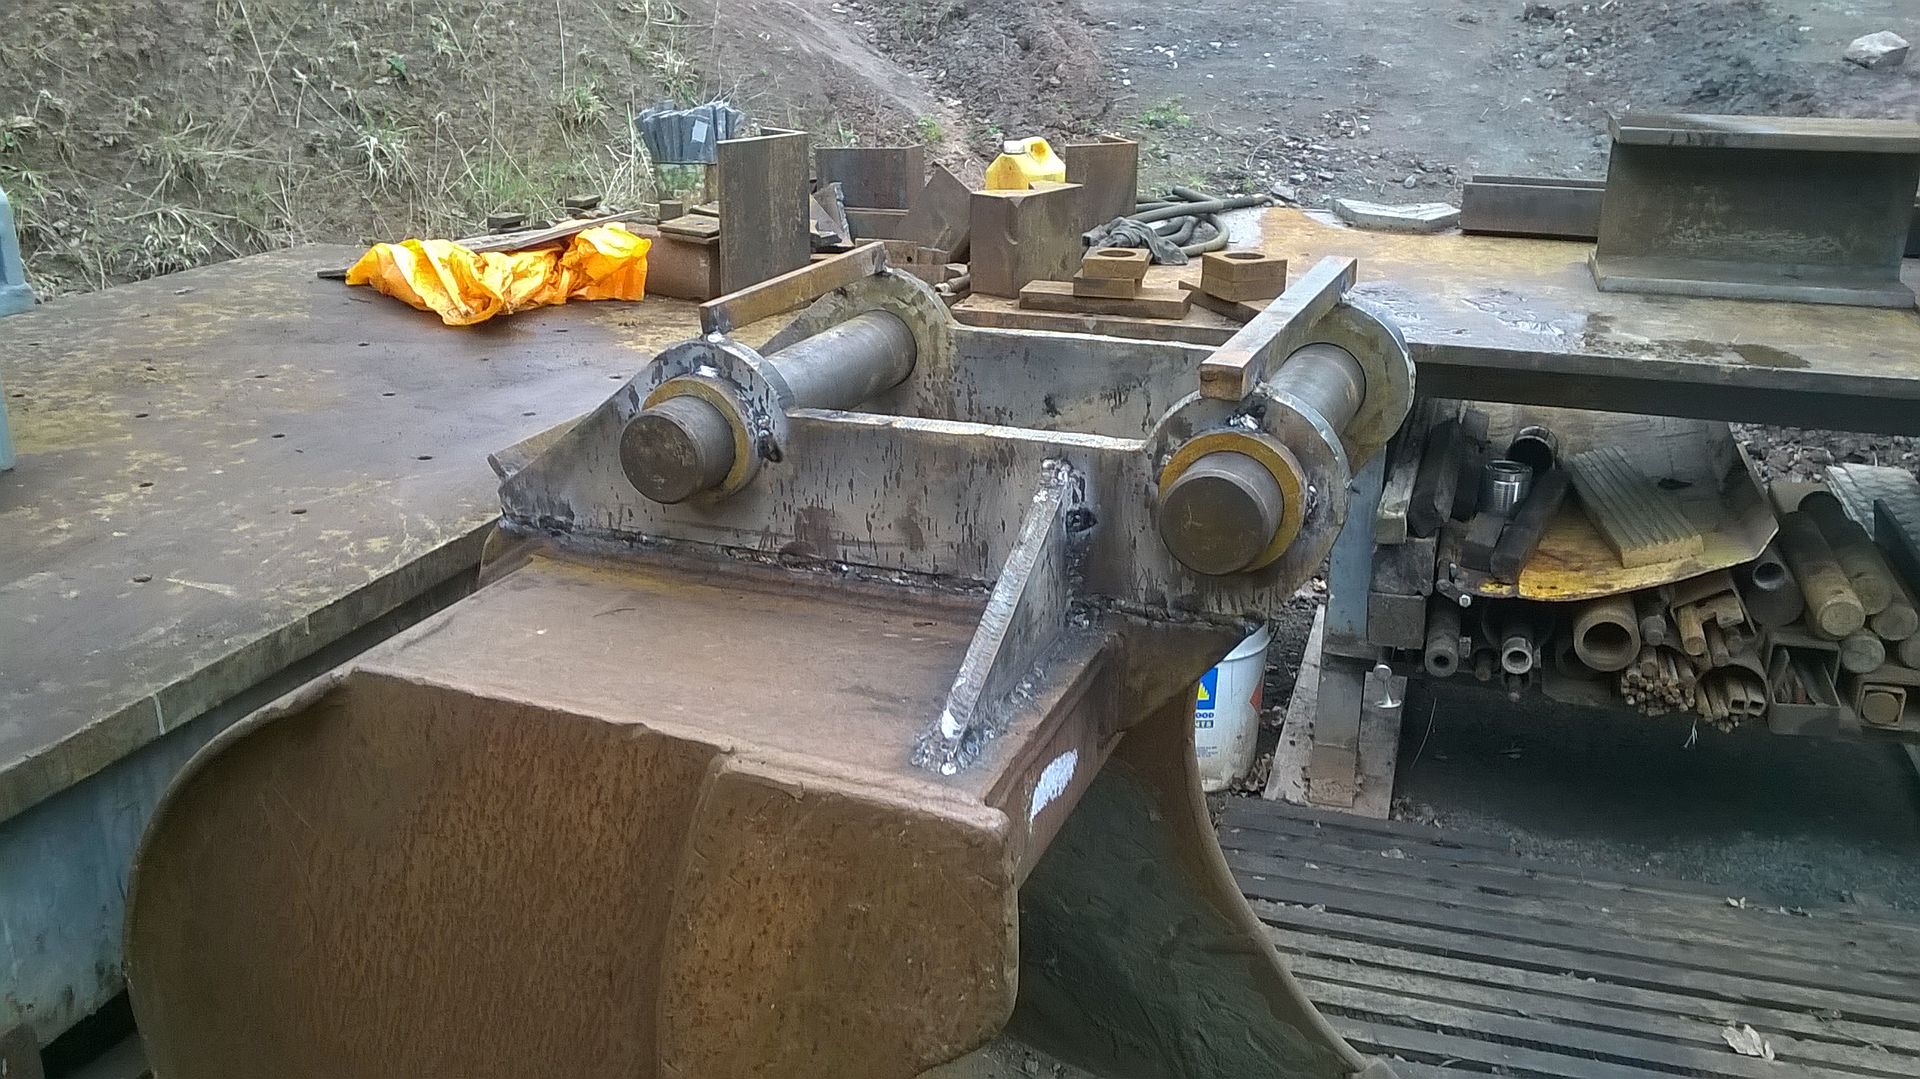
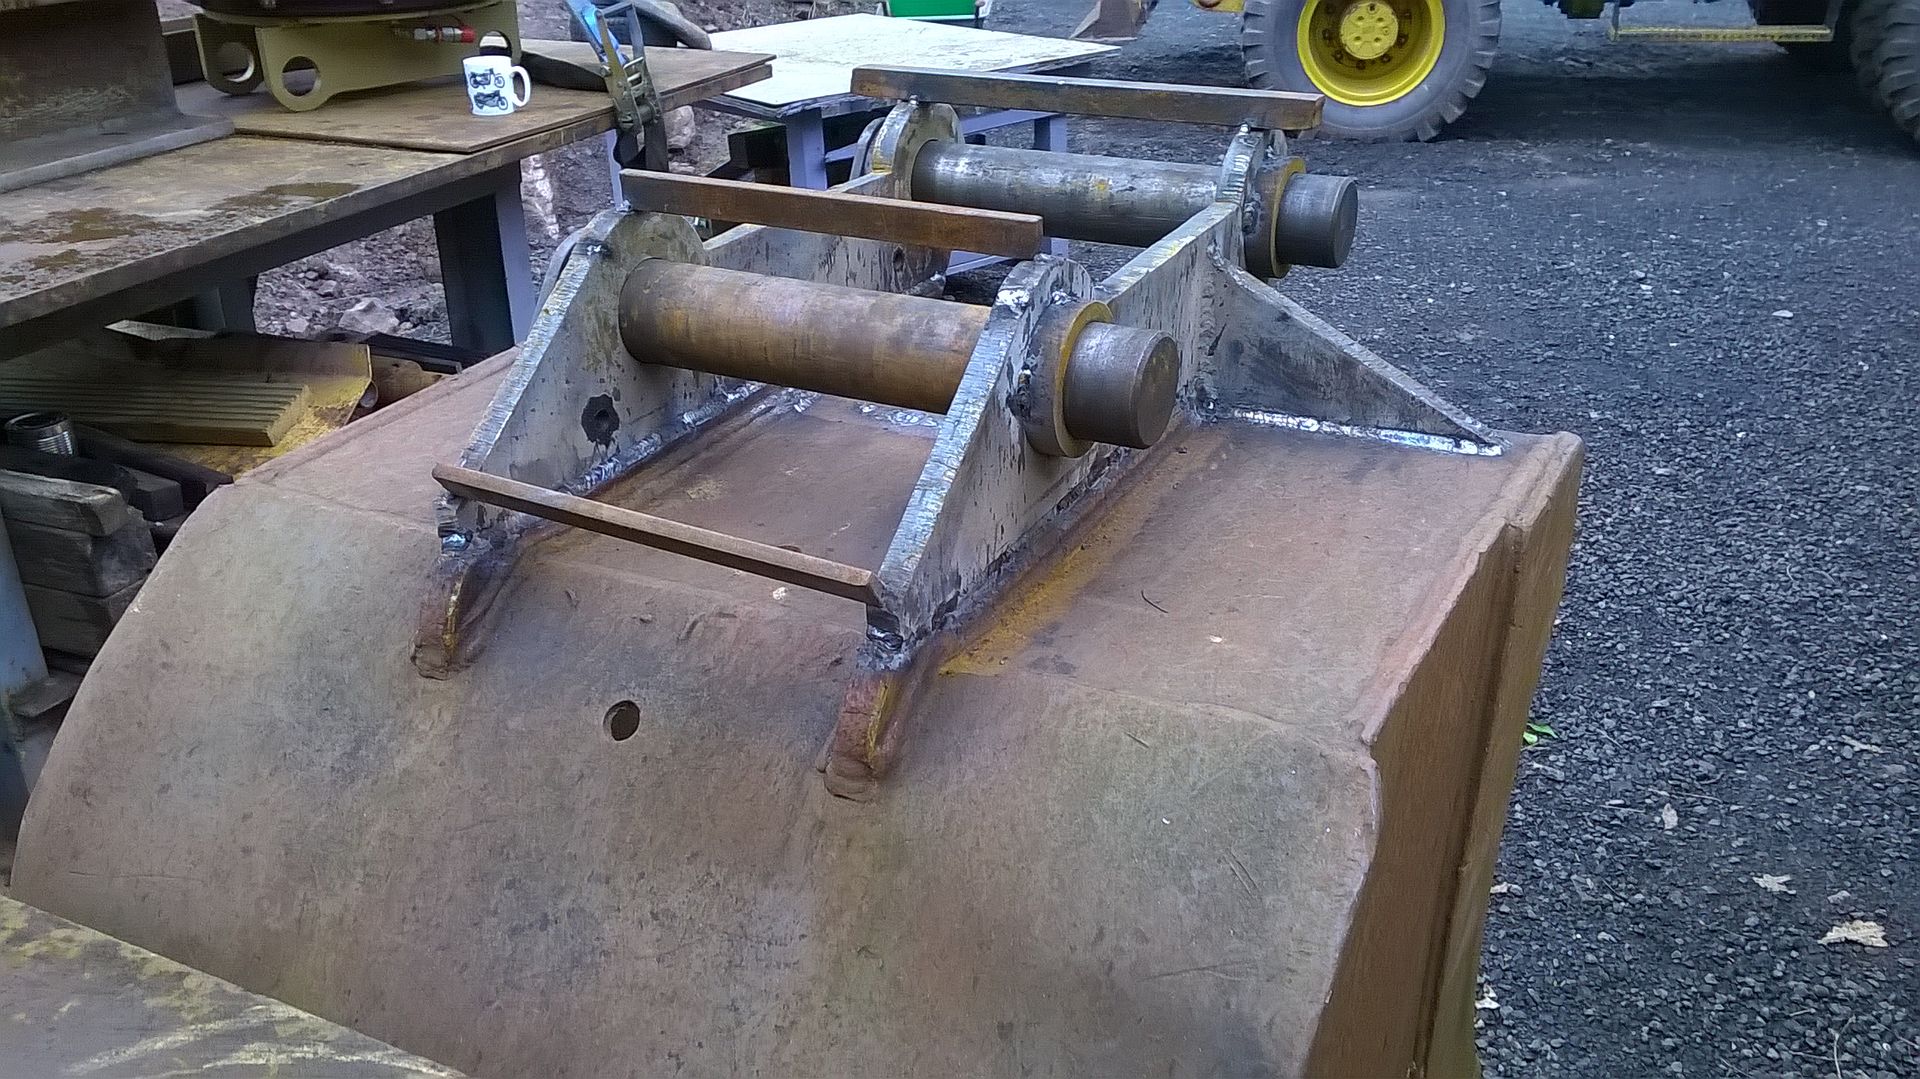
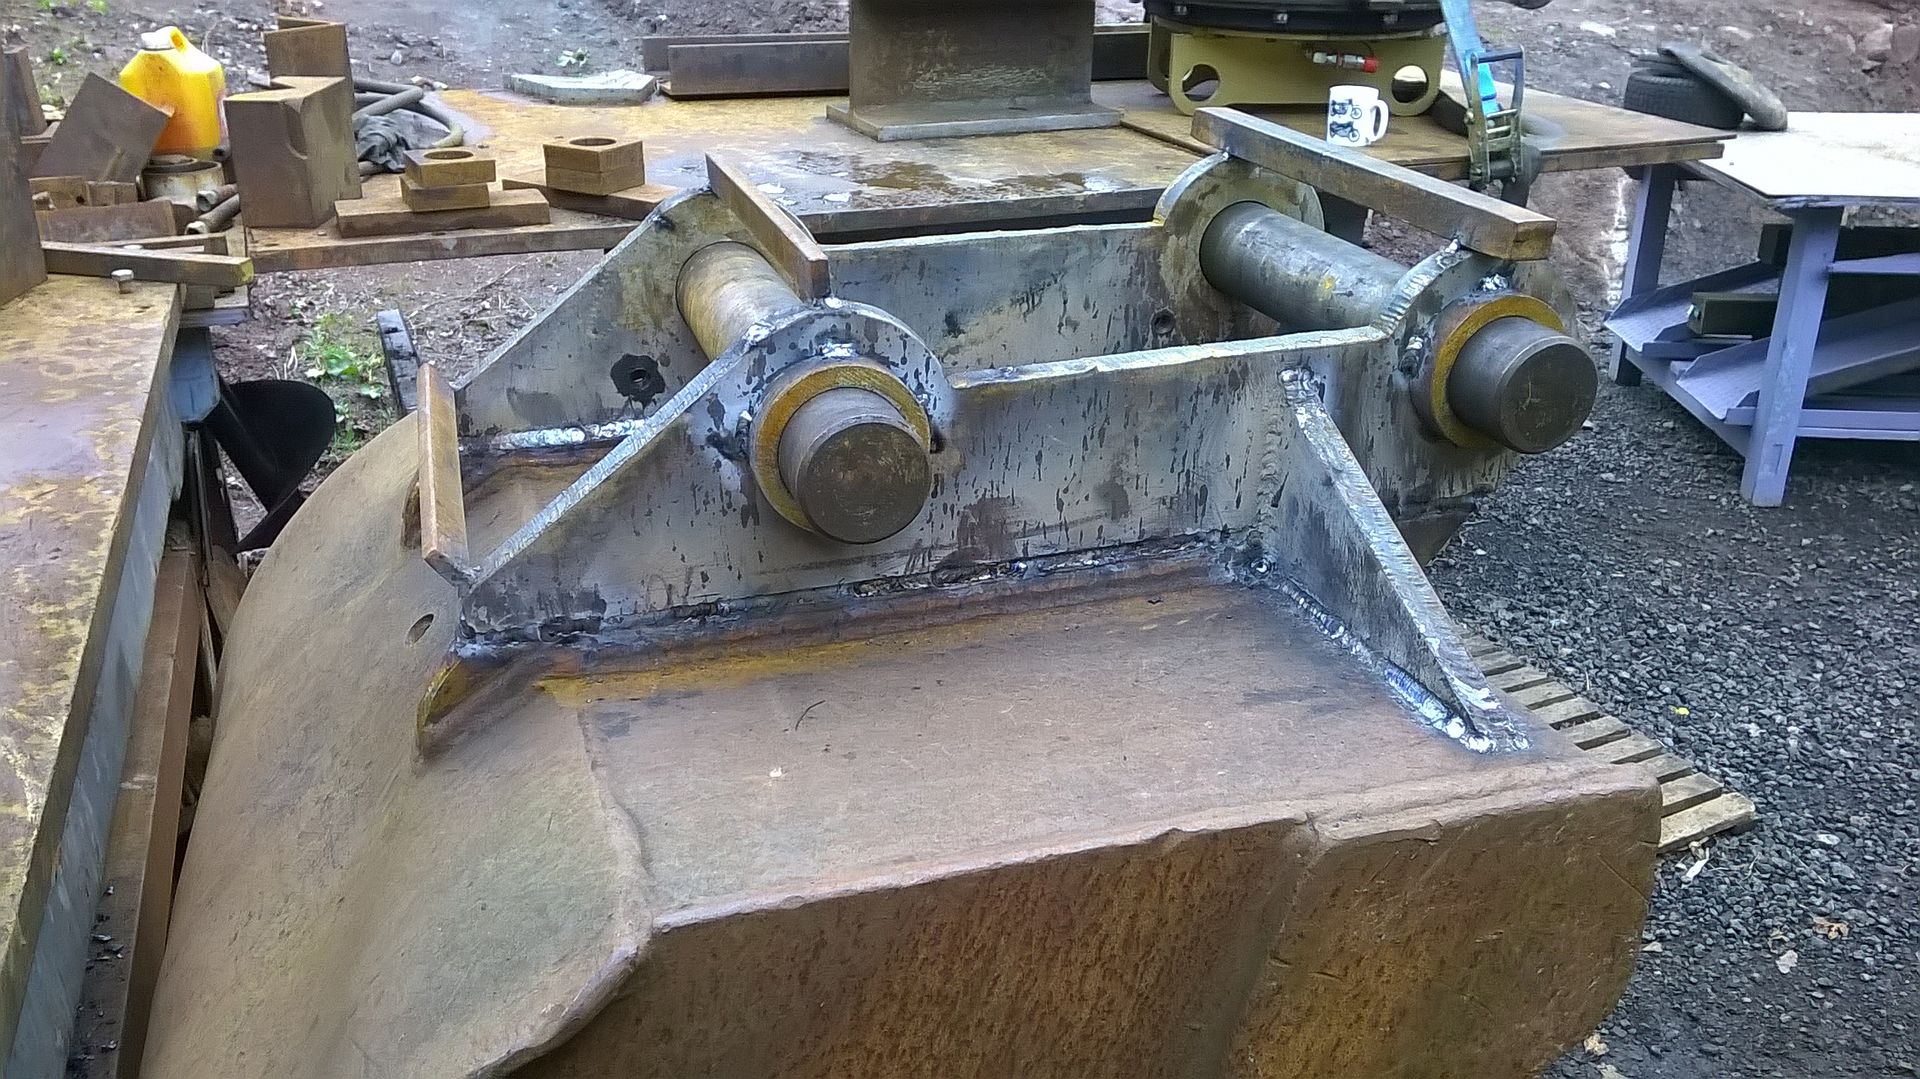
    Know where you're coming from Stock, but this is one nearly new condition bucket and'd be a shame to hack it about.
    One of the guys on Maskinisten put up a link for me, for what look like the right ones, but haven't had a reply yet - must chase 'em up
    This'd be a virtually invincible bucket suitably toothed!! - built like the proverbial brick crapper
    If it's got tracks, wheels, t*ts, or an engine, at some point it's gonna give you trouble!!

    Comment


    • #32
      Getting back to the grab for a while ....... there were issues with getting that grab's quickie bracket actually in a position that I can get at it AND to 'stay put', long enough to get the damned thing onto the hitch.

      Had a few suggestions mooted, by several people in emails, from the UK forum and came up with a simple and very effective (if not a little 'heath' looking) answer -a couple of suitably tailored blocks of wood, strategically placed, whilst I had it hanging on't 'Drema !! (more on that later)

      Yes I finally had a go at getting it on there!!

      Would not want to be doing it too frequently - bit of a faff, but a great att. for loading loose with - again, more anon ...............!


      Having opened it fully and parked it in that position, it's sat a lot more stable than it was and easier to 'play about with' on the floor now that it wasn't towering 7 ft high, above me!!!!!

      Ignore the ratchet strap - just there making sure the thing stayed open, when I picked it up to tuck it away - the block is going no where, with that hitch plate sat on it !!!!!
      If it's got tracks, wheels, t*ts, or an engine, at some point it's gonna give you trouble!!

      Comment


      • #33
        The wooden blocks, suitably 'persuaded' in each side of the swivel, looked like they'd do a fine job - could have always put a small ratchet strap around 'em to make sure they stayed put whilst mounting it up. The big block held the hitch just right to get on and off then with a bit more ease - a lot better than the damned near vertically down that it was.

        The pic.s in Hydrema's publicity brochures show that particular grab direct on the dipper end, which could have been done by pulling the pin in the end of the hitch bracket and dropping that and the hitch on the deck, but that would negate the joy of having the'hitch on a switch' then, though.

        The plumbing was a bigger faff.
        The main service off the crowd service was easy enough, but the swivel/rotate connectors were right behind the hitch plumbing's mount blocks (would like to meet the nerk who welded them just in the wrong place) and are a PITA to get on/off.
        Had to take the top plate off the one block to get the pipe to line up to screw it up!!


        Combine this with it being 8 ft in the air wrestling those damned great, uncooperative pipes and you'll see where I was coming from. That said - good bit of kit, once you have got it on and the second/next time'd be an easier proposition !!!!!

        it was like wrestling spaghetti / canned worms.
        Whoever parked the thing last, had left it half open/closed and it was't very cooperative!!
        Plus it must be a good tonne!!
        I considered that I may well hitch it up the next time and lay it over to pipe it, but got to watch you don't have the pipes and fittings, doing it!!!


        Once on and 'dangling' she sits down a little at the front at full stretch, but get it a bit closer in and it's fine - empty! very quick action on the clam and the rotate was fierce on the pedal, with the slightest of touches, initially, until you're expecting it!!!
        Gave it a bit of a try on what was left of my last 20 ton pile of 3/4" to dust and it took a mouthful with ease!
        Could well see it being a great tool for loading out 'loose' and the rotate was a pleasure to use, once acquainted with the pedal a bit better.
        Sat FOW at about 1/2 reach she handled it really well over the side. On jacks/blade I can well imagine it's going to be very stable.
        Only down side was the free swing, but could soon 'catch it' if it got a bit of a sway on!!!!!

        Can well imagine that without a hitch, this would be a fairly easy proposition to get on the end of the dipper and the crowd link has a 'capture' position for fully closed (pic. to follow on that one) location, to keep it put.

        There was a bit of wear in just about all the pins, but it closed well. Some one at some point has welded/tacked some extra packers in the mate faces of the centre of the shells (see below) - next time it was on I sussed whether they could come off as I thought she'd open more with them off and can't really see WTF they'd been added for really.


        Properly and fully opened she sat quite happily and with the hitch plate suitably blocked it should have been easy enough the next time.
        Just the plumbing was a long way up, but as I said earlier, could have well tried laying it over, once hitched, obviously avoiding the pipework, etc..!!!!!

        one more for good measure !!


        Ain't she a 'Drema ??

        Couple of pic.s of the link retainer lugs/captures, for when the hitch is off/got a grab on the dipper end as promised !


        I thought it was pretty neat .
        IIRC I've seen similar on Atlas and Liebherrs in the Eu markets too.
        If it's got tracks, wheels, t*ts, or an engine, at some point it's gonna give you trouble!!

        Comment


        • #34
          Then I found some pix of a.n.other 'Drema M1500 with a grab on, in an alternate manner..........


          hydrema__weimar_m_1500_year_1998_1998_1_lgw.jpg

          hydrema__weimar_m_1500_year_1998_1998_2_lgw.jpg

          hydrema__weimar_m_1500_year_1998_1998_4_lgw.jpg

          hydrema__weimar_m_1500_year_1998_1998_5_lgw.jpg


          .........and realised why it was such a PITA to get on

          The next attempt was significantly easier !!!!!
          If it's got tracks, wheels, t*ts, or an engine, at some point it's gonna give you trouble!!

          Comment


          • #35
            What was the clam used for originally Graeme? I think you mentioned once before on the BCEF but it takes too long to go back in the pages.

            Comment


            • #36
              Originally posted by 245dlc View Post
              What was the clam used for originally Graeme? I think you mentioned once before on the BCEF but it takes too long to go back in the pages.
              Hi Bert,
              The 'Drema was originally used in a water treatment plant - hence the bio-oil in her tank.
              She's never been road registered and spent her entire life on the same site cleaning sand filter beds and loading hoppers with sand with the grab.
              She's on her original twin tyres and spent some of her time on floaties, (which I've been trying to acquire for the last 12 months).
              Also the reason the 4 ft bucket is hardly used - never done any digging, prior to my ownership. The 7 ft bulker was what got used on the beds and can see by the way the edge is worn to a virtually inverted profile!!

              I bought it off a guy who'd acquired it off the original owner, fitted a brand new breaker circuit to it and was going to use it himself on breaking and crusher loading (he did crusher hire and had a couple of 13 ton tracked tools).
              He'd told me that having acquired it, he'd had a change of heart, as it was "too good to abuse" on the job in mind (despite spendng "£2k" on the breaker plumbing).

              I've since come to the conclusion that he could'n't cope with the intermittent electrical issues with it - axle locks will/won't come off/on, on demand, slew brake had a mind of its own, legs work when they want, etc., etc.

              His loss was my gain

              I've sorted the leccy problems, to a point where I have re-gained control, on demand, with a bit of 'Druidry' and the odd extra switch inserted strategically in the offending circuits!

              Took a while to get on top of it all and you need to be familiar with it, to use it 'without incident/getting caught out'. The original switches are still in circuit and work as and when they please They're still usable, but I have over-rides, for when they play silly buggers so it's always usable and controllable

              I can well imagine the guy must've been well pissed of with its idiosyncrasies though and glad to be shot of it to a 'novice Druid',who'd (at the time) no idea of the issues it caused. He could certainly not have relied on it to do a day's uninterrupted graft!!


              It has proven to be a hell of a good buy though, as it's in great, if not superb condition for its age and I've had the time to 'deal' with the problems at virtually zero cost - would not have wanted to pay someone else for the days of effort involved in tracing the various 'gremlins' and then dealing with them, all be it by, 'hook or by crook' as they say

              Got a few leccy issues still to deal with on the ancillaries - wipers, working lights and horn, but all the critical bits're are now under complete Druid control!!
              If it's got tracks, wheels, t*ts, or an engine, at some point it's gonna give you trouble!!

              Comment


              • #37
                The grab's a great tool for loading loose materials with and is I believe a 'digging' grab, but at 3 ft wide, the ground would not want to be too hard!!

                I have a lot of 'loose'/pre-dug to re-handle so it will be very useful for loading this out into my dumper 'praps!


                I have also reduced/eliminated the risk of pipe damage, on the grab, by fitting QCs to the rotator, so the pipes are off, out of harm's way, whilst it is being 'juggled about', getting it on there and I wanted to 'borrow' the pipes for other things!!

                I did eventually try the grab on the way around it was intended ........

                I'd been intending to wrestle the grab on to her for a while, to bag up a load of 20mm to dust and 40mm clean left over from a couple of 20 ton loads that'd been sat about for a while and were in the way for a (garden type) shed move.

                Having sussed the 'right way' round to hitch her up, from pix of others I'd found on the net (and also discovered that this is adigging grab as opposed to a simple loading grab), I set about trying to get the damned thing on.
                Even with my 'patent' wooden blocks supporting the hitch, it was still a little bitch!!!

                After what seemed like some considerable time and effort it was on and I took somebody's suggestion of laying it over on its side, to pipe it up.

                You want fingers like the Madagascan Aye Aye Lemur ........

                aye aye lemur.jpg


                .........to get at the screw on QCs, with the crowd ram
                closed against the dipper - lot of room - NOT !!!!!


                But it was on eventually and hanging as it was meant to!


                For such a lump she handled it well - as long as I remember the axle locks, that is!!
                Having got myself parked where I could get at all I needed to reach, I thought it prudent to drop that old blade a tad closer to the deck, just to keep her from nodding about too much !!


                Jakie got woken from his slumbers to hold the bags for his big bro and shift 'em out the way, when they eventually got filled - dumpy bags and a 3 ft grab spell over-spill !! (until I got the drop on keeping it to one side of the grab with some careful positioning !!)
                Sure beats the hell out of filling nine bags by hand though - ended up with eight after the one spewed it guts, when it got picked up and had to reload it into a fresh bag - bloody bio-degradable bags!!!!!!

                I eventually got quite adept at closing it and raising with it, to just scrape the deck of 'loose'. Deffo would've been easier with the close control the right way round though!!!!!!! Pipe swap next time around for crowd=close


                First time that patch of ground has seen the light of day in close on 4 years!!
                No sooner was it clear-ish than another 20 t load, or two, of stone appeared on it, et sec, etc. !!


                Next time though the pipes are gonna get crossed over, as close was the wrong way round and kept catching me out.

                Beginning to wonder whether the pipes ought to be the other side of the pick up, so' I could feed 'em through the swivel, keeping 'em out the way a bit better and they'd be the 'right way round' - crowd to close.

                Just Googled a load of 'Dremas on Heavy Cherry again and sure enough, they've all got the pipes out front !!

                Next question was .............. do I pull the pin, or undo the bolt ???????
                Still have not sussed why that bracket is on such a cock eyed angle either??


                The lil' guy in the last pic below, has just seen the amount of space available to get at the QCs, next to the crowd ram!!!!!!!!!

                aye aye lemur.2.jpeg


                Think I'll put them on first next time, before I lock
                off the ram in the closed position!!

                After Jakie'd parked all the dumpies, once filled, I had to find 'em all a home.
                Past experience has taught me that the straps on these things are not the greatest of items, so thought it prudent to get 'em all on pallets, before trying to relocate 'em to an 'out the way' (for now) spot, with the least jiggling and stress possible to 'em!

                Similarly experience has taught me that these bag's straps do not like forks and are much less likely to 'let go', hung on some more strap friendly, 'softer' tubes!!

                Doing it this way is also a damned sight easier than trying to thread the tubes through the straps, with them slid on the forks.
                These are too small for 'the 'Drema forks' anyway, but I do have some bigger ones that will fit them.


                Was interesting that, at full stretch, placing these, the 'Drema actually sounded as though she was noticeably 'working', possibly the first time she'd actually 'grunted' a bit and she'd done some pretty decent lifts to that point!
                If it's got tracks, wheels, t*ts, or an engine, at some point it's gonna give you trouble!!

                Comment


                • #38
                  To round off the day, whilst I had it on, I thought I'd just 'deal with' those naff packer blocks that had been attached to the opening stops on the clam shell halves!


                  10 minutes with a thin disc to 'off' 'em .......


                  and a quick grind, to tidy up .........


                  and hey presto - proper job!!!!!


                  She now opened fully/all the way and sits down a lot more tidily.

                  Can see why the previous owner was told to buy a new weapon, if they were using this a lot, as I'm told they did. (This m/c spent its entire life in a water treatment plant, cleaning beds and loading sand hoppers, hence the grab, the fact it has never been road registered and is on its original tyres!)

                  This is not the most oil tight of attachments!!!!!!!


                  Couple of scraper/gland seals may be in order on the rams and an investigation of WTF the oil's coming from, down the centre column?????????

                  Job for a.n.other day though - tea was ready!! Yummy!
                  If it's got tracks, wheels, t*ts, or an engine, at some point it's gonna give you trouble!!

                  Comment


                  • #39
                    Yeah that clam is a different set up for me we don't see that type in use very often here. The closest I have seen is one with a longer reach that's used by sewer and water construction crews for digging deep vertical shafts when they are tunnelling under roads, rivers, or railroads in built up urban areas. I don't have any pictures of the actual tunnelling operations but I was able to get some pictures of the actual clam.
                    Attached Files

                    Comment


                    • #40
                      Returning to the 3 ft Geith digging bucketI picked up a while back, for a very sensible 150 quid.
                      I
                      t needed a little work to make it usable on my 'Drema.

                      The original hangers were too narrow and it only had 50mm pins on 380mm centres, plus one cheek plate had a slight bend in it.
                      I eventually got around to giving it some attention a few weeks ago.

                      Whipped the angle out the middle first, ........


                      .........then flipped it on its side and gave it some with the 'axe'!!


                      quick tap and oops!!


                      quick flip again and ditto t'other side............


                      set it up, the right way up for a 'bit of grinding'!!


                      and a while later ended up with this .........


                      Ready for some new cheeks to get planted on.

                      The originals were, as I say, too close together, wrong centres and only 50mm pins, which was pretty small, considering the size of this bucket and had that bend in the front end of one cheek!!

                      Having had a good look at this, it's going to want a bottom at some point in the future, but'll stick a bit of action first.
                      Found a 2 footer, virtually identical to this one on Fleabay the pther night too, for not a huge amount ........ but in need of/will need cheeks, as can only be expected - 'Drema does not seem to have what one could call 'std' dimensions!!

                      knocked out a couple of 20mm profiles for some cheeks to replace the 25mm ones that came off the 3 footer ..........


                      ......... to sit back on there


                      Can see now why I left the front triangles on there !


                      If it's got tracks, wheels, t*ts, or an engine, at some point it's gonna give you trouble!!

                      Comment


                      • #41
                        Then set about 'em with the Ying Tong ......... Bought this off ebay a while ago and has done really well considering I thought I'd knack it first time out. A very good 12 quid-worth and I've bought a few other sizes since, all of which have proven to be admirably good VFM


                        Hole no 9 with it and still nice and sharp - the drive spigot however wasn't looking too hot half way through no 10 !!!!

                        So it looked like it may have to get a no. 3 morse sleeve welded to it in the near future, but is gonna leave me a bit short on travel!!

                        So I dug out a collet chuck set that was too good to not keep, when I was clearing out my old workshop, (glad I did) and spent an hour cleaning up a collet to take the No. 3 sleeve, which'd give me the required depth from the mandrel of the mag stand to hopefully finish off No. 10 hole, produce 11 & 12 and hopefully several more yet.

                        The Ying Tong has done remarkably well, considering I'm giving it some sort of testing, on what I'm asking of it!!

                        The drive left a lot to be desired, unfortunately and was succumbing to the grief of driving that gert hole saw attached to it


                        No matter how frequently I check the chuck for tightness! It inevitably worked loose as it's as soft as the proverbial tish!!

                        So...... it got one of these welded to it next morning........


                        A #2 to #3 morse taper sleeve and was going to use my Collet chuck assembly to drive it


                        As it's a good solid bit of kit!! Tool room rigidity!

                        Hole #10 got finished off with a different drive to the Ying Tong, for reasons I can not for the life of me recall at this moment in time?????


                        But 11 & 12, got the collet chuck treatment and good it was too!!

                        Both the alternate drives were too tall for conventional use of the mag, so had to improvise a bit and make sure nothing was gonna make a bid for freedom - or move a muscle.
                        Ying Tong will not stand for any flexing.

                        This plate leaves a lot to be desired in the quality control dept., even though its cert.ed and traceable (supposedly) , I reckon it's also a bit of Ying Tong's finest too - has hard nodules in it (where they don't smelt the scrap properly in the pot!!)
                        Gives the cutter hell and me palpitations when I hear it hit a hard spot!!!

                        Used to get it a lot in UBs and big flats - would take all the bloody teeth off the bandsaw blades!! At 60 quid a blade, a couple in a day used to make for a very depressed/pissed off Druid!!

                        Actually lost a TCT tooth on one bit that day, but it's still hanging in there!!
                        Patience is a virtue and one that is needed by the dumper load, to get away with what I'm asking of this lil' cutter. Boring a 20mm deep hole with it requires it's kept clear of swarf build up ...... very frequently !!!

                        I may need to invest a further 12 quid shortly, as it's getting a tad tired, but it's got four bosses to ream/bore tomorrow, then it can have a rest for a little while!!

                        Weather was less than optimal here that day - ('kin freezing actually and 'damp'), but ploughed on and ended up with this, at close of play.


                        As you can tell - 'twere dark-ish, by the time I'd persuaded said Ying Tong through both profiles (between other things, of course)!!

                        Plenty to plod on with though !!!
                        If it's got tracks, wheels, t*ts, or an engine, at some point it's gonna give you trouble!!

                        Comment


                        • #42
                          Thought I'd have a couple of hours boring out some bosses I cut a few weeks ago, (on my mate's bandsaw) whilst I had some guide holes.

                          I need some for this set of cheeks and could really do with fitting the ones on the fork cheeks too, to keep it centred up, especially under the VA-r's pick ups and spread the loading on the pins - not that those big ol' 70s notice a lot!!

                          The bosses are cut from engineering tube which was bought as 70.3mm ID, but when it turned up was only 69.3mm ID
                          As i'm lacking a lathe at the moment, I've had to 'improvise'


                          My methodology is to stitch 'em to the cheek plates and bore 'em out with the Ying Tong - Oh for my 14" chuck on my old DS&G lathe - would be so much quicker!!
                          However, that was then and this is now - improvise is the current name of the game !!


                          It works sufficiently well for my purposes. All the pins are captives and this is just to add additional bearing points/spread the loading!!

                          Was just getting into #7 when the bloody heavens opened again ........


                          and it was a case of cover up quick and head for cover. Was just contemplating calling it a day .......... an' it stopped again !!!!!!

                          Got #8 done as well, but with ever darkening skies, decided to call it quits, before the mag got PO-ed with getting wetted!


                          Decided to put these together on the surface table, with temp braces & spreaders, to drop onto the bucket, as a unit, to ensure trueness, etc.!

                          One day, when I've a quickie under the VA-r as well as the Miller, on top, I'm going to curse myself for putting me to all this effort, when a couple of profiles, with two 70mm holes blown in 'em and a couple of fixed pins welded in will be all I need to bother with

                          One day!!!!!!!

                          It was another grim day again, but dry for a while, on and off, so got this .........


                          put back together .......


                          (Can not believe the Ying Tog survived doing that to the tang!!!!!)

                          ......and finished boring ALL my bosses, whilst I had some guide holes to use.


                          Finished the last one off just as the 'precipitation' started again and didn't it ever precipitate!!!!!!

                          Pottered about at a few bits an' bobs, after I'd tidied up and sussed/cut a spacer for setting up the cheeks - when it ain't so wet!!
                          If it's got tracks, wheels, t*ts, or an engine, at some point it's gonna give you trouble!!

                          Comment


                          • #43
                            Not quite so wet and wild the next day - occasionally pee-ed on but on the whole dry-ish!

                            Got the cheeks clamped and stitched up on the bench, first off, using the pins as datums for true/level/square.

                            Once it was all solid, picked the bucket up to a flatter orientation to sit 'em on and lifted 'em across onto the old cheek roots, after suitably vee-ing the required bits on both and tacked 'em in position, before putting some decent stitches on to keep 'em put.


                            Tidied up a few triangles I had sat, for a couple of decent gussets and got those stitched in place too .........


                            Before a lot of sequential root runs got laid down and replaced a few that had had to go/had never been done from new (under the centre angle).


                            And filled in the odd 'gas axe' gouge !!

                            stitched the pin bosses on and eventually ended up with this, fully rooted and now in need of a.n.other pass in places and capping off everywhere.


                            May just wake up a mig for the rest of it, which I'd like to do down-hand rather than the positional that this was all done at, so will need to roll the bucket a few times, as I do it, but much quicker and better looking results !

                            There'd been a consumables supplier in Hereford who had been punting some serious offers on rods in my inbox of late.
                            Stepson and his wife were home for a few days and going to Hereford that morning, so got him to pick me some up, after paying for 'em on the phone first thing.

                            They arrived, just as I'm getting real low in the rod dept. and got tried out straight off.

                            Different to anything I've ever used in the 6013 range before - took a rod or two to get the suss!
                            Got to drown the arc virtually, like hand held submerged arc!!

                            POP for a beginner to use - the arc is virtually self sustaining within the melt pool - wierd!!
                            Ain't the best weavers I've ever used, but put down a decent pass and overlay well.

                            At 18 quid a 20 kg carton I will get used to 'em, but at that cost, could use 'em for knitting needles.
                            Can't say I'm disappointed with 'em though.
                            They smell like the old Philips Vodex rods, which were a decent enough electrode.

                            Oh and for the curious - although it may look as though the cheeks are back in exactly the same position as the ones I took off - they ain't !!

                            Originals were 25mm thick, 270 between and only 200 between the bosses, which were only 380 ctr.s and 50 dia pins.

                            They're now 20mm cheeks, 280 between, (I decided not to put the extra 20mm bosses inside this one - it's good enough for the likes of the S type pick ups, so that'll do me) with my 400 ctr.s and 70mm pins installed!
                            So the outer faces of the cheeks are where the originals were and the inners're 5 mm inset from the cheek roots, as you may have noticed!
                            If it's got tracks, wheels, t*ts, or an engine, at some point it's gonna give you trouble!!

                            Comment


                            • #44
                              Mate , missed reading most of this over the other place .and i am really enjoying the read . Great photos ,and if i was smart enough ,might even pick up some skills .

                              Comment


                              • #45
                                Originally posted by ianoz View Post
                                Mate , missed reading most of this over the other place .and i am really enjoying the read . Great photos ,and if i was smart enough ,might even pick up some skills .
                                Cheers Ian, Quite a bit here that's not been aired before, especially pix - you know why!!
                                Bit more to come yet on this and a few others to bring along too

                                Watch this space, as the old adage goes
                                If it's got tracks, wheels, t*ts, or an engine, at some point it's gonna give you trouble!!

                                Comment

                                Working...
                                X