
 Tweet
Tweet
Originally posted by v8druid
View Post
-
I'm not sure exactly but I'm sure they are not cheap. I have seen some smaller ones sold at hardware stores that are large enough to park a car in and are often a few hundred dollars on sale which is not bad really. -
A mates brother has got a 'kin humongous one - 150' long and 60' wide - virtually proper steel frame, with a poly/canvas skin,Originally posted by 245dlc View Post but temporary/collapsible - council wouldn't let him put up a permanent steel frame 1/3rd the size
 . ........ so it was a f*** you gesture
 - been up about 15 years now and they can't even charge him rates
It's about 20' high - beautiful building!
God knows what it cost new - he had it s/hand and wasn't cheap but the guy's a millionaire so I don't think he was too bothered, as long as he got to stick it to the tossers in planning.
 He'd have preferred dayglo orange or pink,
  but it had to be white, as it was what was available
  still pretty visible though
Next time I'm at his place I'll get some pix - it's awesome
If it's got tracks, wheels, t*ts, or an engine, at some point it's gonna give you trouble!!
Comment
-
There will always be a time and a place for hand tools and the necessary skills to use 'em correctly !!

and then there's the 5" x 1mm thin disc!!!!!!!!

complimented by the 5" grinding disc!!

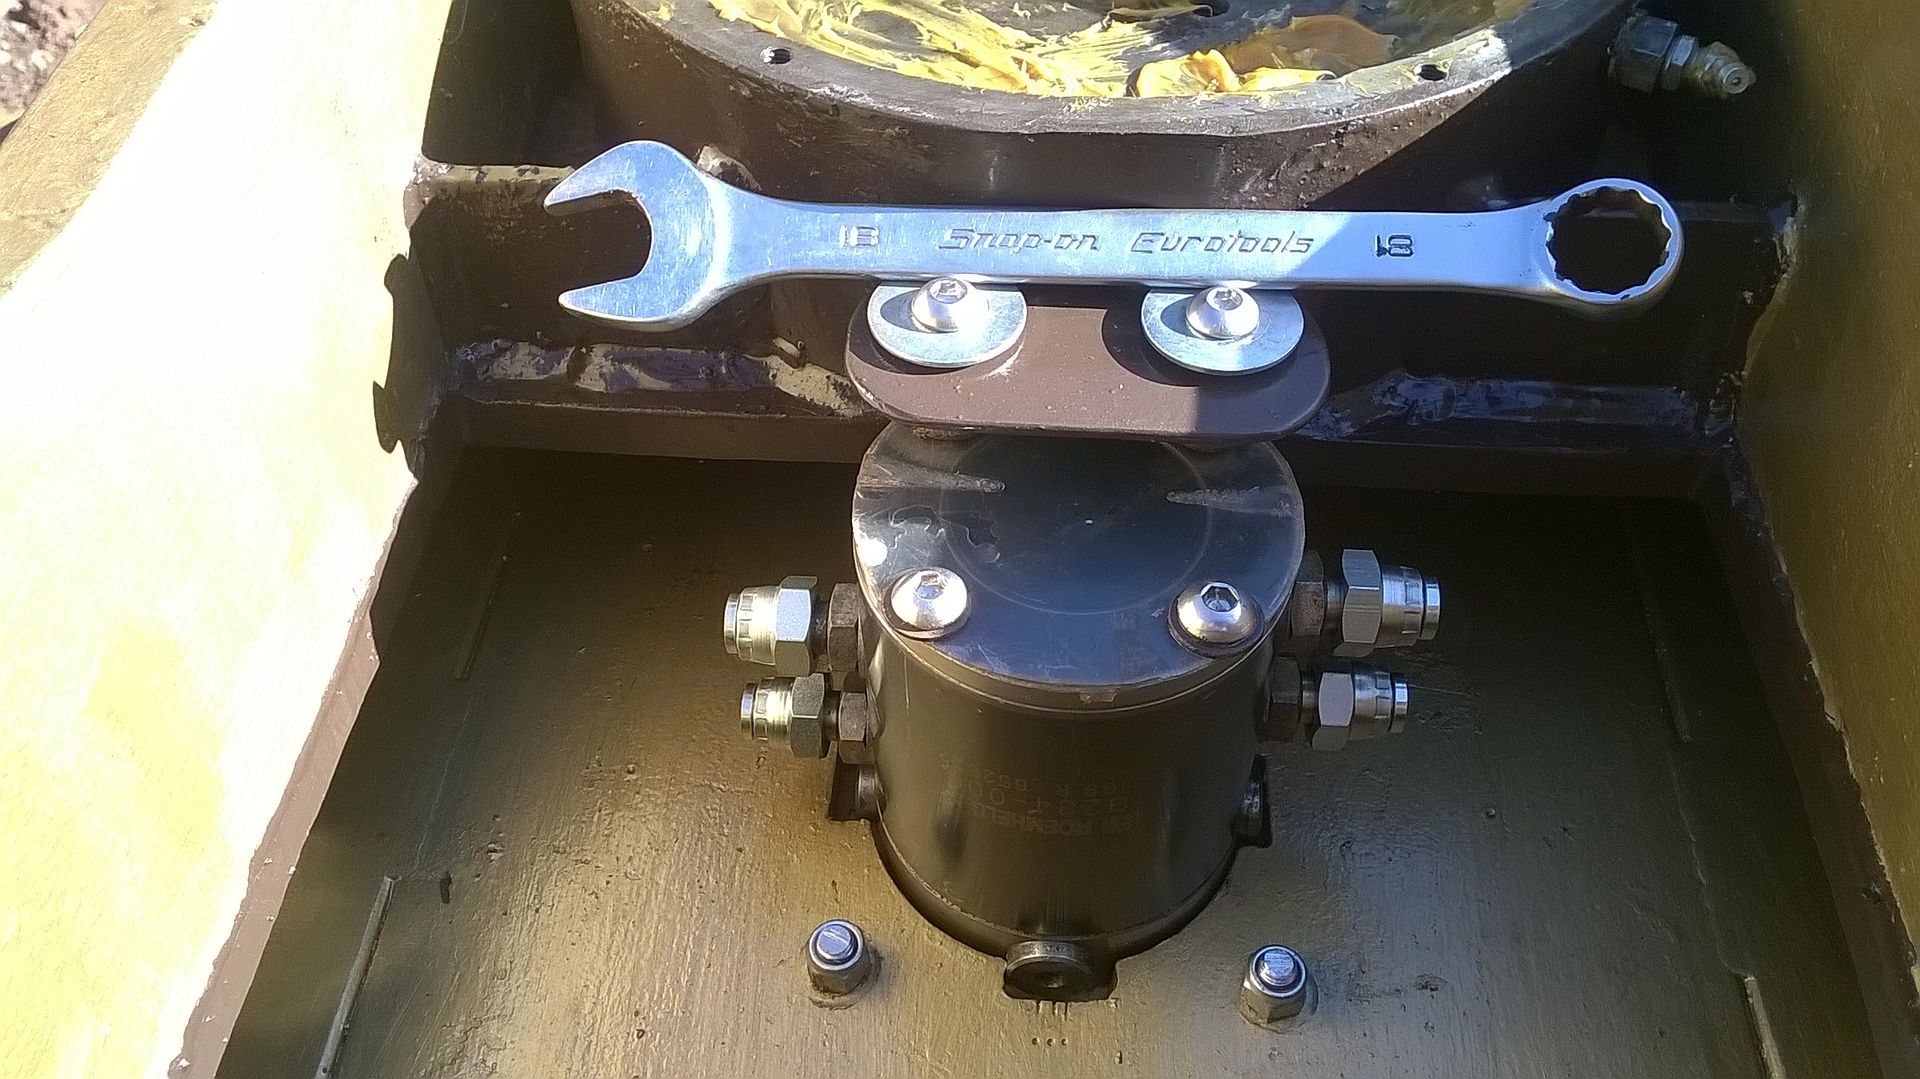
quick check for centre distance from a decent datum - dowels are as decent as you'll get .........


289mm centre to datum

239mm datum to edge, plus 50mm to centre =assume smug grin as Roemheld is 85mm diameter!!!! If it's got tracks, wheels, t*ts, or an engine, at some point it's gonna give you trouble!!
Comment
-
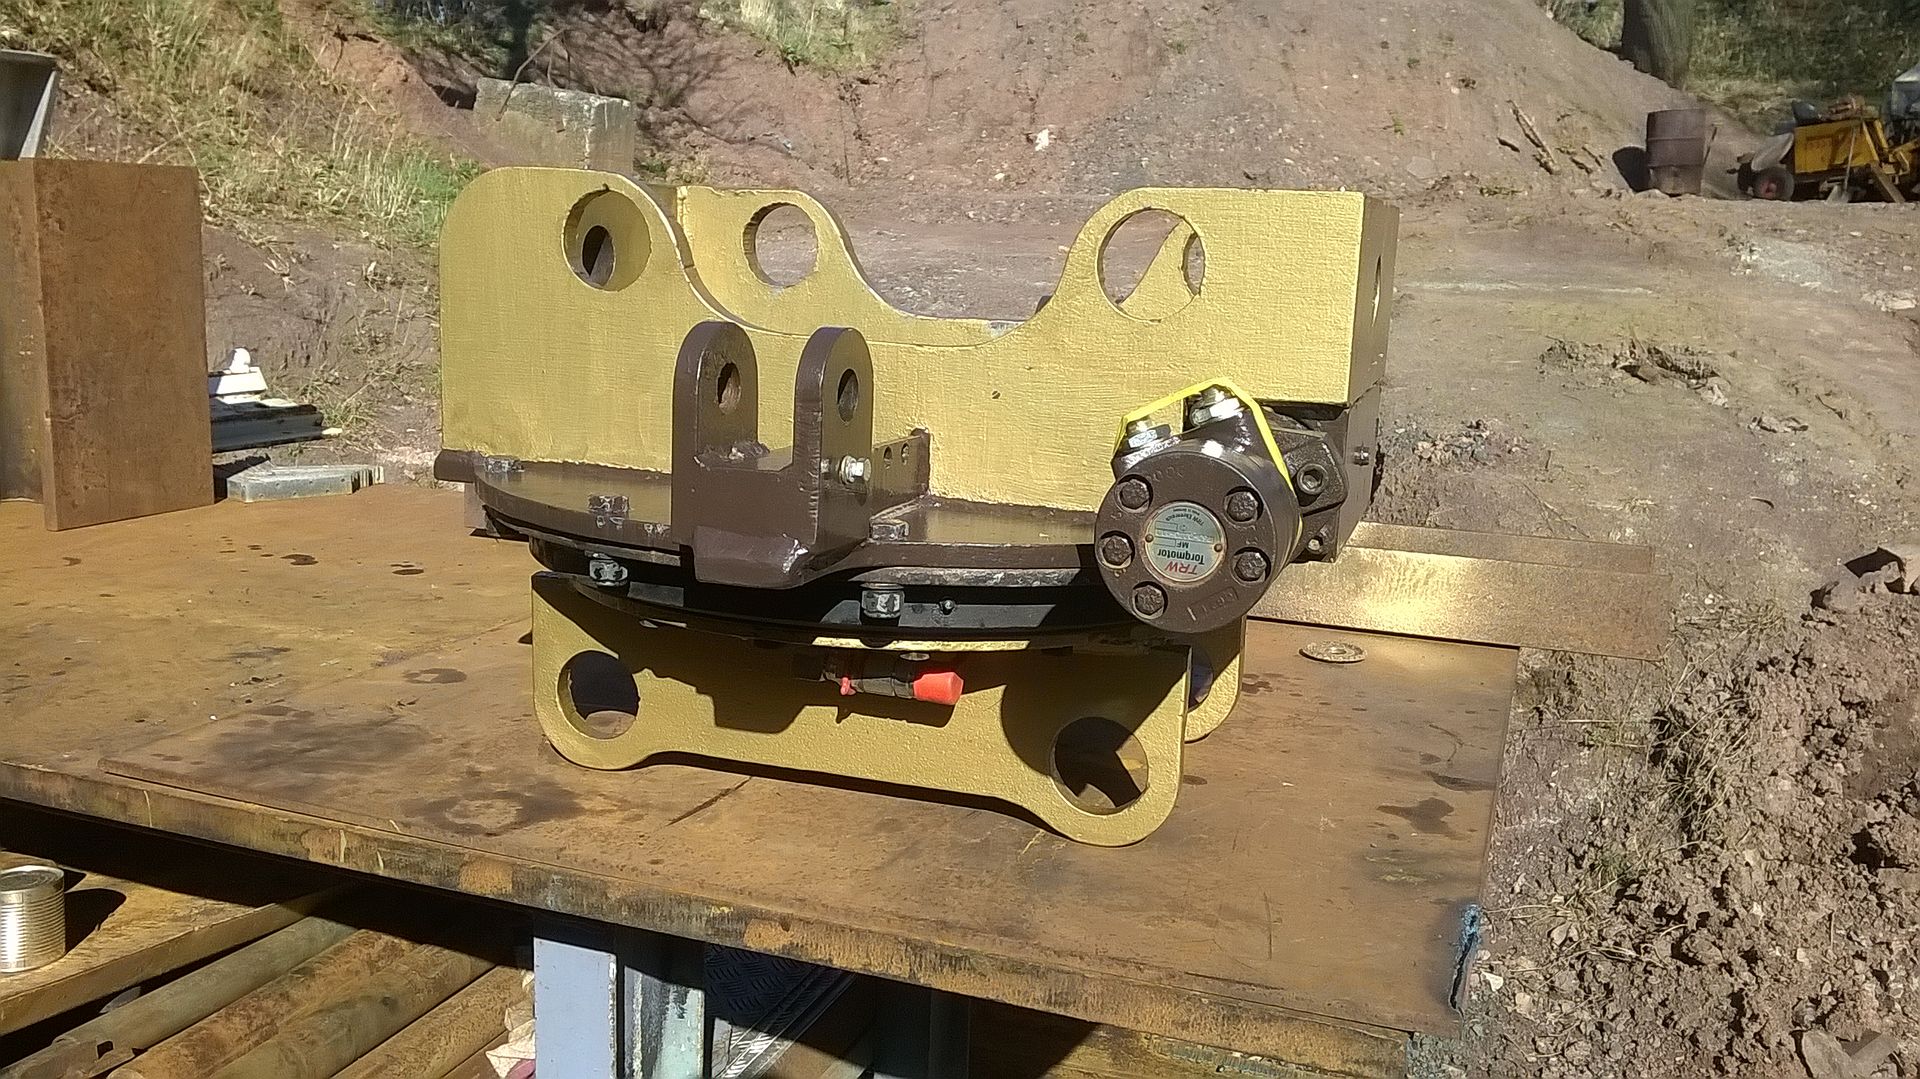
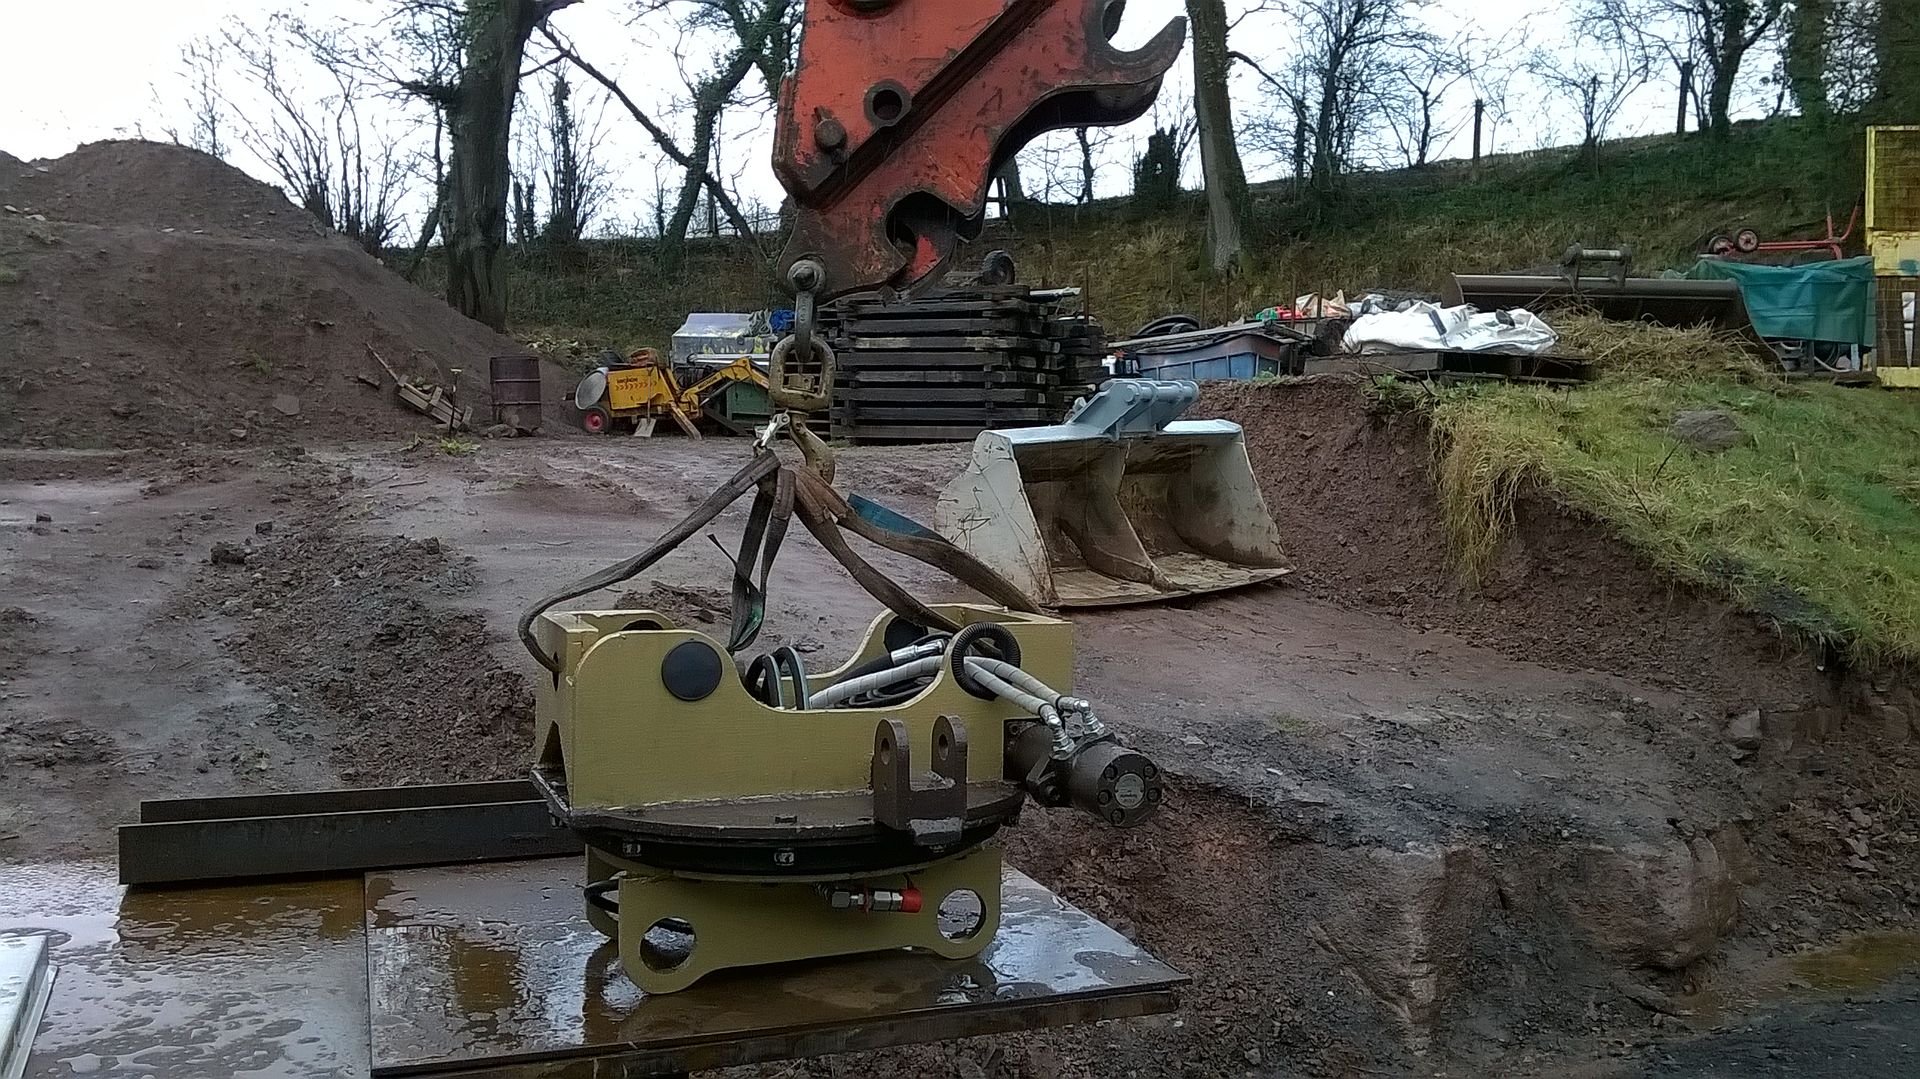
chucked the upper section back on to the ring gear dowels and lower section - positioned the rotary coupling in location and supported it at the necessary height, stood back ............................. and i'll let the pix do the talking!!!!


mission accomplished!!!!!!

Fortunately it didn't take me too long, to get it hacked out.
Have to admit that, having determined it'd go, (not that I ever had any doubts, mind you ), I tidied up, locked up and went back indoors, as it was 'kin bitter out that day and once my toes got cold, standing about fiddling and fettling, I wanted a warm!!!!!!
Even my face got cold, despite having grown the 'winter coat' to the chin/cheeks/neck, which Pam moans like **** about - It's there 'til it warms up a bit!!!!
Just enough of a NE breeze to make it damned uncomfortable and even resorted to gloves, which I do not do very often - hate working in them.
There wasn't a lot done the following day, as it was my 6 monthly MOT with the consultant in Cardiff in the afternoon -SWMBO thinks the beard is getting a trim, for the event!!
Think on!!!!!!!
The following few days were slow with the Va-r, as the weather hadn't permitted a lot to get done - wasn't great !
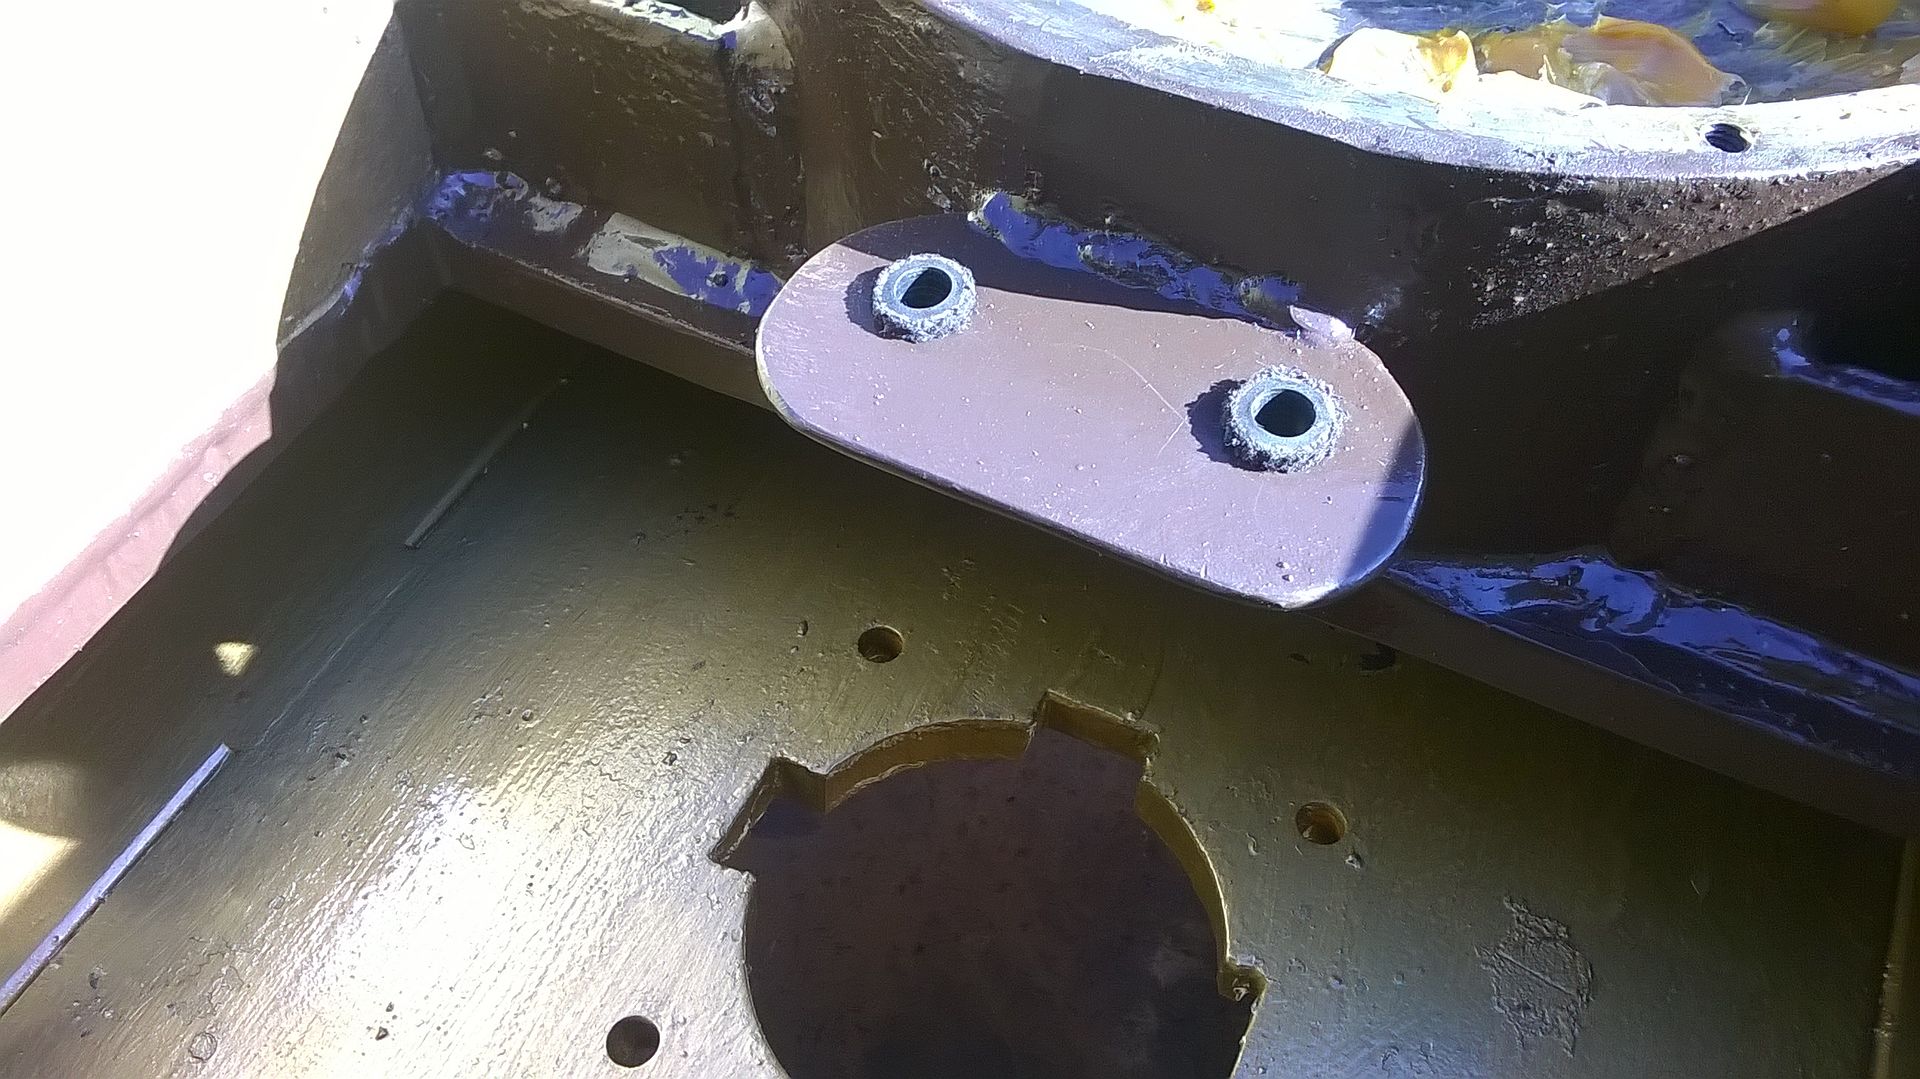
Managed to get the Roemheld drive plate 'created' indoors ...........

......... and tacked into position, once the weather picked up a little.
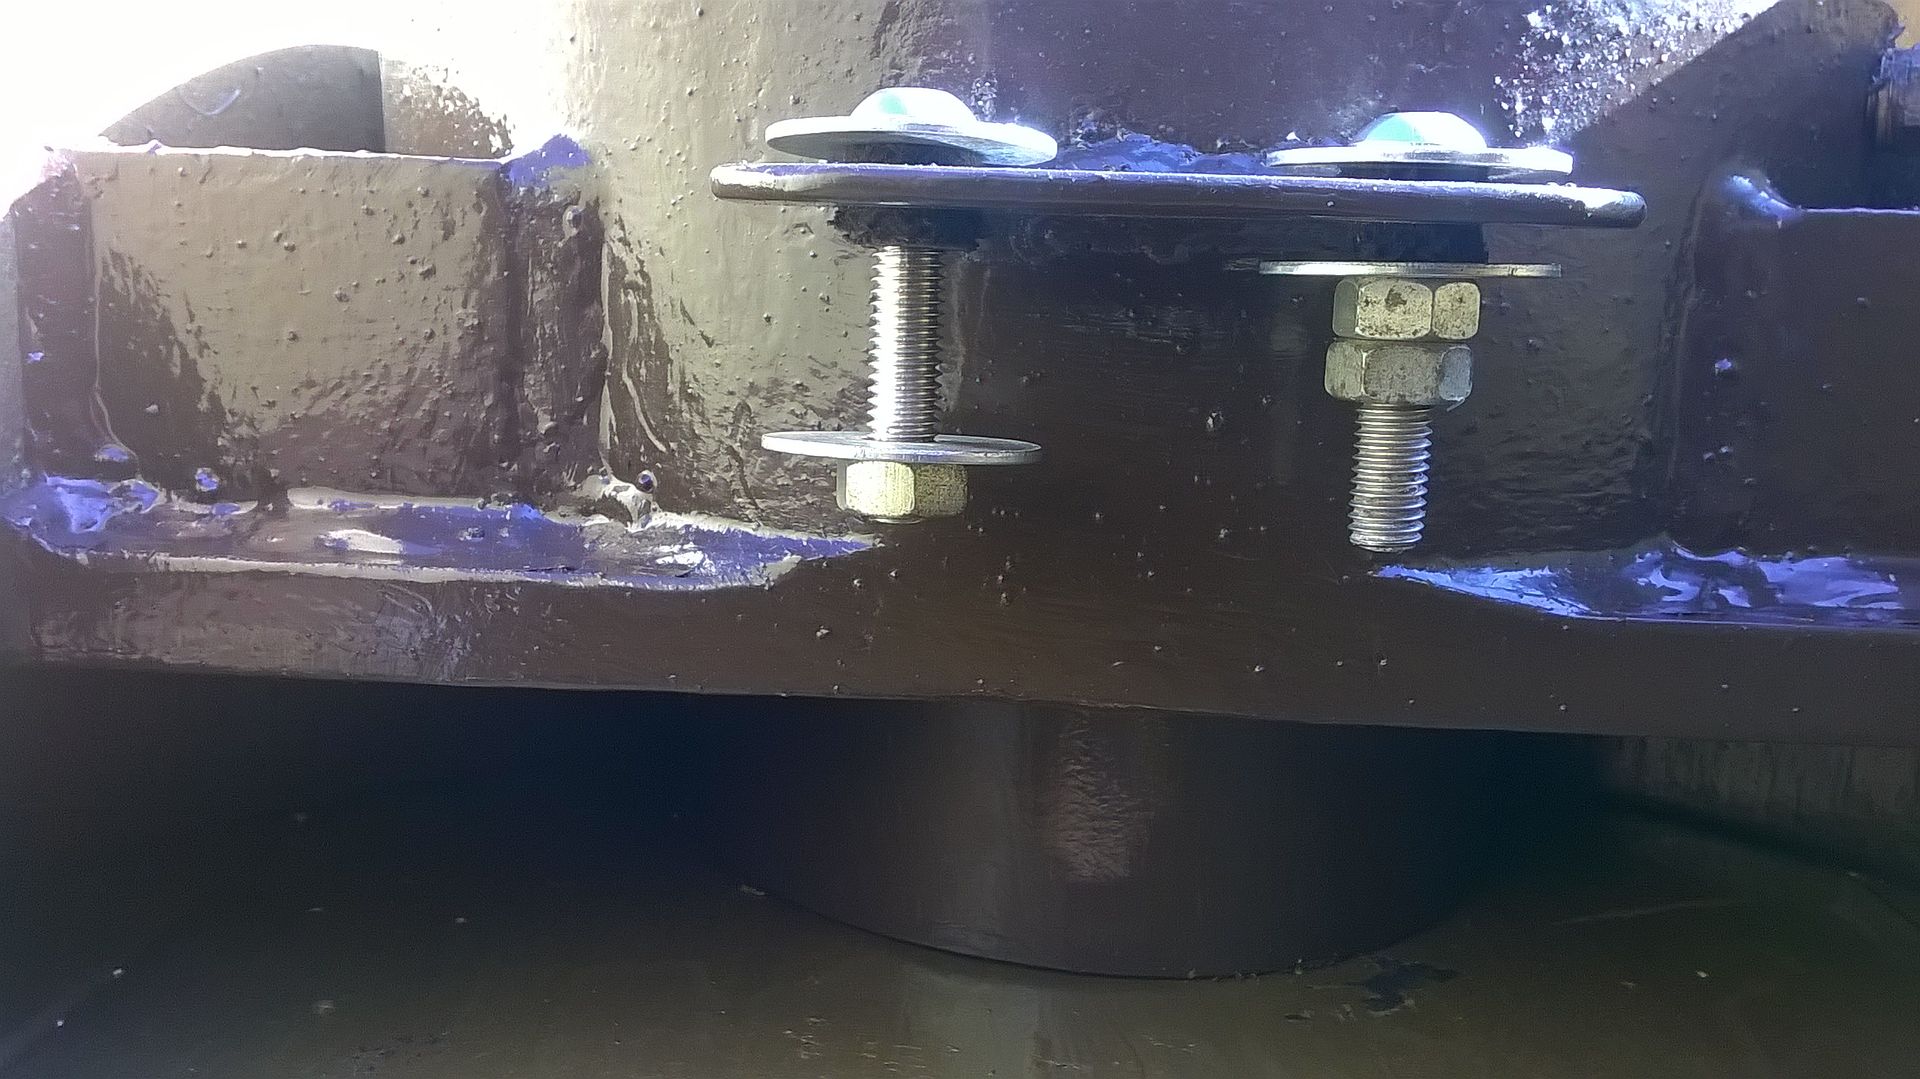
Rubber cushed for a bit of flexibility at the top and have yet to fab the lower mount.

All the steel that got slung in the sort out last March/April, when I emptied my workshop site - I'd have thought I'd have kept a few bits of 3mm plate - did I hell !! Needed a bit about 5" square for the bottom mounting!

Pulled the rotary and nailed the one side of the plate, then split the upper off the ring gear dowels again, to weld the underside ...

Drive system could now go back together, get packed with grease and sealed up - plus a few extra grease nipples inserted here and there, to add a bit of grease occasionally - there were several ports that I could utilise for some nipples, which was handy!
Then I had to create an inner ring guard on the underside of the upper plate, to keep the crap out of the ring teeth and some grease in there.
I had it sussed, just had to create it!!
Create a bottom mount, for the rotary and it could go back together, once I had modified the lower mount plate to accommodate the plumbing in those notches.
Then, there was the small matter of creating a hitch!!!!!If it's got tracks, wheels, t*ts, or an engine, at some point it's gonna give you trouble!!Comment
-
Having searched high and low for a bit of 3mm plate, the only piece I was able to find was 'otherwise engaged' - at least it was until then!!
Robbed the flame guard off the back of my gas forge - I'll make it a 4mm one!
So - some progress was made!


The hole in the centre was courtesy of a Ying tong 60mm cutter, which arrived earlier that week and a nice hole it produced too !
Plenty of careful setting out, a bit of time later and hey presto .....


it's where I want it to be.


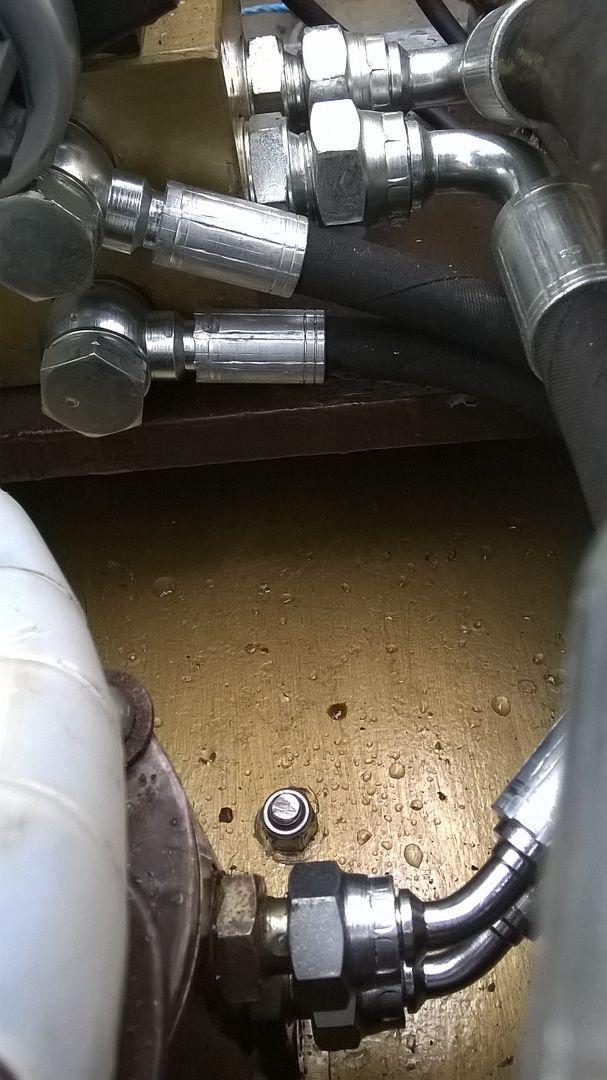
Ordered some S/steel socket head button screws to replace the hex heads with, as they were a bit 'lumpy' and I had to get some plumbing in there too, on banjos ideally, to keep it all flat as possible
This side's wasn't so bad as it was straight forward adapters and cones, with a bit more room to play with, in the 'bowels' of the mid section with the Cetops.

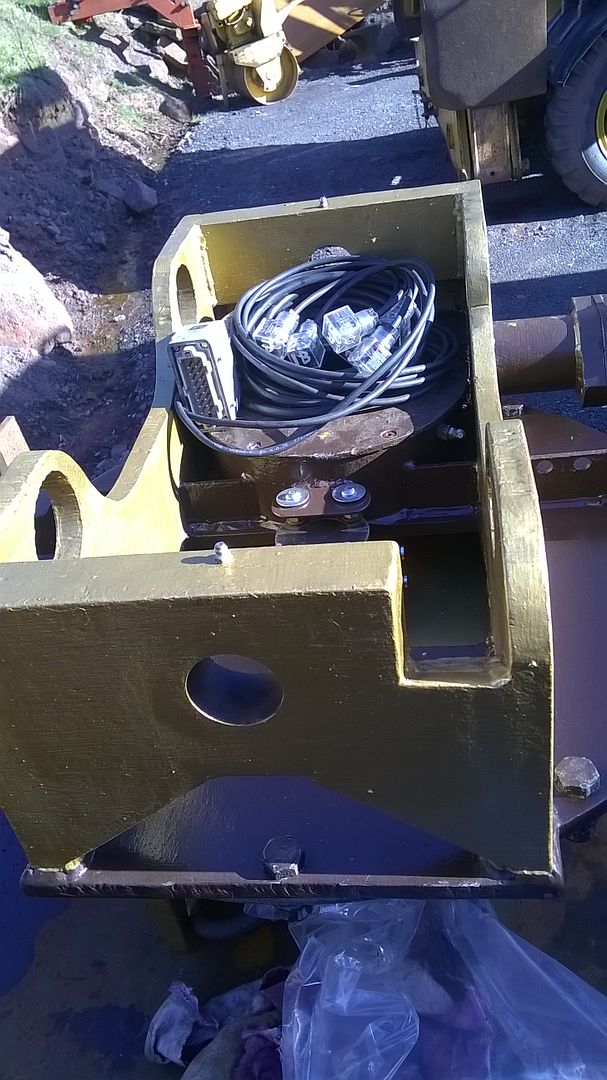
Coat of paint and this bit was done - almost, apart from some holes in the side cheeks for some bulkhead fittings to transfer some fluids outboard, from the Roemheld to a pair of accessory Q/Cs!!
I had to wait for them to arrive though! Local guys didn't have any long ones!!!!
Next up's a Druidfab Quickie to replace the cheek plates, but at least it was usable as is and i think once piped it'd be oil-able - at last!!!!!If it's got tracks, wheels, t*ts, or an engine, at some point it's gonna give you trouble!!Comment
-
Then remembered - I also had this to attend to too

Grease bath/muck guard for the ring gear/pinnion - job for the a.m. if it wasn't raining
having gotten the Roemheld mounts sorted it was time to get things back together.
Everything had a good wash off in kero and was all nice and clean, so ready to re-assemble.
Got the lower bearing packed with fresh grease and back in the case with the pinion sat in it.
This is the circlip that retains it, with what I thought was a capture cover/spacer for it, but after checking the circlip slot, it wasn't deep enough and having got it back in place it was evident that this was just a very fancy spacer!


Stuffed the bearing a lot more after spinning in what I'd already packed into it, with the pinion and got ready to drop the crown on, having measured it up for centre height ................

.......... greased up the worm's inner bearing, outer bearing,

inner race

and slipped the worm into the housing, I grabbed the crown .......... and the phone rang!!
Twenty minutes later I stuck the crown in and gently tapped it down with a copper hammer 'til I realised I'd put the bugger in the wrong way up!!!!!
NOT a happy Druid!!!!
What a bollock to drop - the right way up it has two threaded drawing holes - the wrong way up is not so easy!!!!!
there are two other holes in the crown wheel - plain holes!!
I'd guess that they're for drawing the wheel back onto the pinion shaft, as there are two holes in the case (with what look like snapped studs in 'em) which look like they'd align up to.
So ......... I'm a tad stuffed - head scratching time - tap the plain holes out - nah there's a step in the face half and half on the holes!! Didn't really fancy grinding it down level as I'd have had to strip and clean it all AGAIN and drill the 13mm out to 14mm for an M16 tap!!
Think man!!!!!
Ok it didn't take a lot of tapping on, so will hopefully not take a lot of getting back off, but could not get a hold of it to support it enough, to try giving the pinion shaft a gentle tapping.
Where's the bright idea emoticon when you want it !!!!!
Got a smaller puller out, than what I used originally - then couldn't find the spindle for it!!!! OK M12 bolt and nut - it's not going to be tight - honest !
Found two Paslode Spit expanding body anchors, fitted 'em in the plain holes and dogged them up reasonably well, then gave it a gentle try.

gently tapping the centre as I went and off it quietly came - thank f**k!!

Next time the phone rings an' I'm busy, it can ring!!!!!!!
Right - we won't do that again - put it in THE RIGHT WAY UP ...........

(you can see the drawing holes now) and got the top bearing onto the pinion shaft.
Whilst I could spin it by hand I packed a fair bit of grease in around the crown then re-fitted the motor extension tube/outer bearing housing to support both ends of the screw, so I could pack that too.
The screw shaft is now at the bottom of the extension tube and the drive extension is NOT coming off the motor shaft without a fight!!
It did however engage soon enough to leave enough gap to drive it with a pair of nut fu**ers ( water pump pliers) so enabling me to really stuff the grease in, in large quantities and get it everywhere!
The plain holes also came in handy for pumping a dose of grease down to the underside of the crown wheel too, to 'flood' the lower case

replaced a BSP plug with a reducer and a new nipple for piling some more grease in .........

and there was another plug at the back of the worm housing, which'd do for a.n.other nipple, to stuff the worm with, but might use a flat nipple on that one!!

Or just fit it when necessary - it's very vulnerable !!If it's got tracks, wheels, t*ts, or an engine, at some point it's gonna give you trouble!!Comment
-
That is funny Graeme, they have certainly become popular structures here I've seen them in use on construction sites to create a sort of mobile workshop for repairing and servicing equipment, they just need somebody to come up with a portable shop floor so the mechanics and service personnel aren't working in gravel if they have to crawl underneath a machine or a truck.Originally posted by v8druid View Post
Comment
-
I then turned the old girl over and started to sort the grease/crud guard for the ring-gear and pinion.
The height measured out at 55.3-55.4 mm so I was going to need a strip at 55 mm to be a reasonable fit. Marked out a few strips on some 4mm plate and ripped 'em off with the trusty 1mm thin disc (great weapons), de-burred 'em, clamped a bending bar set up to the bench and proceeded to 'manipulate' 'em all into shape.


Just got to assemble it all up and stitch it into place, take the ring gear back off ( was just sat on dowels again ), coat of paint, refit and bolt down the ring gear, ready to drop the lower section back on with the Roemheld in place, (then swap the hexs for the SHBSs, when they arrived), ready for some more piping up.
set the bits up on a centre line and stitched 'em up to try it before consolidating it into one piece.

Dropped it back on and clamped it down solidly to the base plate - did not want it moving/wandering around on me - only had half a mil of clearance to NOT lose

welded it all up and gave it a couple of coats of shiny tish ......

....... before dropping the ring gear back on and bolting it down.

Followed by a pump of grease every other tooth, by way of a bit of lube.
then dropped the lower pick up eye plate back on and got it dogged down....

Popped the motor back off its extension tube so I could rotate the lower plate into line, along the centre axis (which I should've thought about before dropping the ring gear back onto the dog) !!


Clearance between the guard and the lower plate felt fine, as much as I could access, with a 0.5mm feeler - plenty of room. It is going to leak - it's inevitable, with out a rubber edge seal to it, but not significantly enough to worry about and there's now't down there to be particularly affected by a little grease.
Set out and marked up the aux oil output locations in the side plates for when the long series bulkhead fittings arrive and must remember to mod the pick up plates to clear them, on everything else - remarkably the original buckets will do, without being touched!!
To fit my b/heads, much to my annoyance I had to take the lower pick up plate back off the ring gear to drill the bulkhead fitting holes, as I could not be arsed to wrestle the mag drill into spot, as it was.
Double hand-er really with this beast, or grow a third arm/hand to switch the magnet on!!
While it was off I thought I'd stick a couple of extra holes in it too, for some grease nipples, to squirt some grease in the general direction of the ring gear, tapped 'em and screwed them in!!
Then re-fitted it to the ring........

Together with the B/head fittings and the auxiliary Q/Cs .........


stuck some spare covers on the Q/Cs, an old 1/4 - 1/4 pipe between the b/heads, to keep the damp out and got beaten by the light again

It was nice to have it staying light later, but ....... mrs D was on the horn announcing tea, before I'd had a chance to clear up!!
As I know what's good for me, I dropped everything and went and ate, before getting ear-ache for not arriving within 30 seconds of the announcement!!!!!
Came back later, tidied up under a halogen, got some clear spray lacquer onto the Roemheld, in anticipation of a full re-assembly of the VA-r and a measure up for the plumbing to/from the Roemheld, to the b/heads and the Cetops.
It was very nearly video time !!!!!If it's got tracks, wheels, t*ts, or an engine, at some point it's gonna give you trouble!!Comment
-
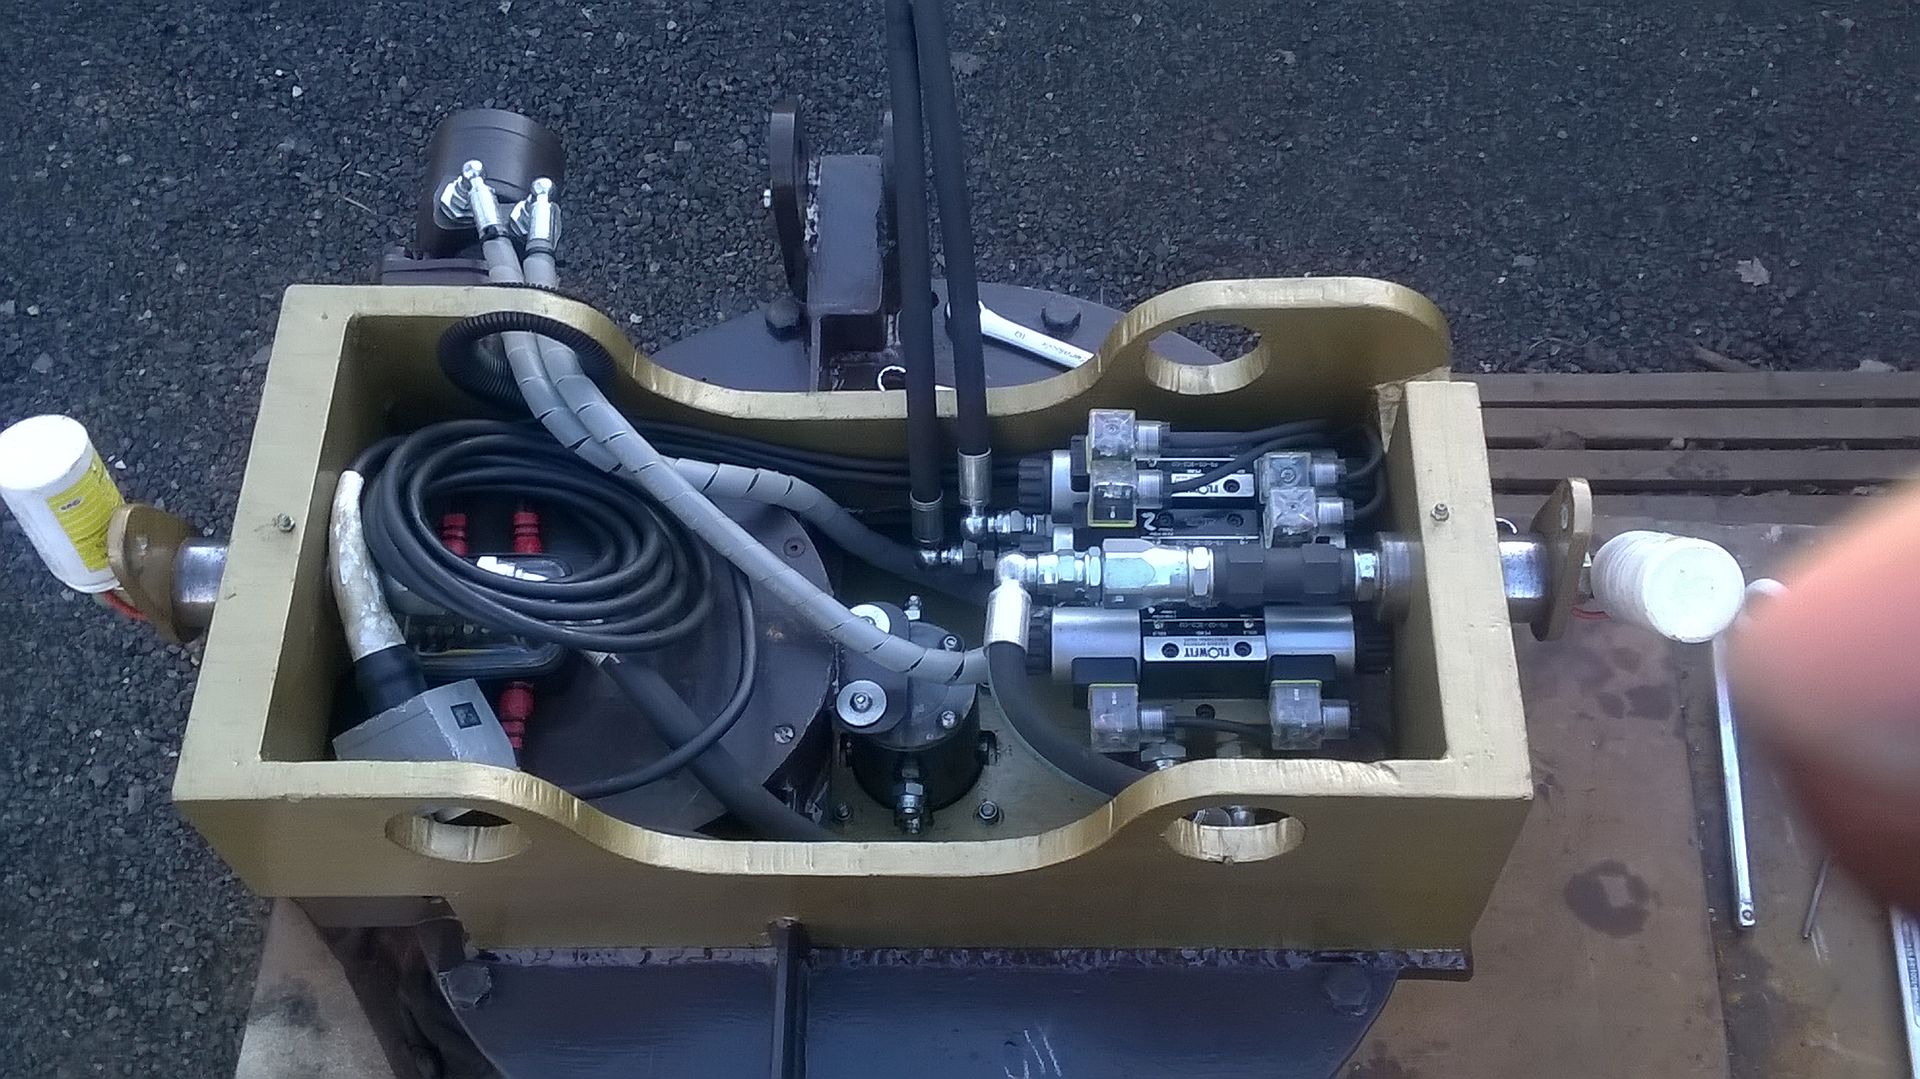
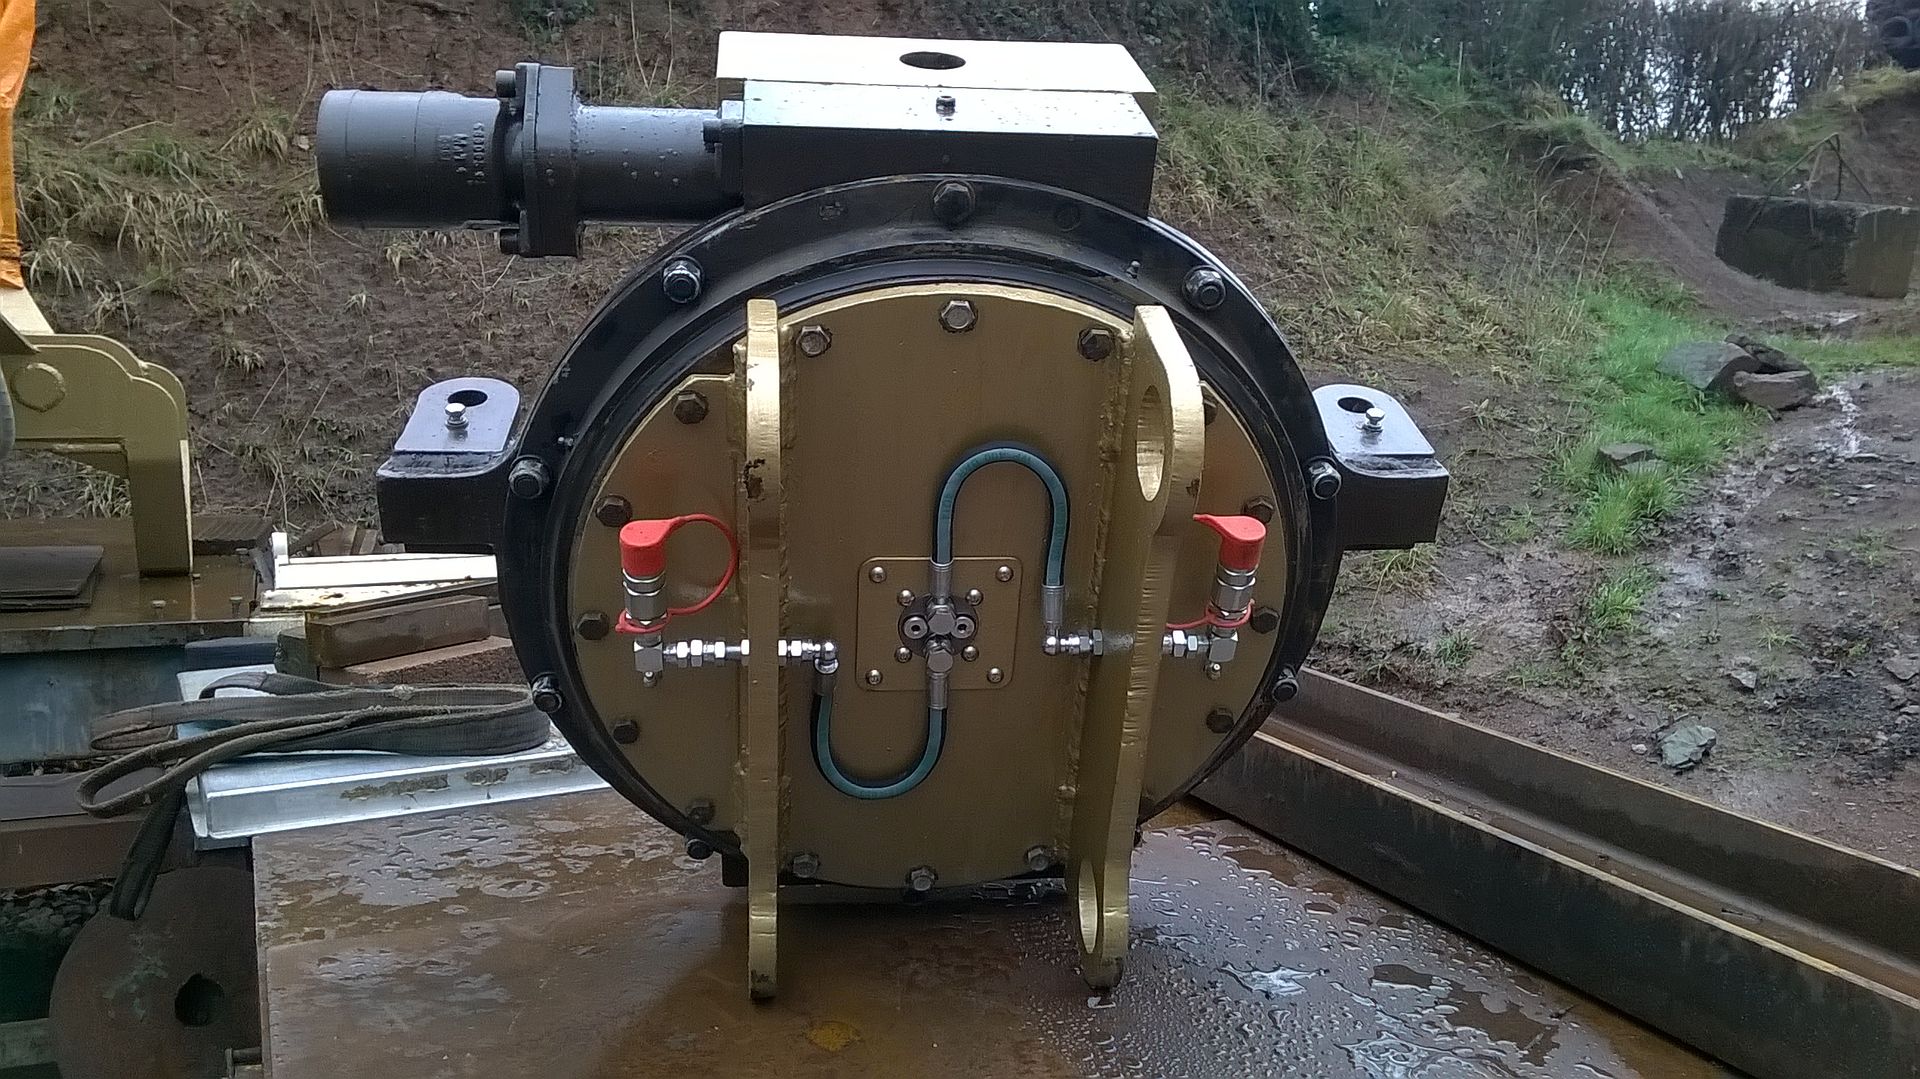
Next job was get it the right way up again..........
then it was time to get the rotary in place and secured.........
............followed by the ring gear crown wheel top cover/bearing housing and loom
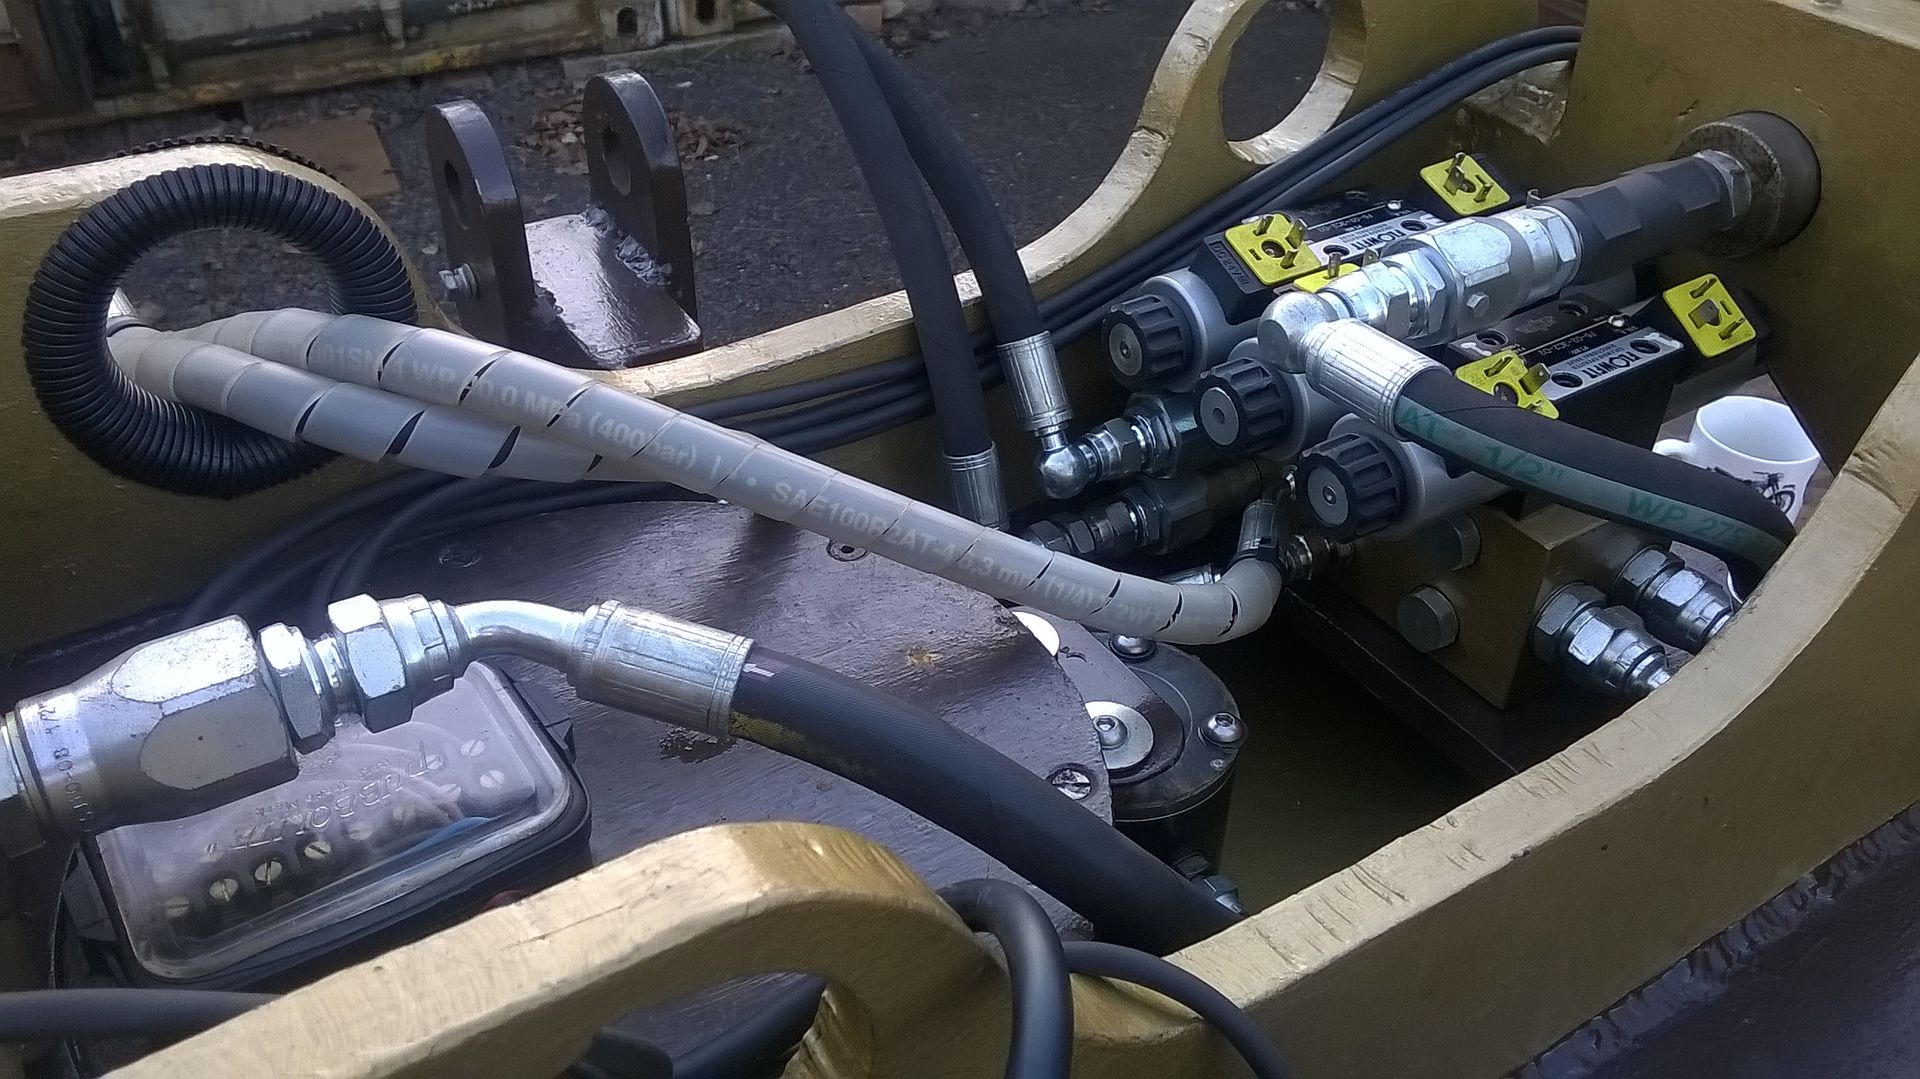
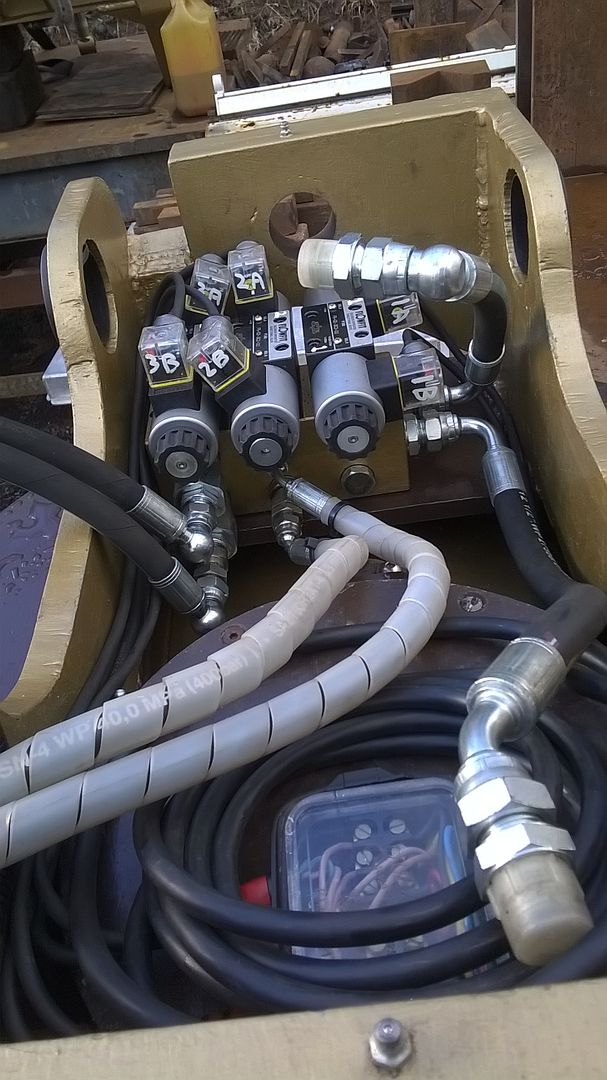
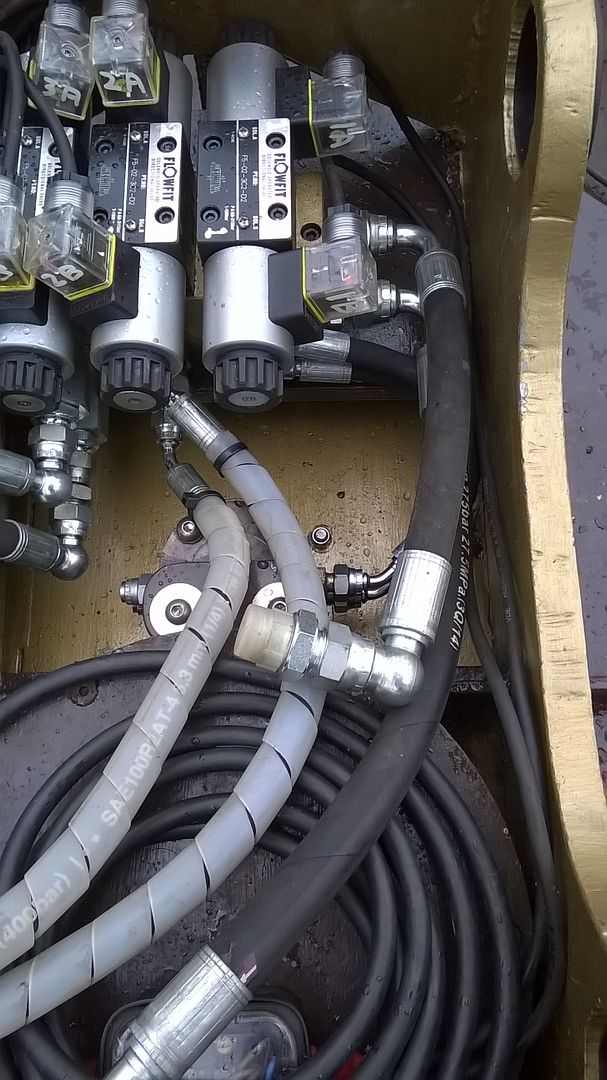
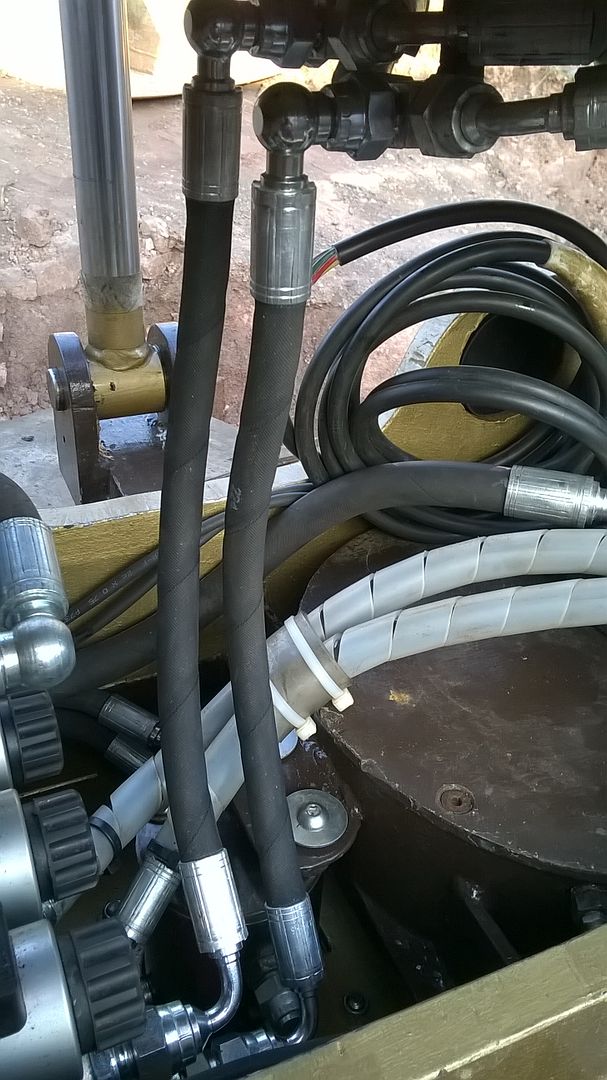
Next was the Cetop manifold and plumbing.........
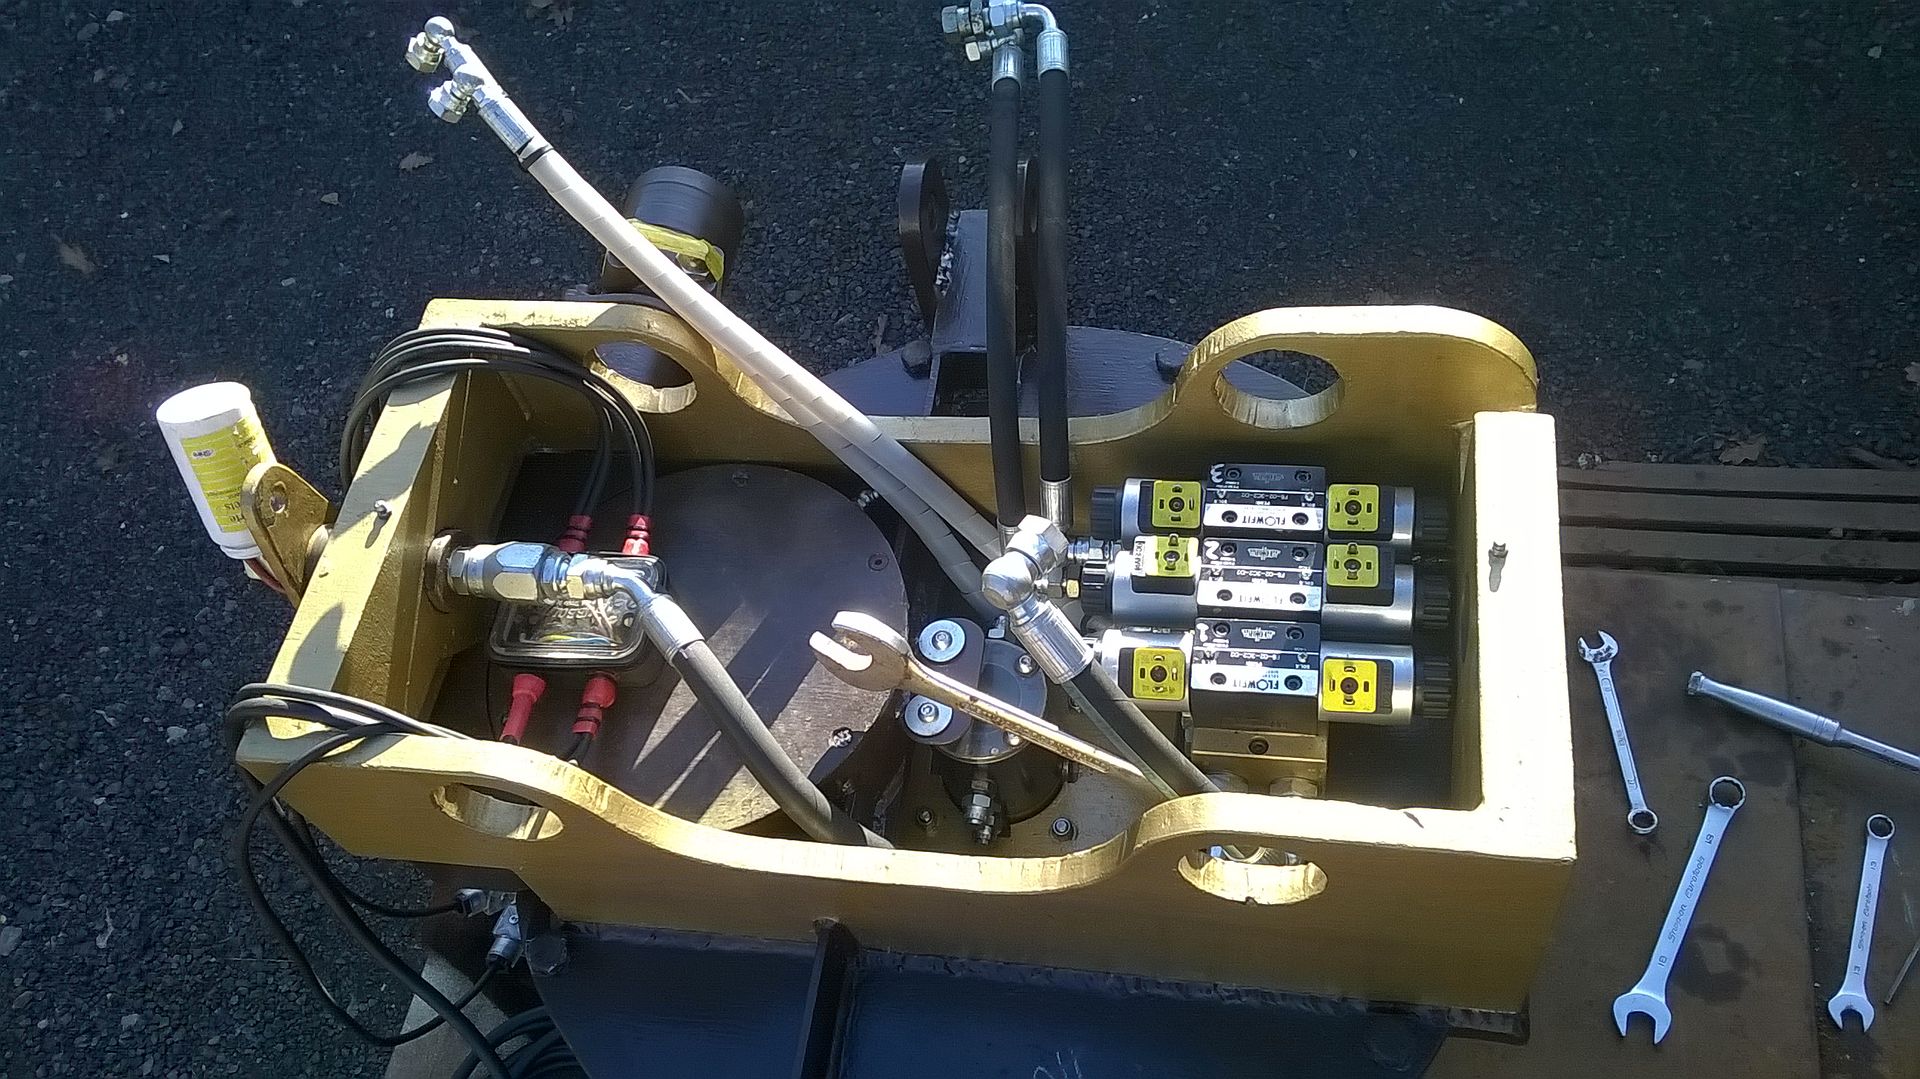
Tweaked the run/lay of some of the plumbing and completely re-jigged the motor pipe routing ........ several times, with a few extra bits in/out/in, until I arrived at the way it got left, which I'm happiest with!!!
Could really have done with changing the one swept 30 ends on 'em, but if it meant losing any length to do it, it'd have to stay as it is or make a new pipe, as there was no latitude for shortening them !!
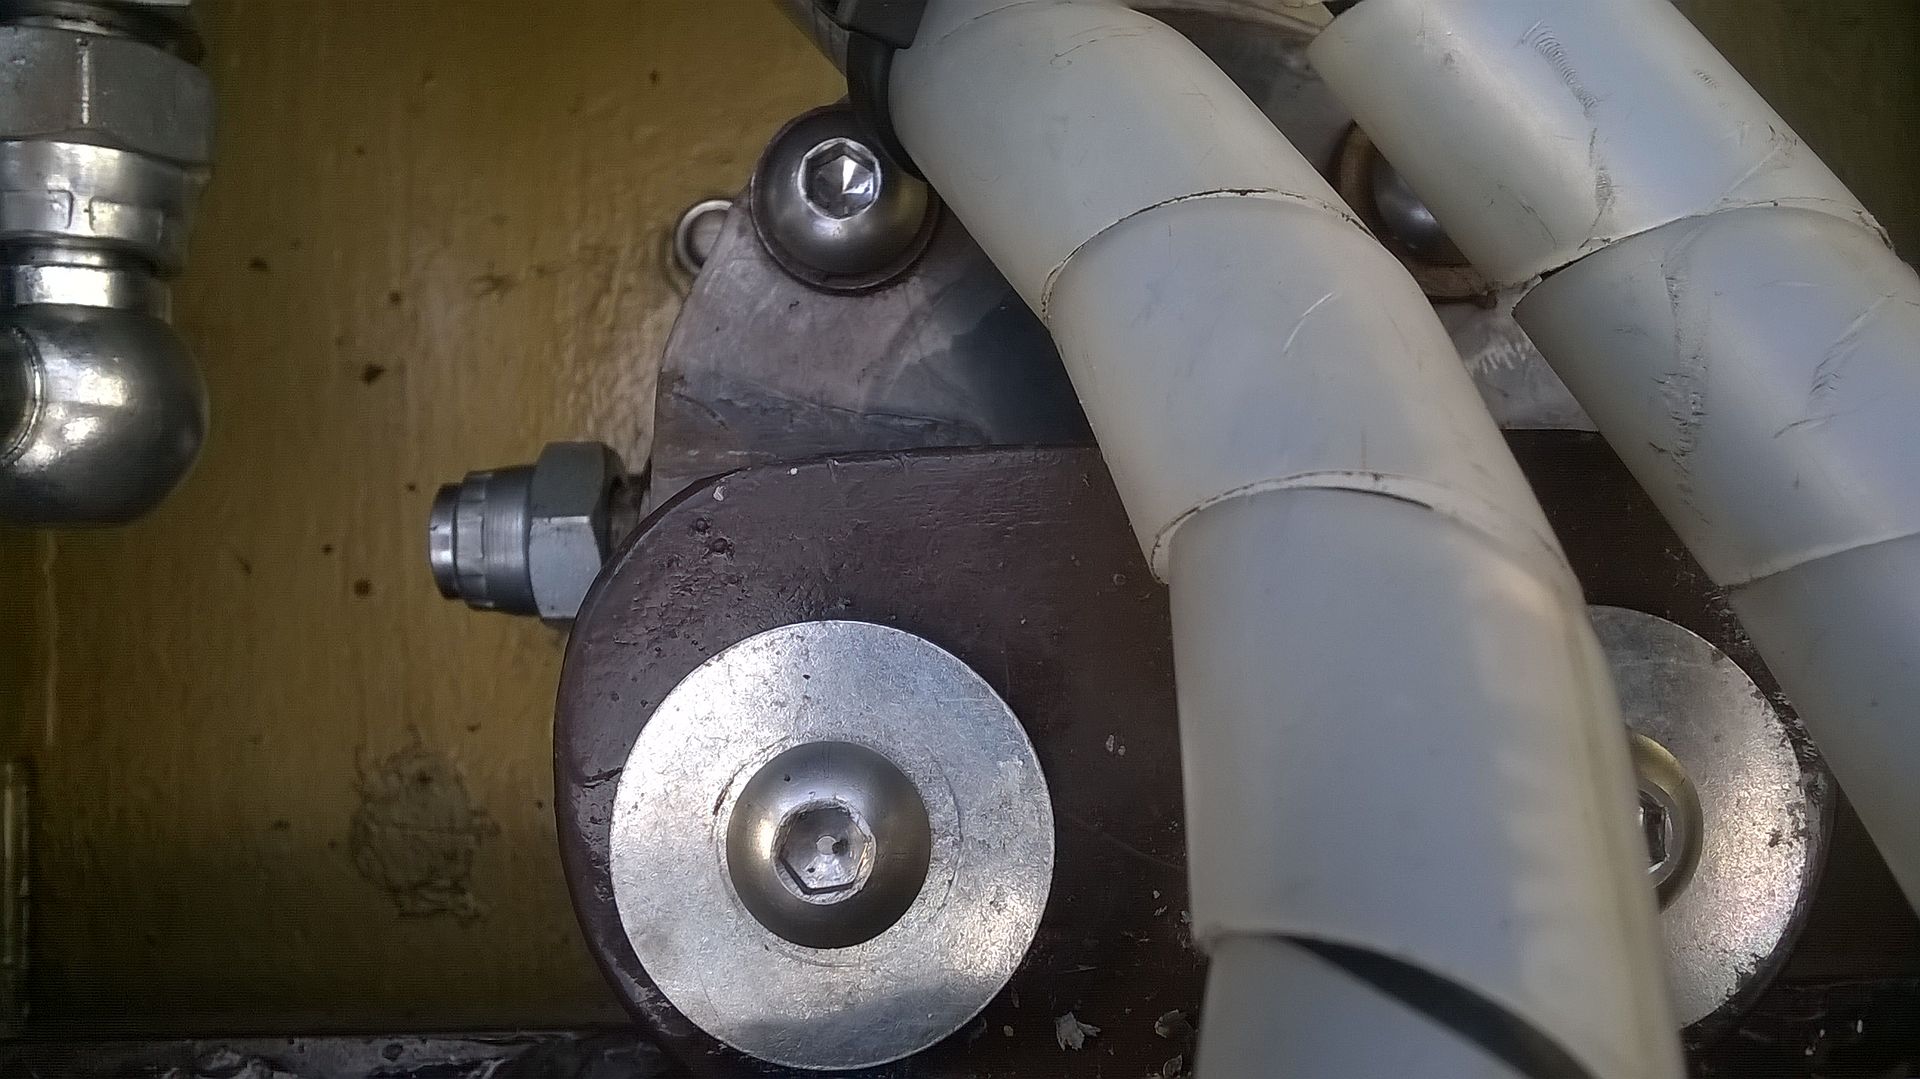
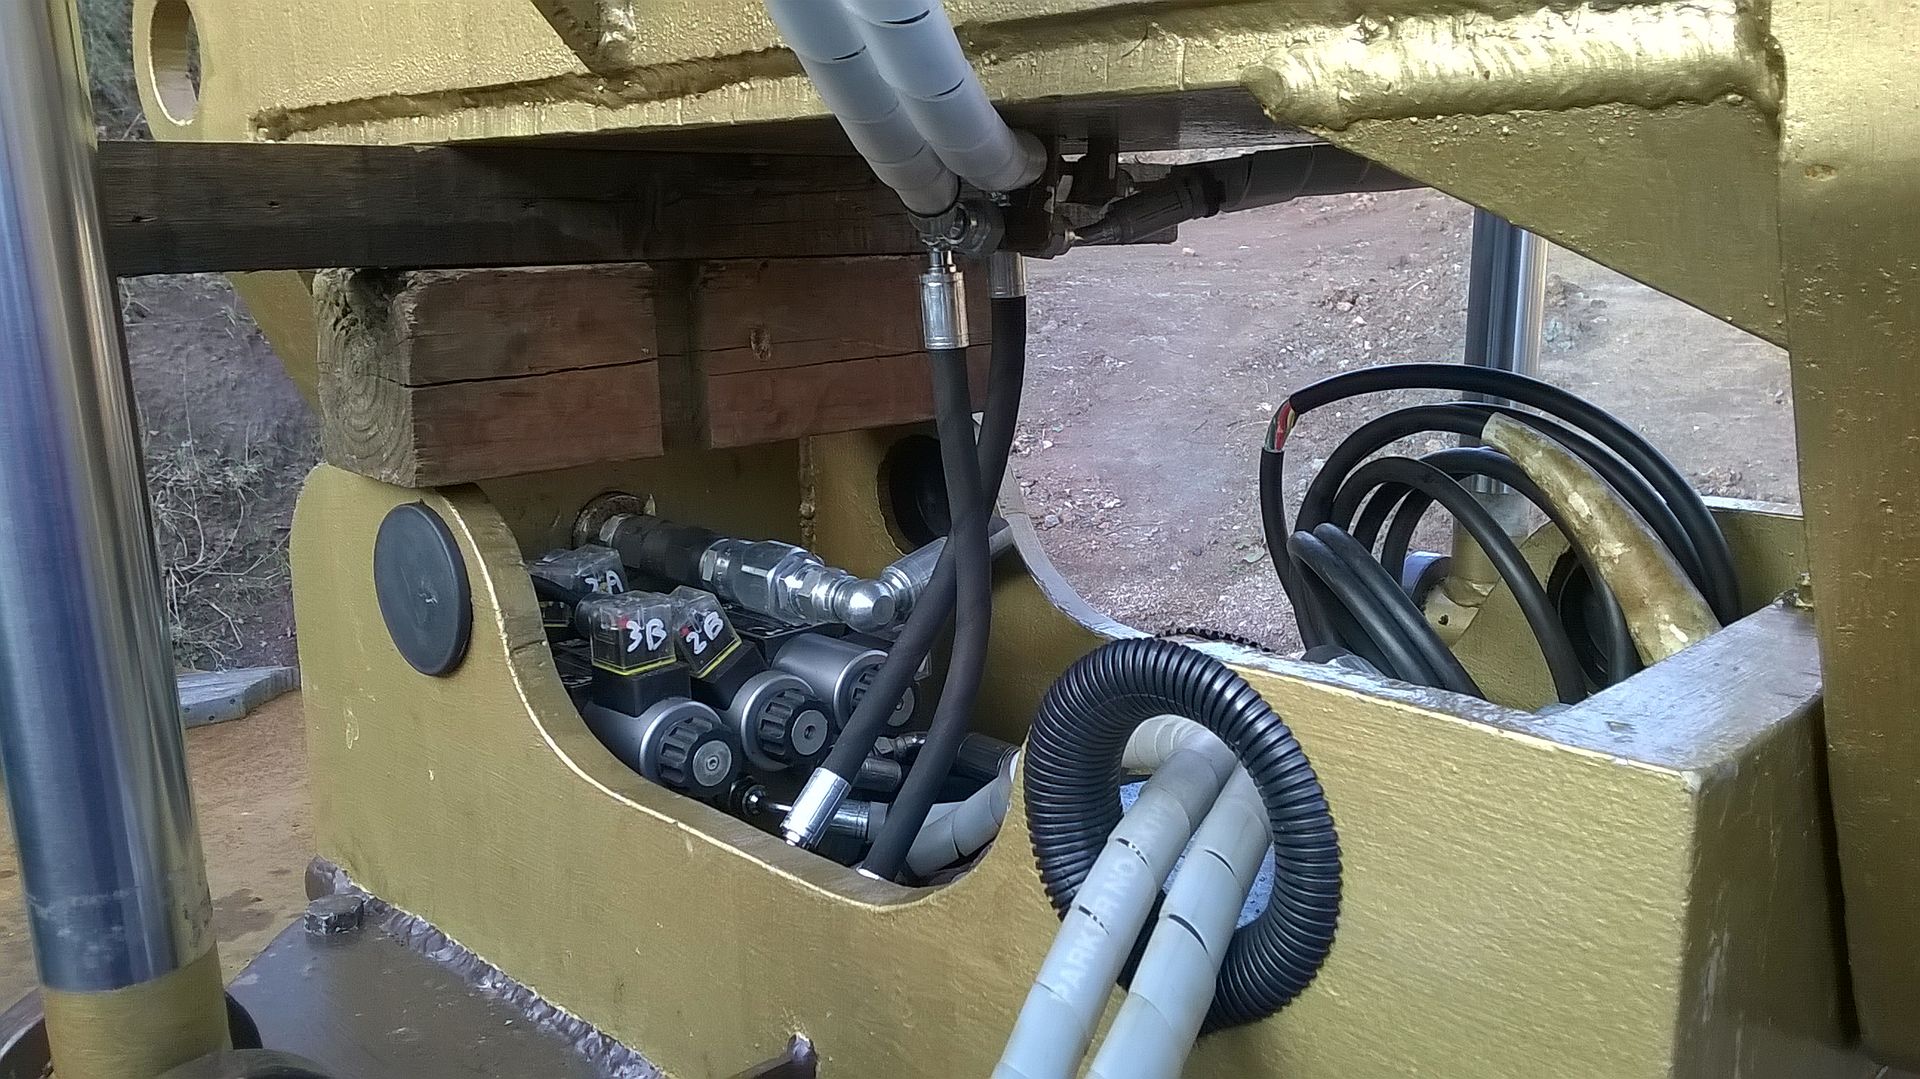
Having gotten all the pipes where I wanted 'em, I was stood looking at the Roemheld and how nice a fit it was when I thought - "daft sod - if you'd put that the other way round you'd have gained half an inch clearance for the left side ports" - so..........
whipped out the top drive bolts and the other two top cover retainers, a couple of the side port adapters and spun it 180 about!!
Getting the top drive bolts [and all their associated nuts and washers] back in, in that tight lil' spot was 'interesting', but suffice to say - I gained the clearance (every millimeter counts in there!) and it may have even worked out better for pipe routing underneath too - win, win!!
next up was the loom.........
popped the placcy blanking caps back in - amazing the difference they make to the look of it.
Then pulled the main pins back out, capped off any open ended pipes, for the night and tucked it all away, ready to get a cover over it, as the forecast for the next day wasn't great !!
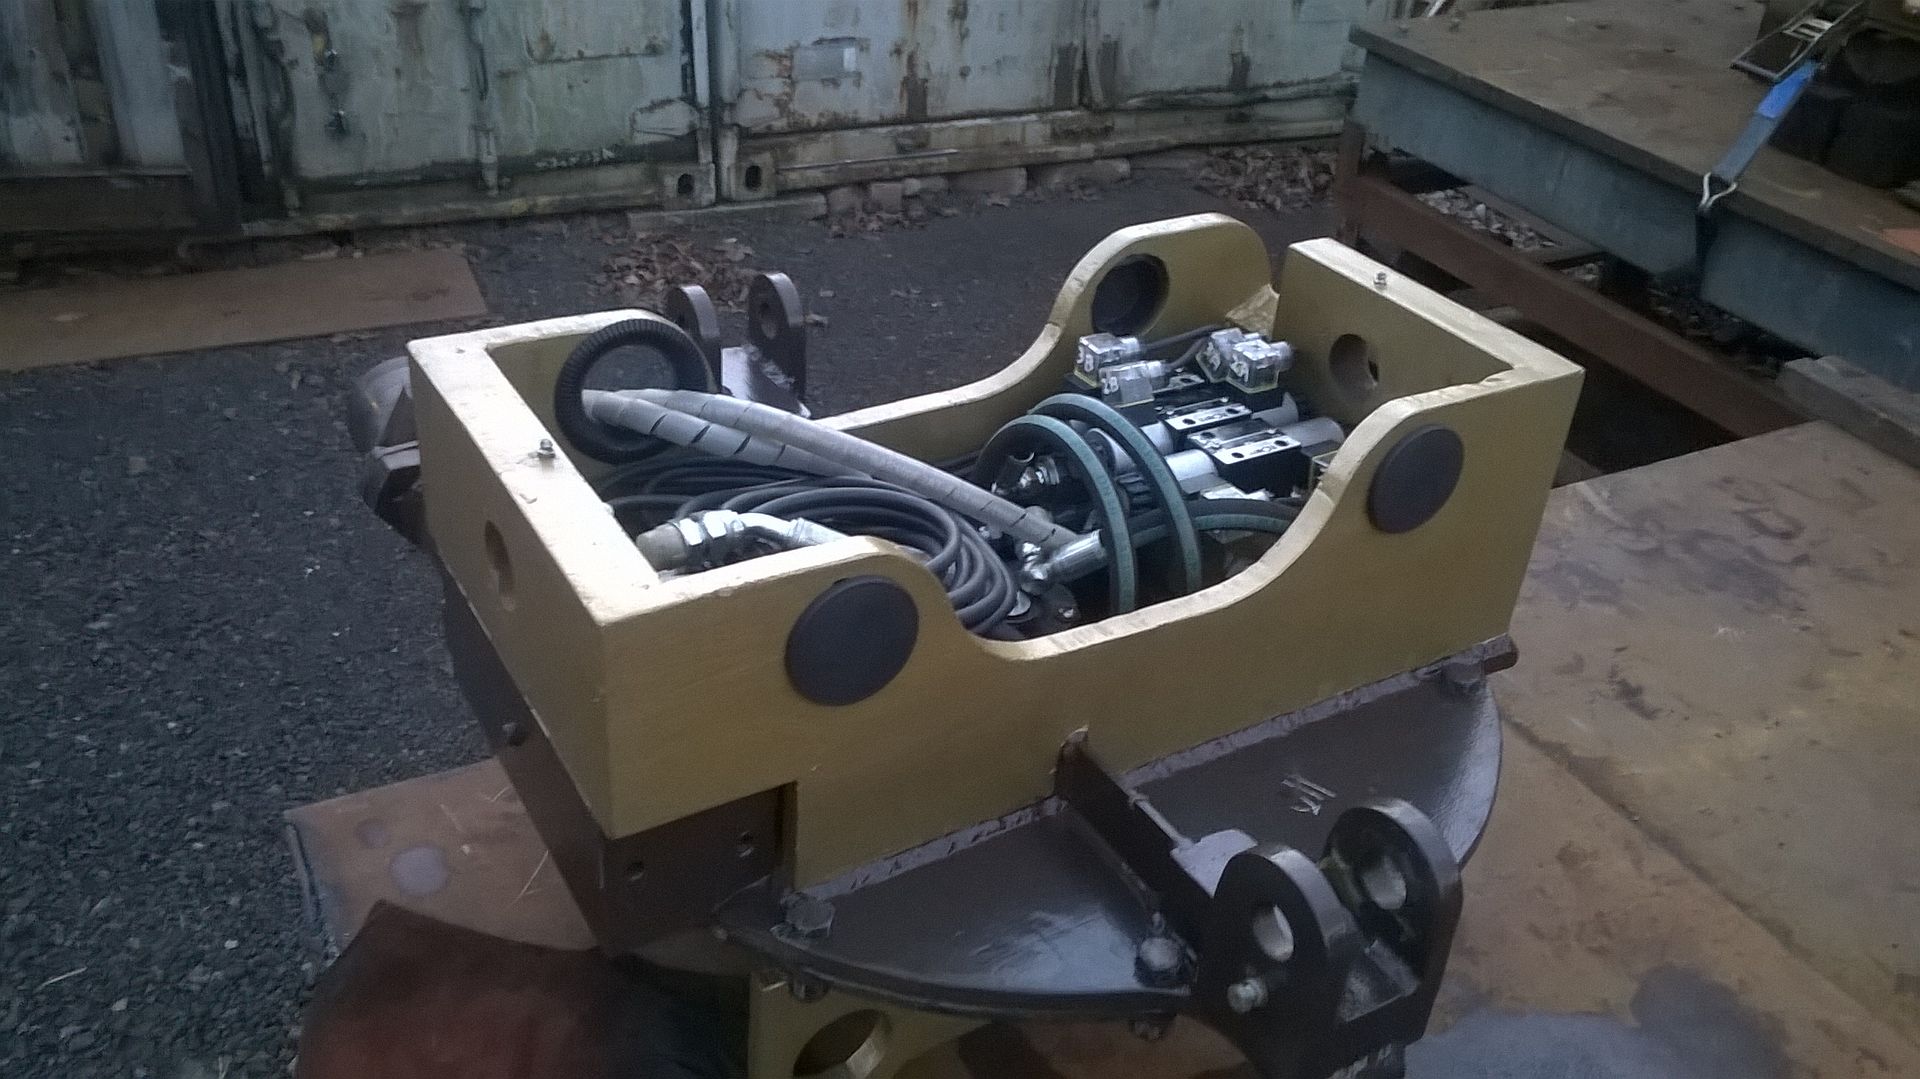
I took a lot of pix of this that day, as hopefully it wasn't going to be coming apart again for a while!!If it's got tracks, wheels, t*ts, or an engine, at some point it's gonna give you trouble!!Comment
-
Well yer know me by now - can't leave it 'til I'm happy with it.
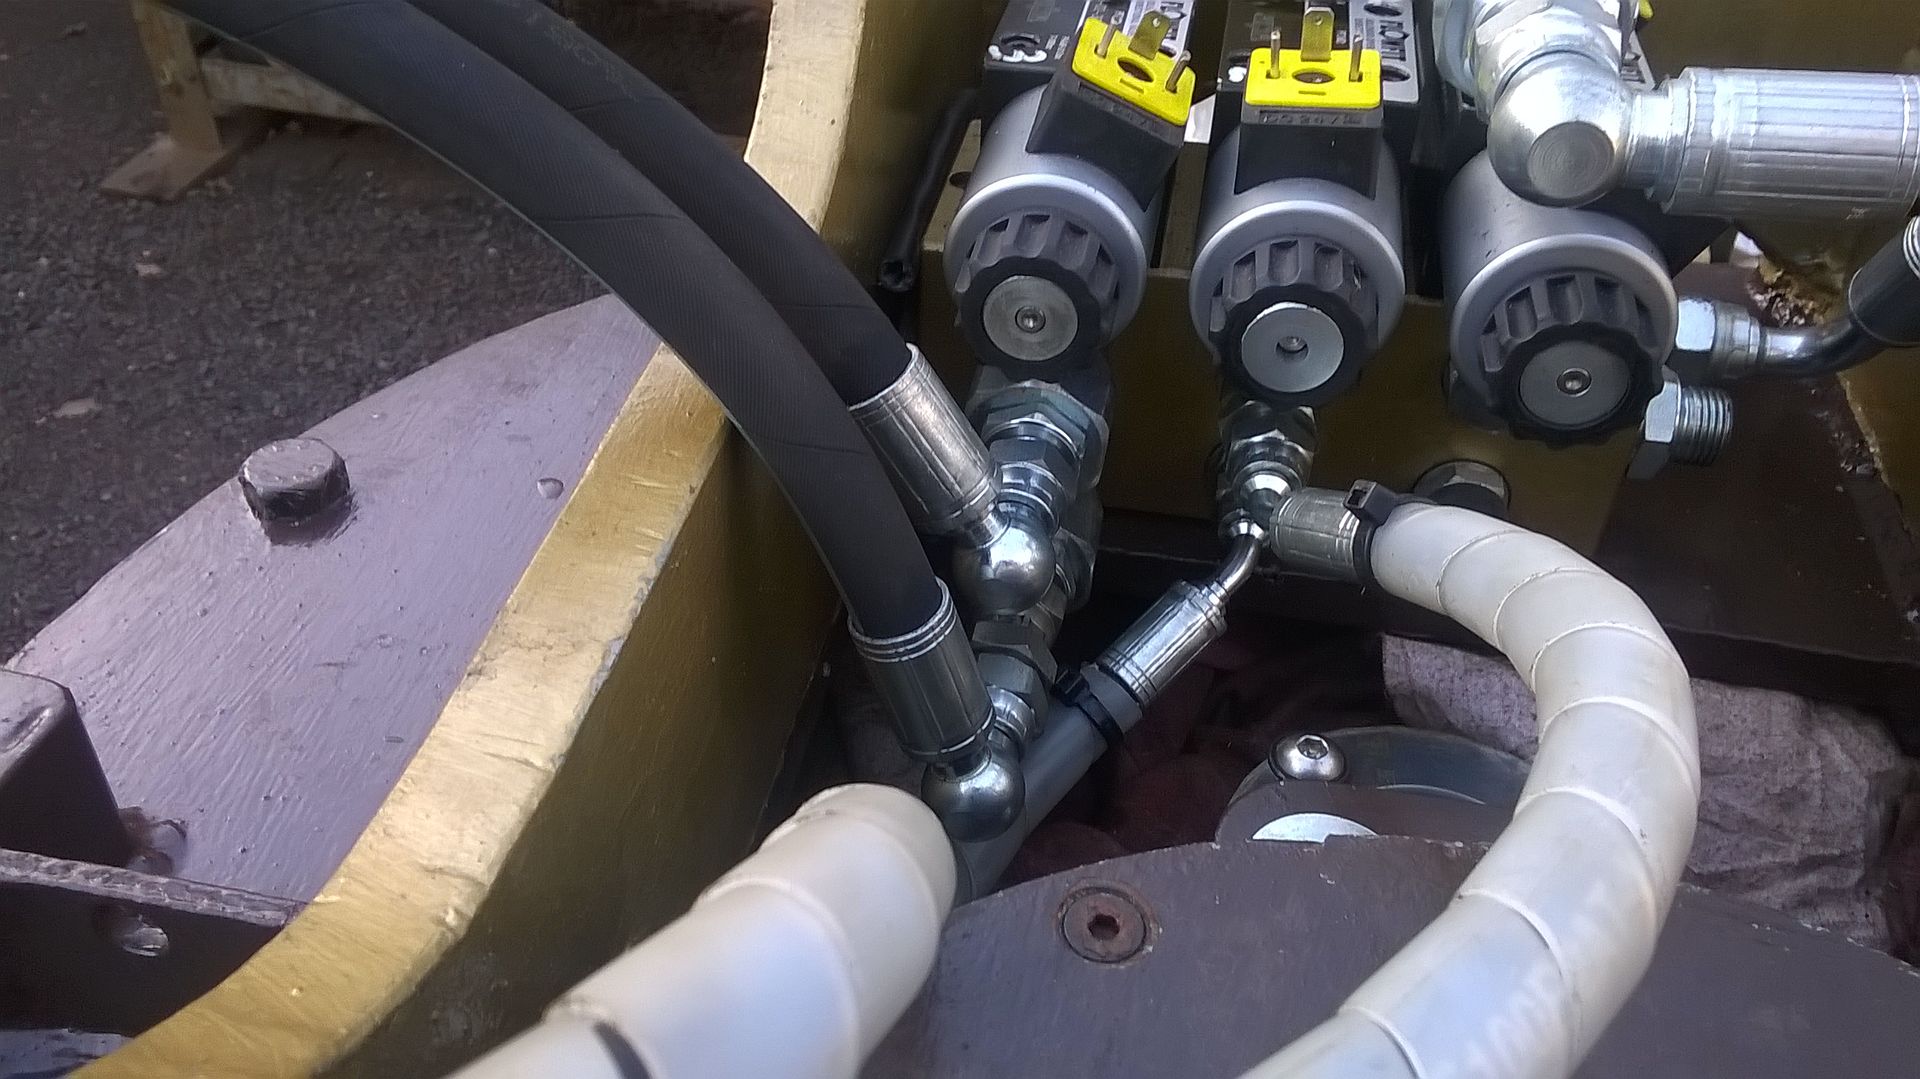
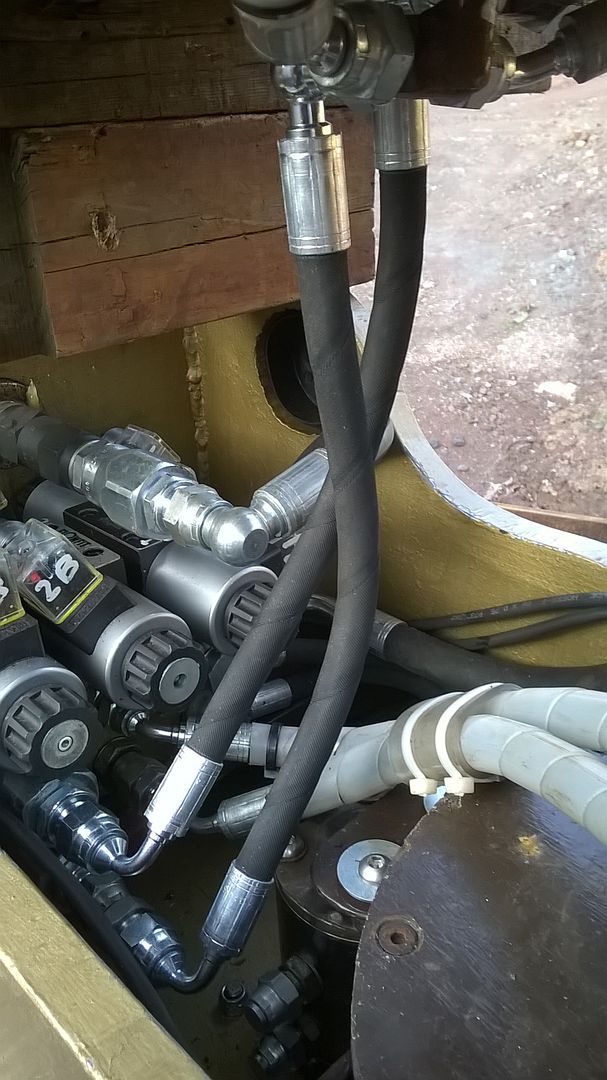
Came to me that night as I was dropping off, how to get a better route, so out to it in the morning, pulled a couple of bits out the way, motor pipes off, swapped over, a M/F swivel in for a spacer........
......... and re-route the second pipe over the top of the Roemheld.
Much better route, right lengths.........
......... and a much better access/clearance to the rotary ports for the aux connections from the Cetops and for the eventual quickie feeds to the rotary too
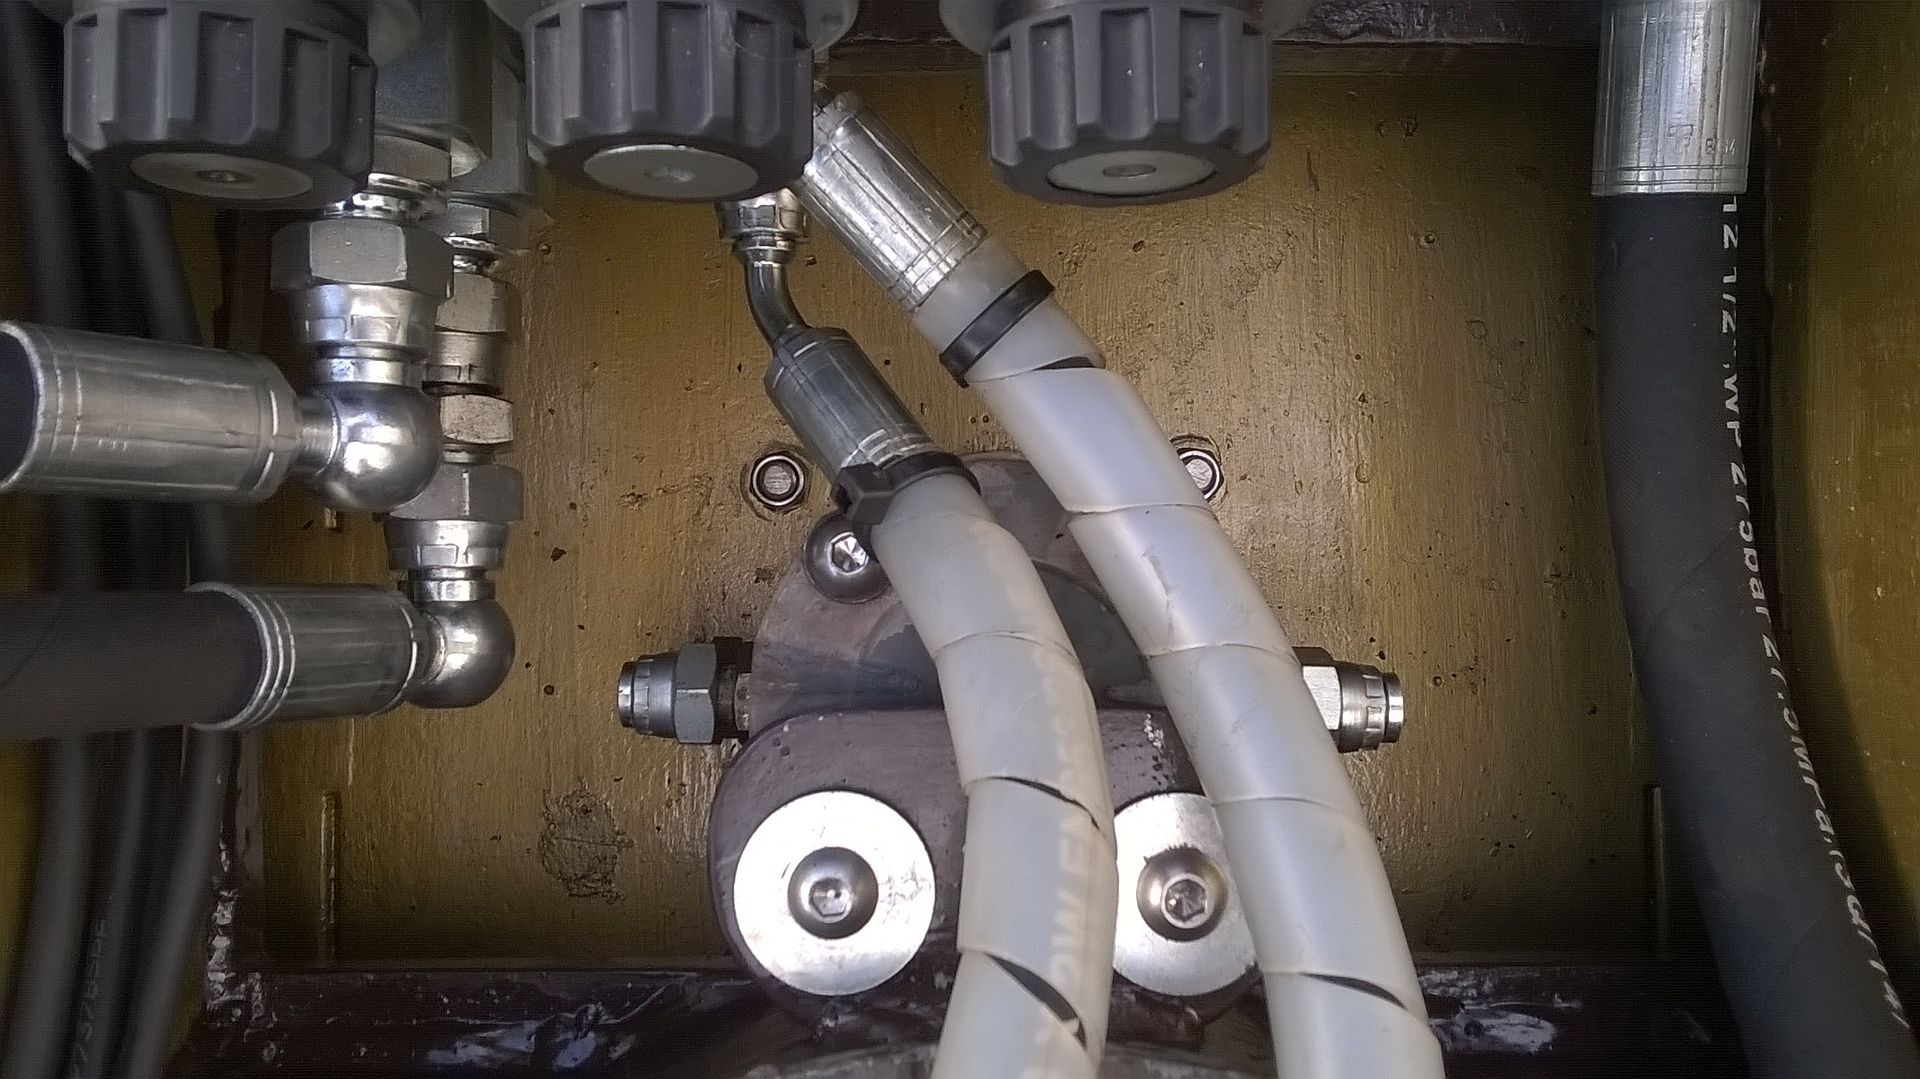
It'd give me much more space for some already tight 1/4" plumbing! If it's got tracks, wheels, t*ts, or an engine, at some point it's gonna give you trouble!!Comment
-
It was absolutely 'lashing it down here the morning I took the lower half to get some pipes made up; not fit for a dog to be out in and thought i was going to have to tell Marty (the guy I was going to see) I wasn't gonna get there.
Then about eleven, it eased off for a quarter of an hour and I dashed out and got the VA-r in the trailer ......... and got piddled on roping it down!!!!
Anyway, got there and showed Mart what needed doing - out came a handful of fittings after a bit of a discussion, as to how, spannered a few into place and persuaded a bit of rubber into the line we wanted it on.
Marked, chopped, crimped and spannered back into place, in between Marty serving the hoards of folk through the door - I was in no hurry and could wait for 'the maestro's' attention, at my leisure, stood by the space heater with a cup o' coffee.
Four pipes, two and a half hours later and the odd fittings I wanted identified and in my mitt and I was away homeward. Still lashing down!!
Sod it, had a late lunch when I got back - not getting piddled on again!
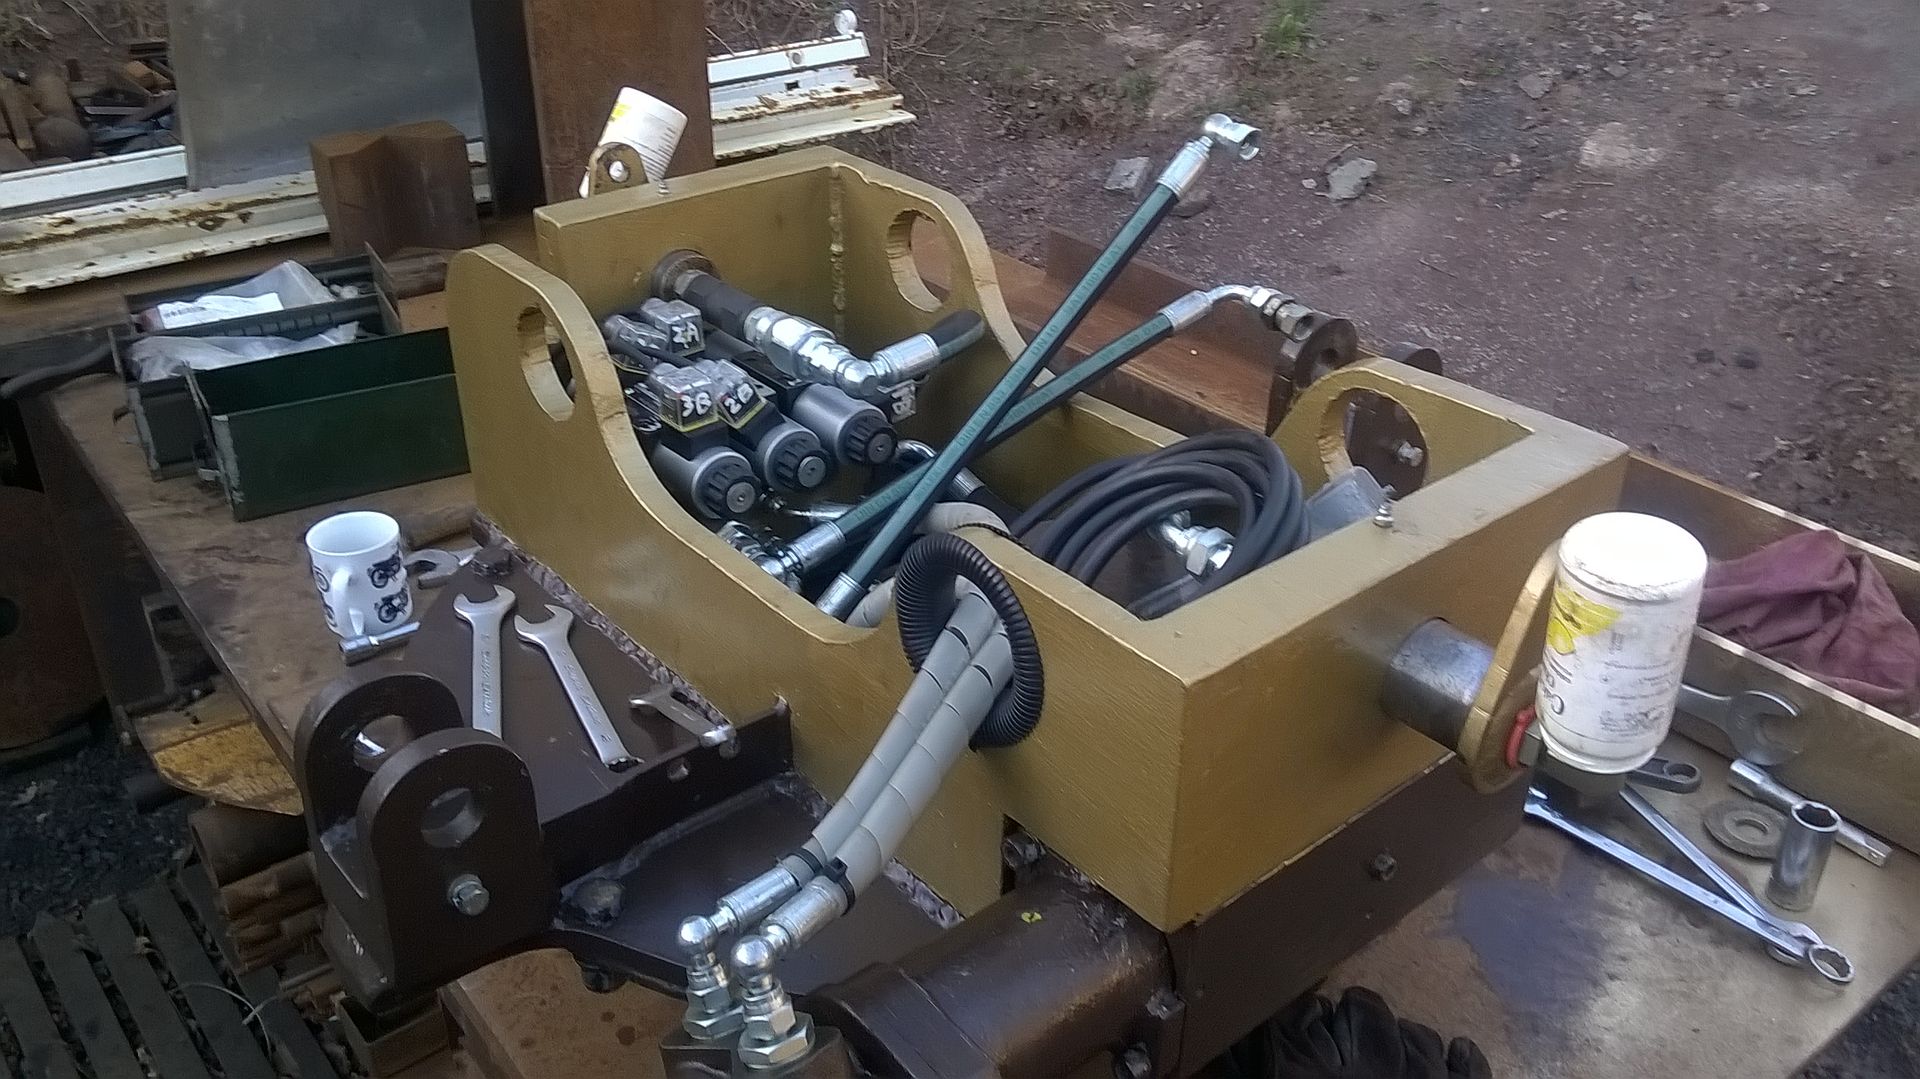
By the time I'd filled my face it'd eased off to a drizzle and out the trailer it came, .....

.... after I'd taken a couple of pix ..........
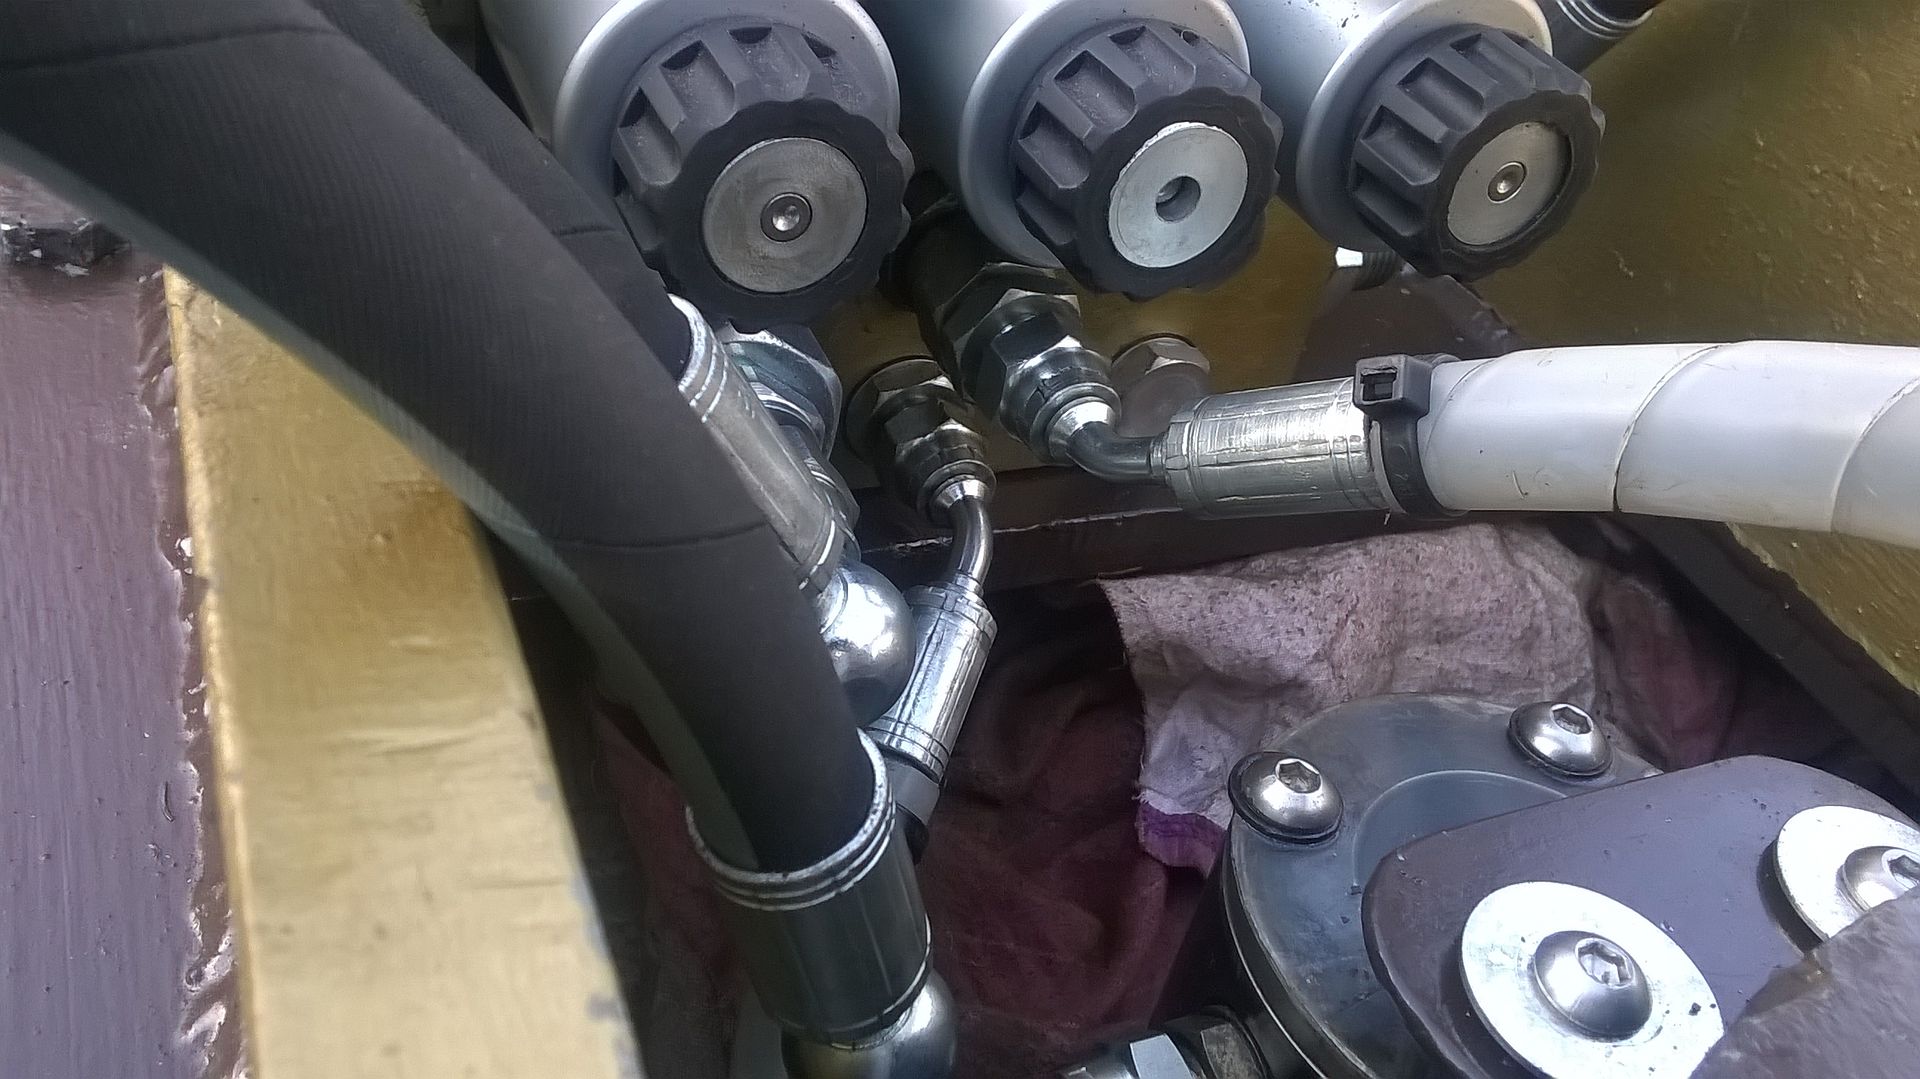
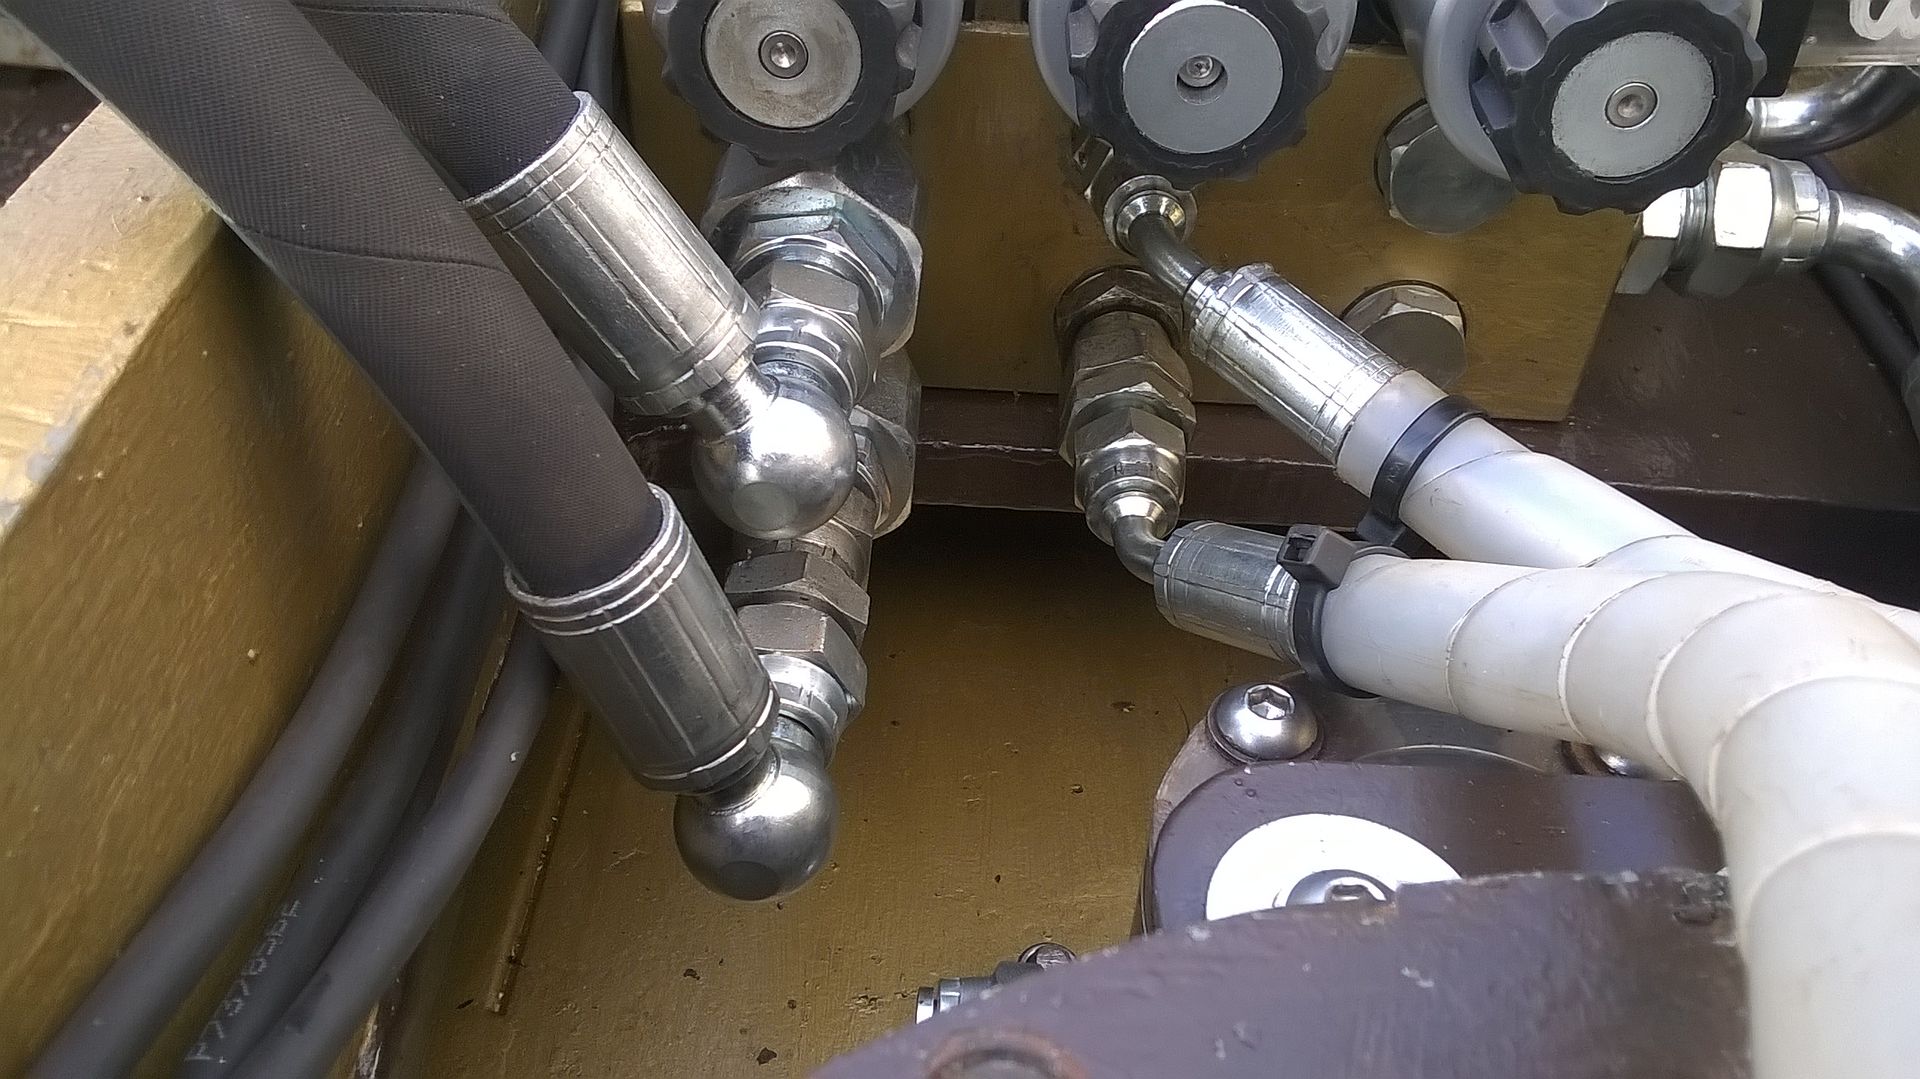
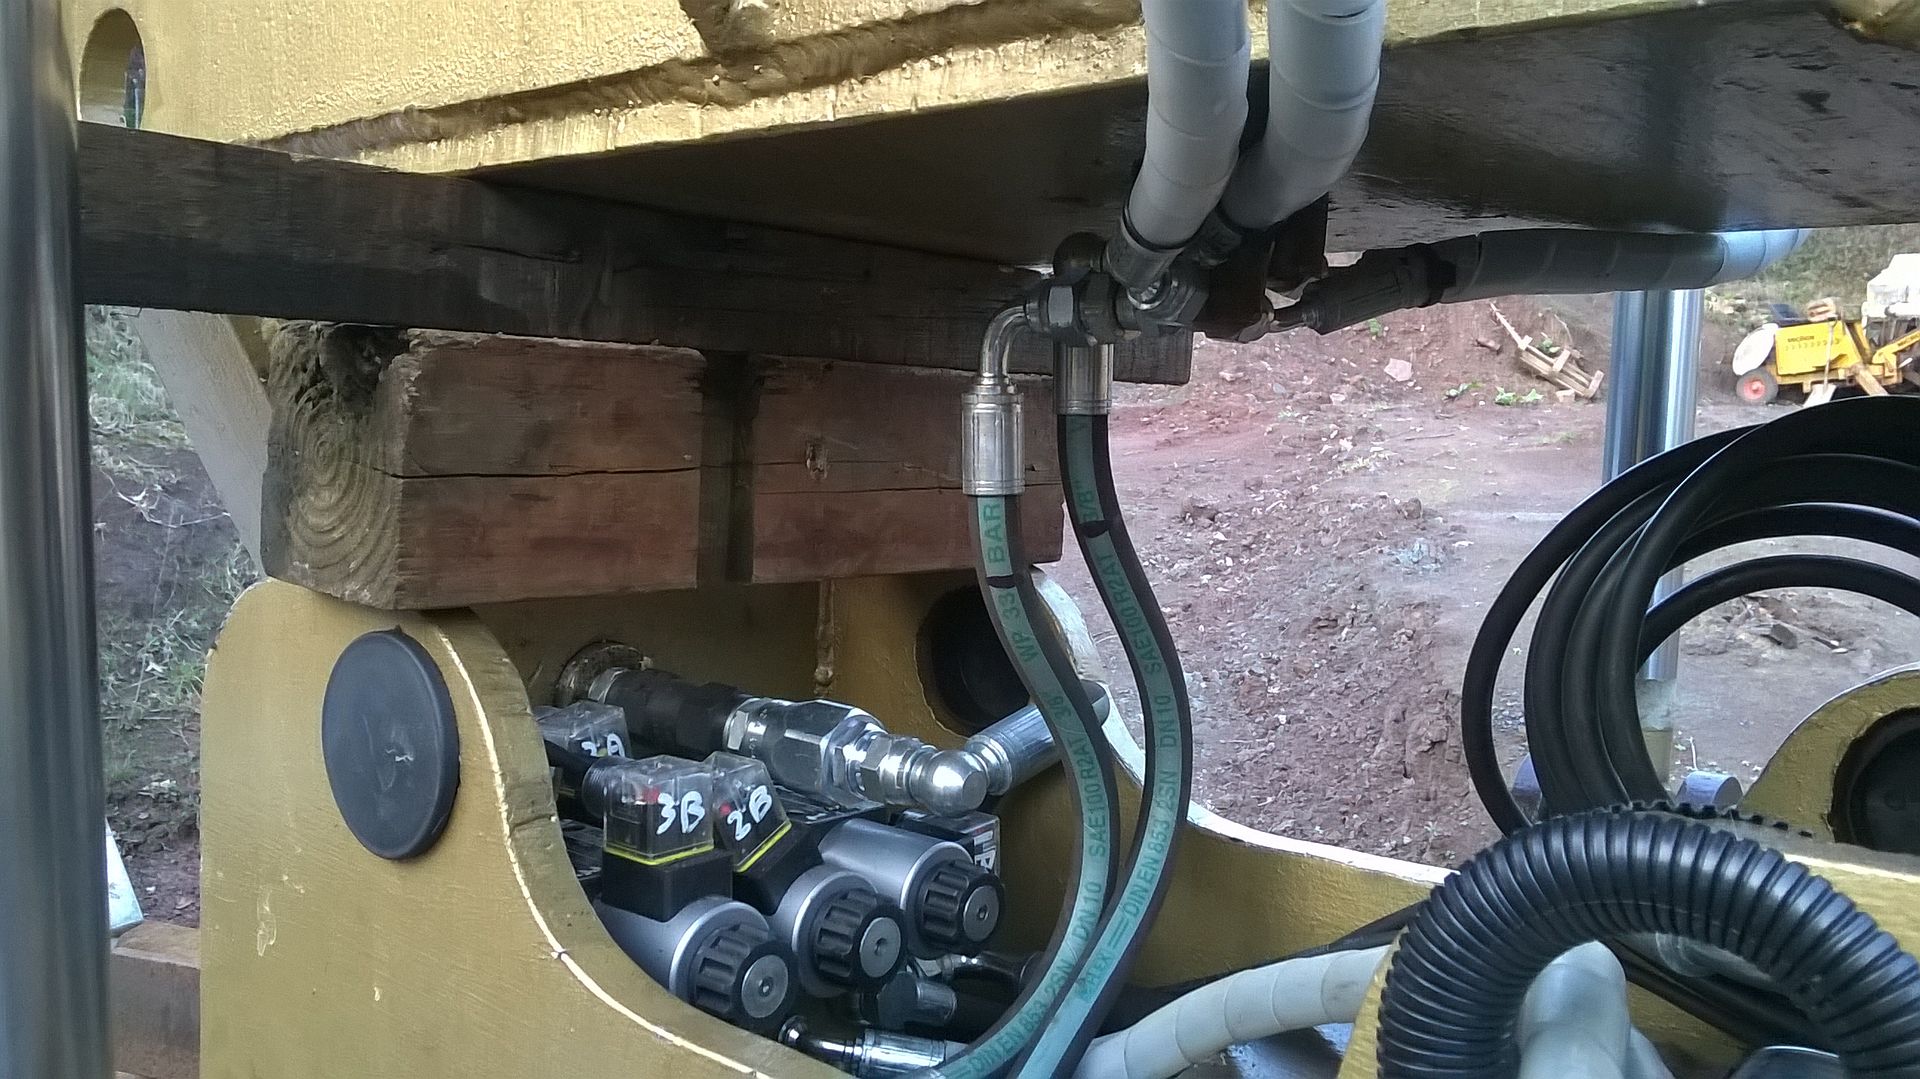
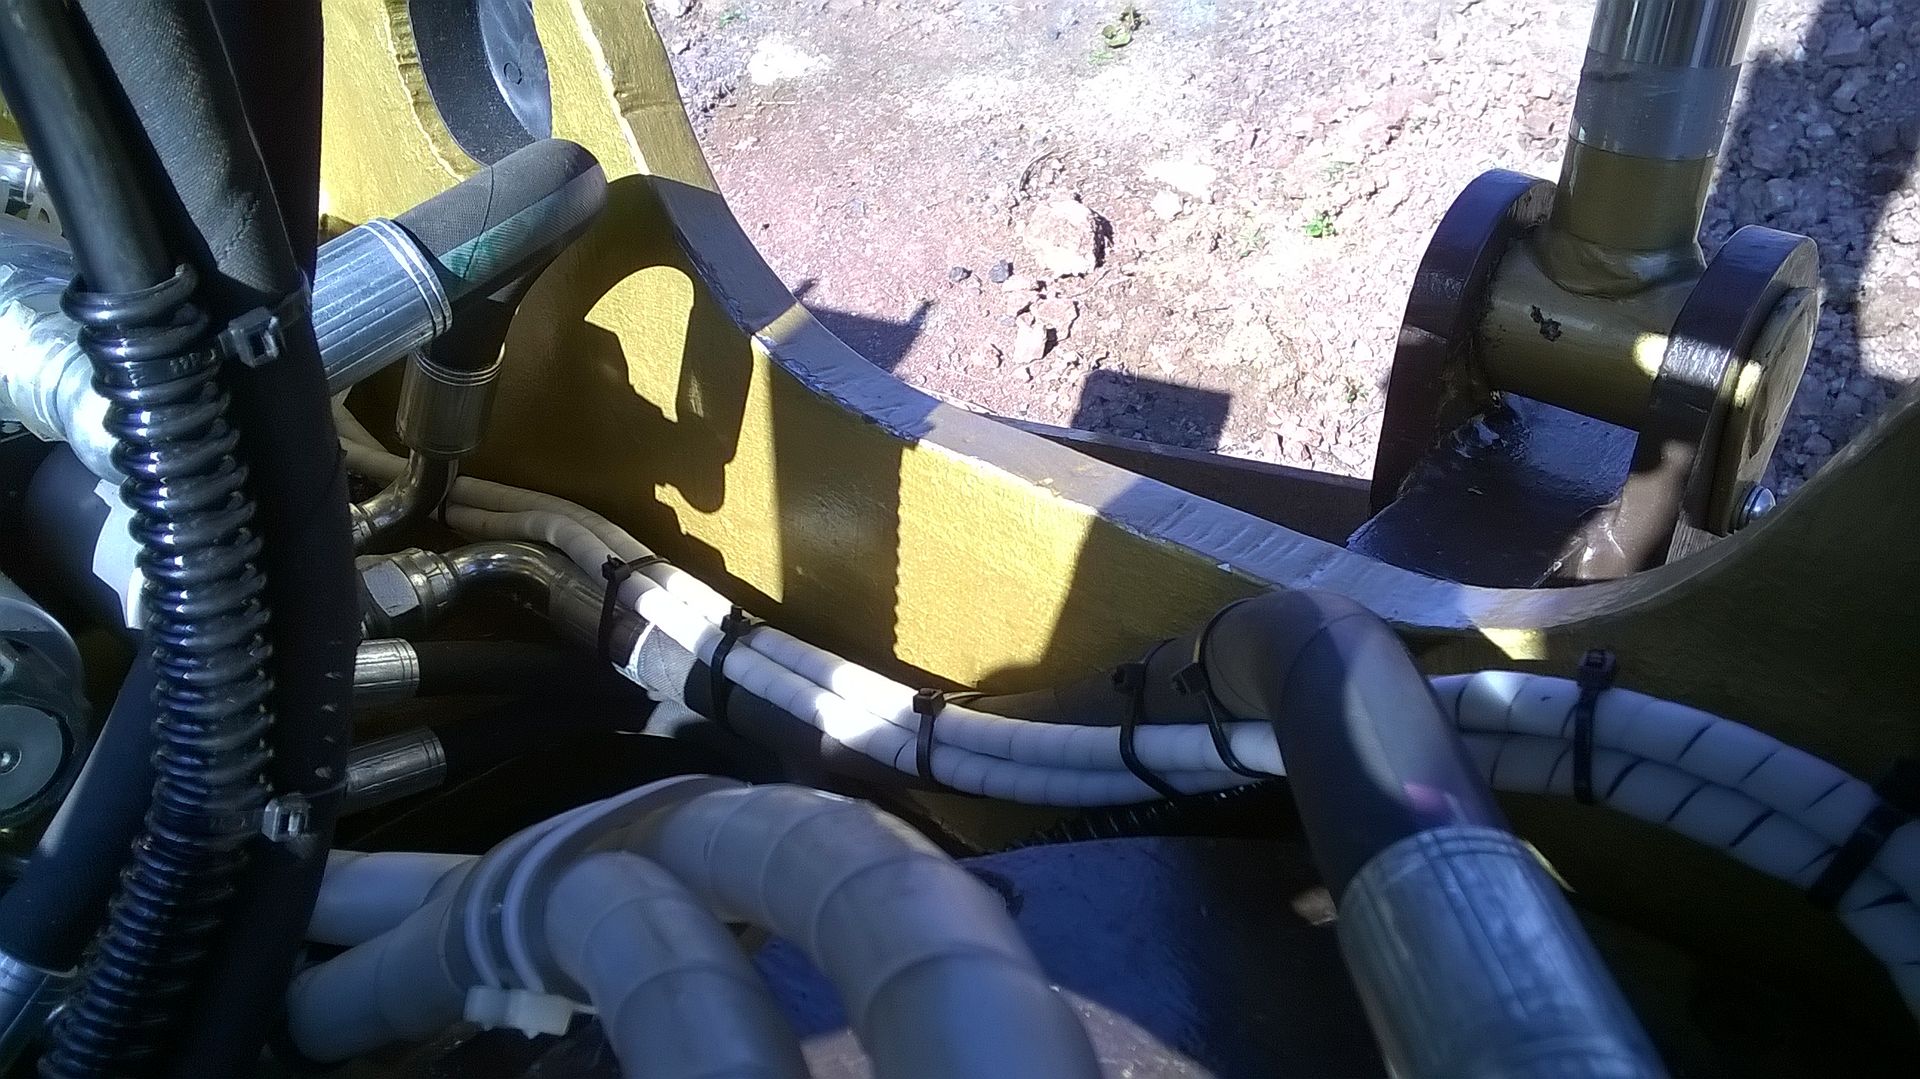
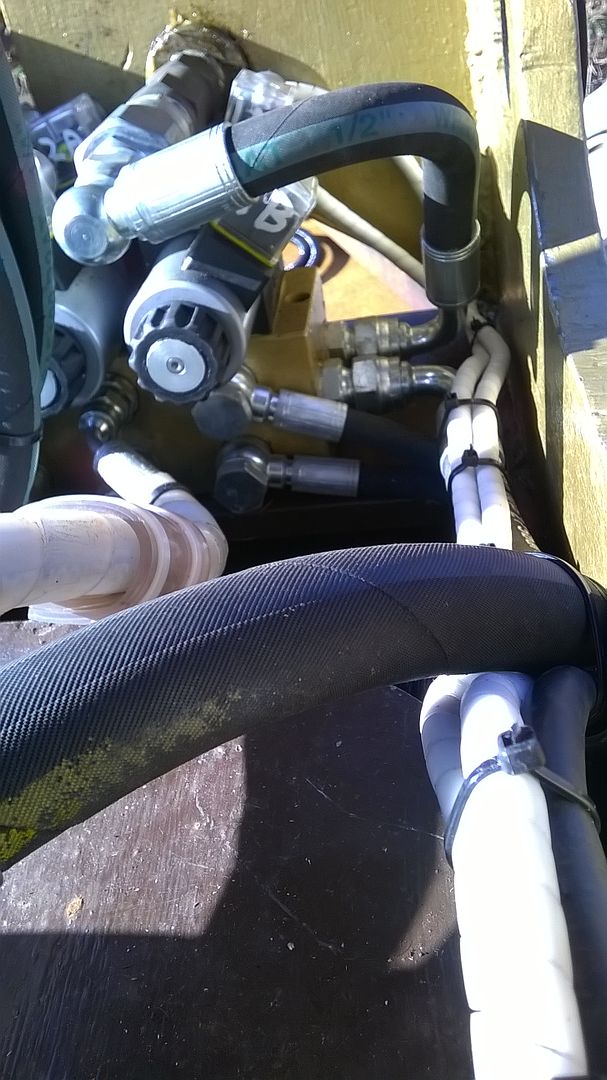
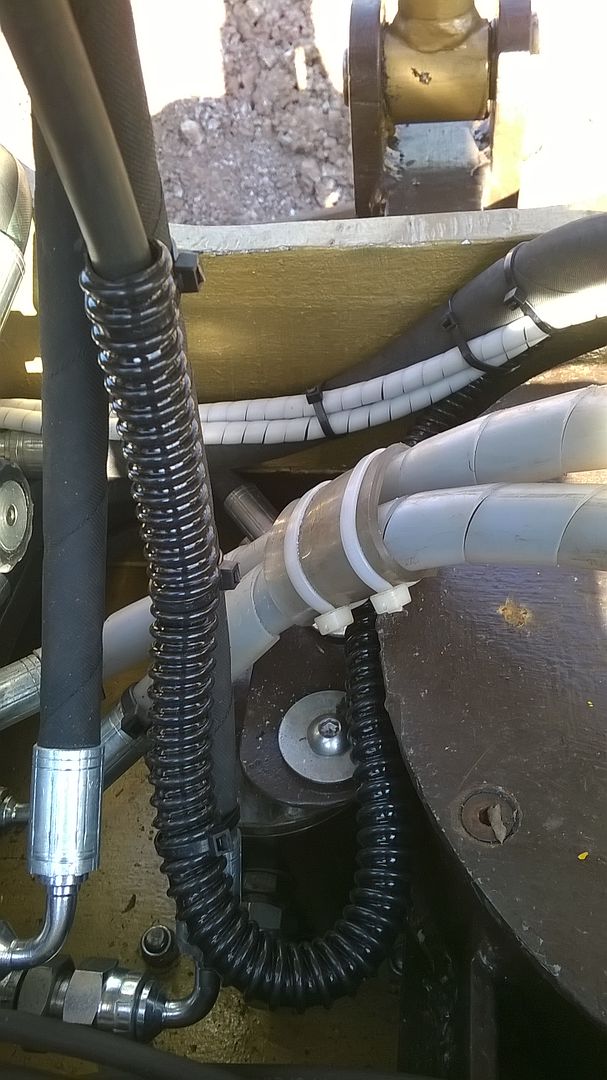
well that's the top, from the Cetop manifold to the Roemheld rotary and here's what it looks like underneath, at the other end of the rotary coupling.......
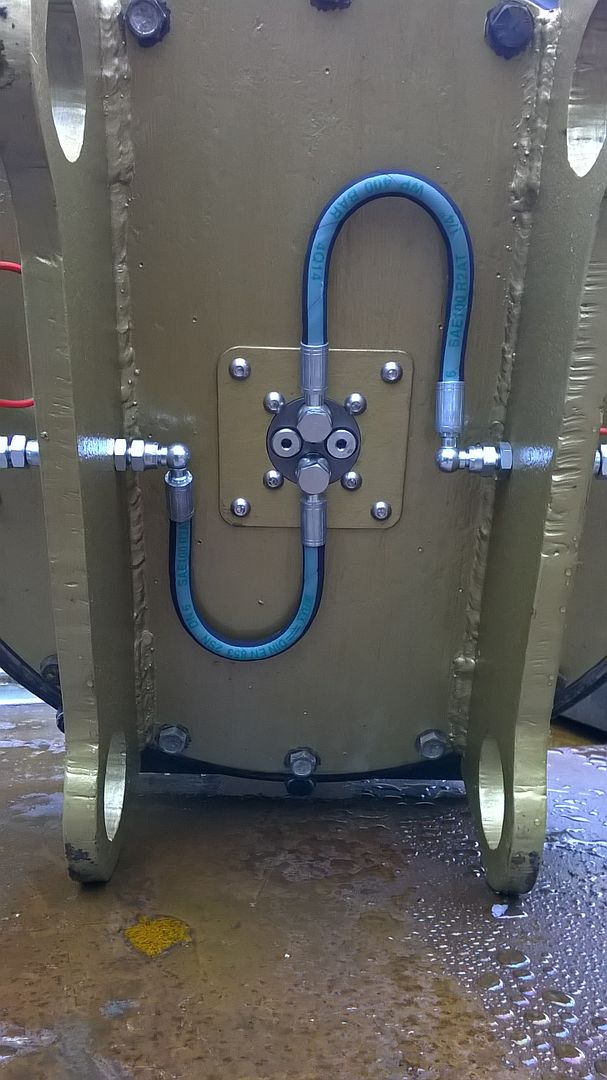
......feeding the aux. QCs
The other two ports, currently capped on top and plugged underneath will provide oil to the hitch ............. when I get around to creating it!!!
Some of the strange/odd fittings I was after, in Raglan, were metric/BSP adapters to alter my clam shell hoses and having bide-ed my time altering these, under cover in a box, the rain/drizzle had stopped too.
So, got the pipes onto the QCs on the dipper, while it was on the floor - that was an easier proposition than the eight plus feet in the air, the last time I did it and swung it around over the ................. but that's a different story, of a.n.other attachment I've been working on
One last pic which I thought might interest you.
This is a 'dead' �5000 hose, the replacement for which I had to move to get my trailer into Marty's unit's door!!
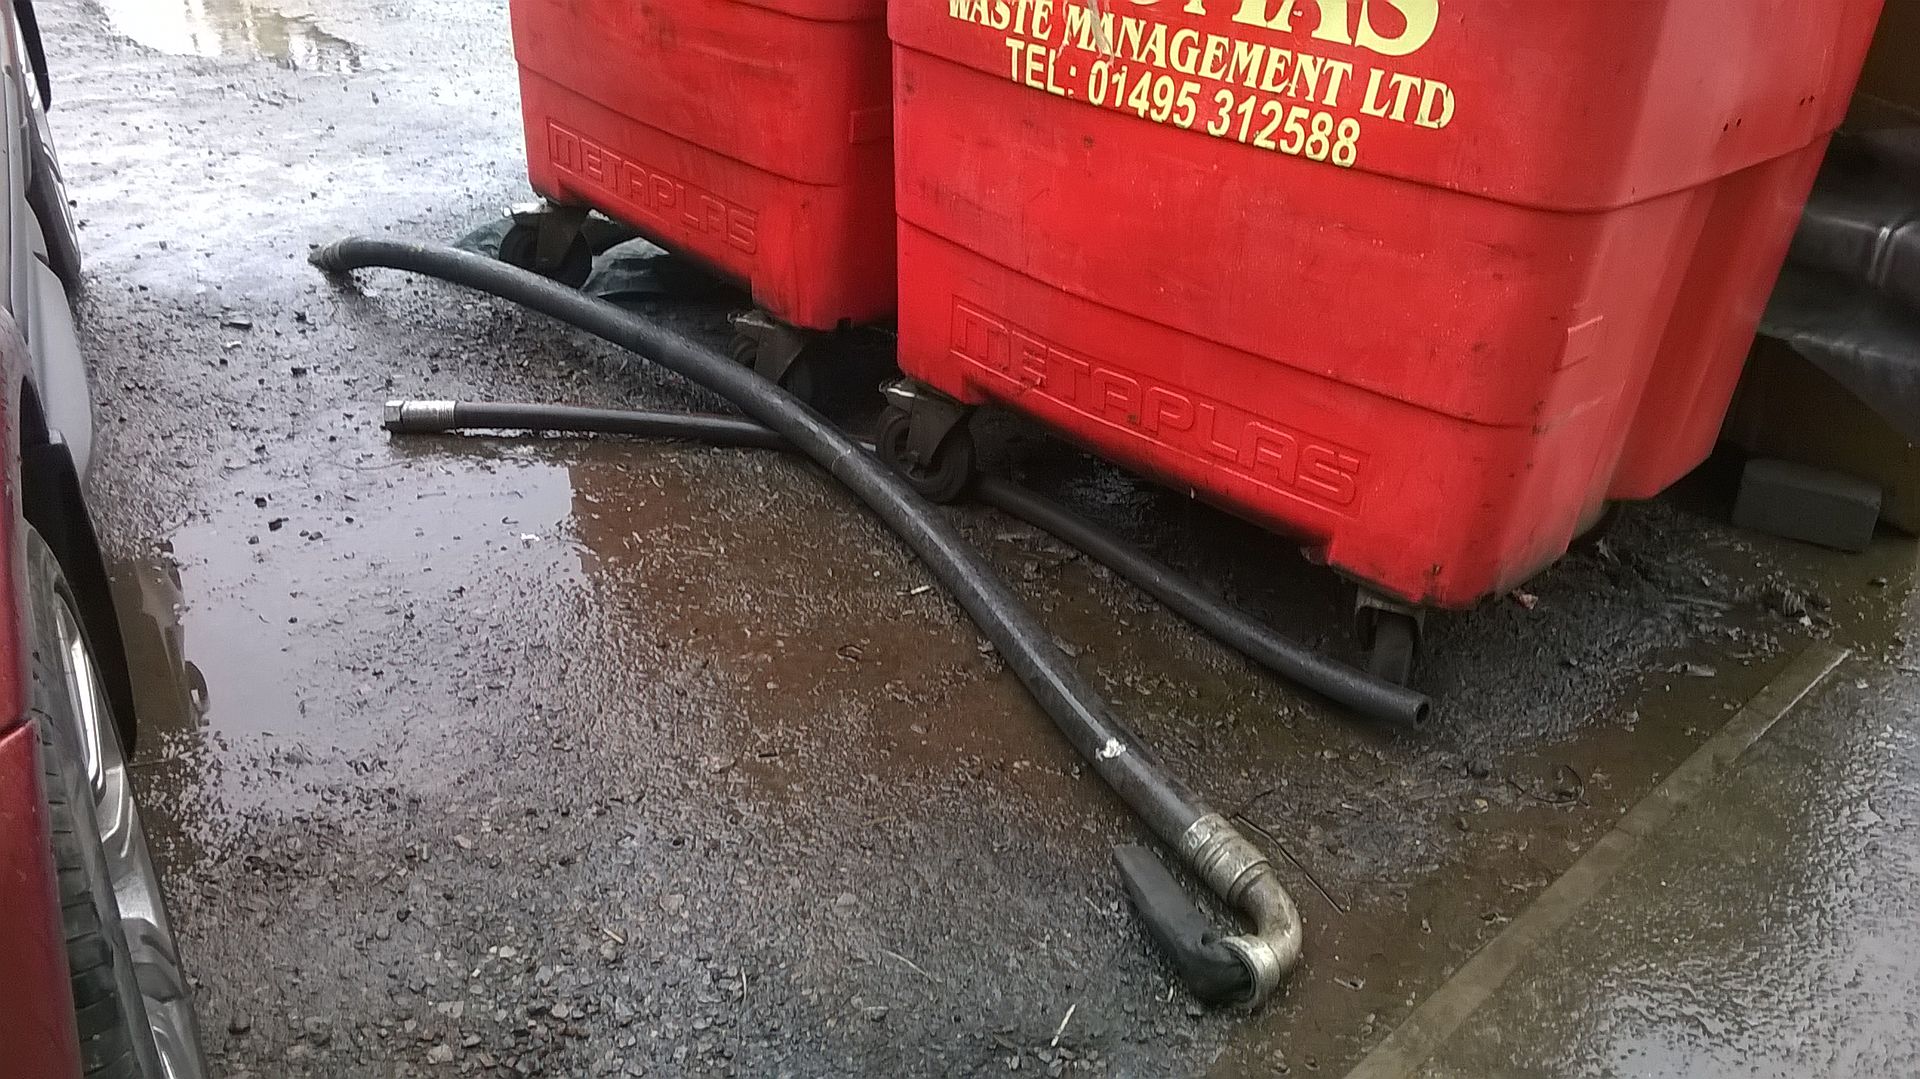
The fittings are 'Parkeronly' at �2000 each. It's 2" x 6 wire, ('bout 3+" O.D.), 1500 bar working, IIRC, with a burst pressure of 6 times that - guaranteed!!
He does two, or three a week for a local companyIf it's got tracks, wheels, t*ts, or an engine, at some point it's gonna give you trouble!!Comment
-
managed to get the top back on to the VA-r,, the following day, picked up on the hitch and positioned so's I could suss out the tilt ram feed pipe lengths, which I knew (in my heart) were going to need altering !!
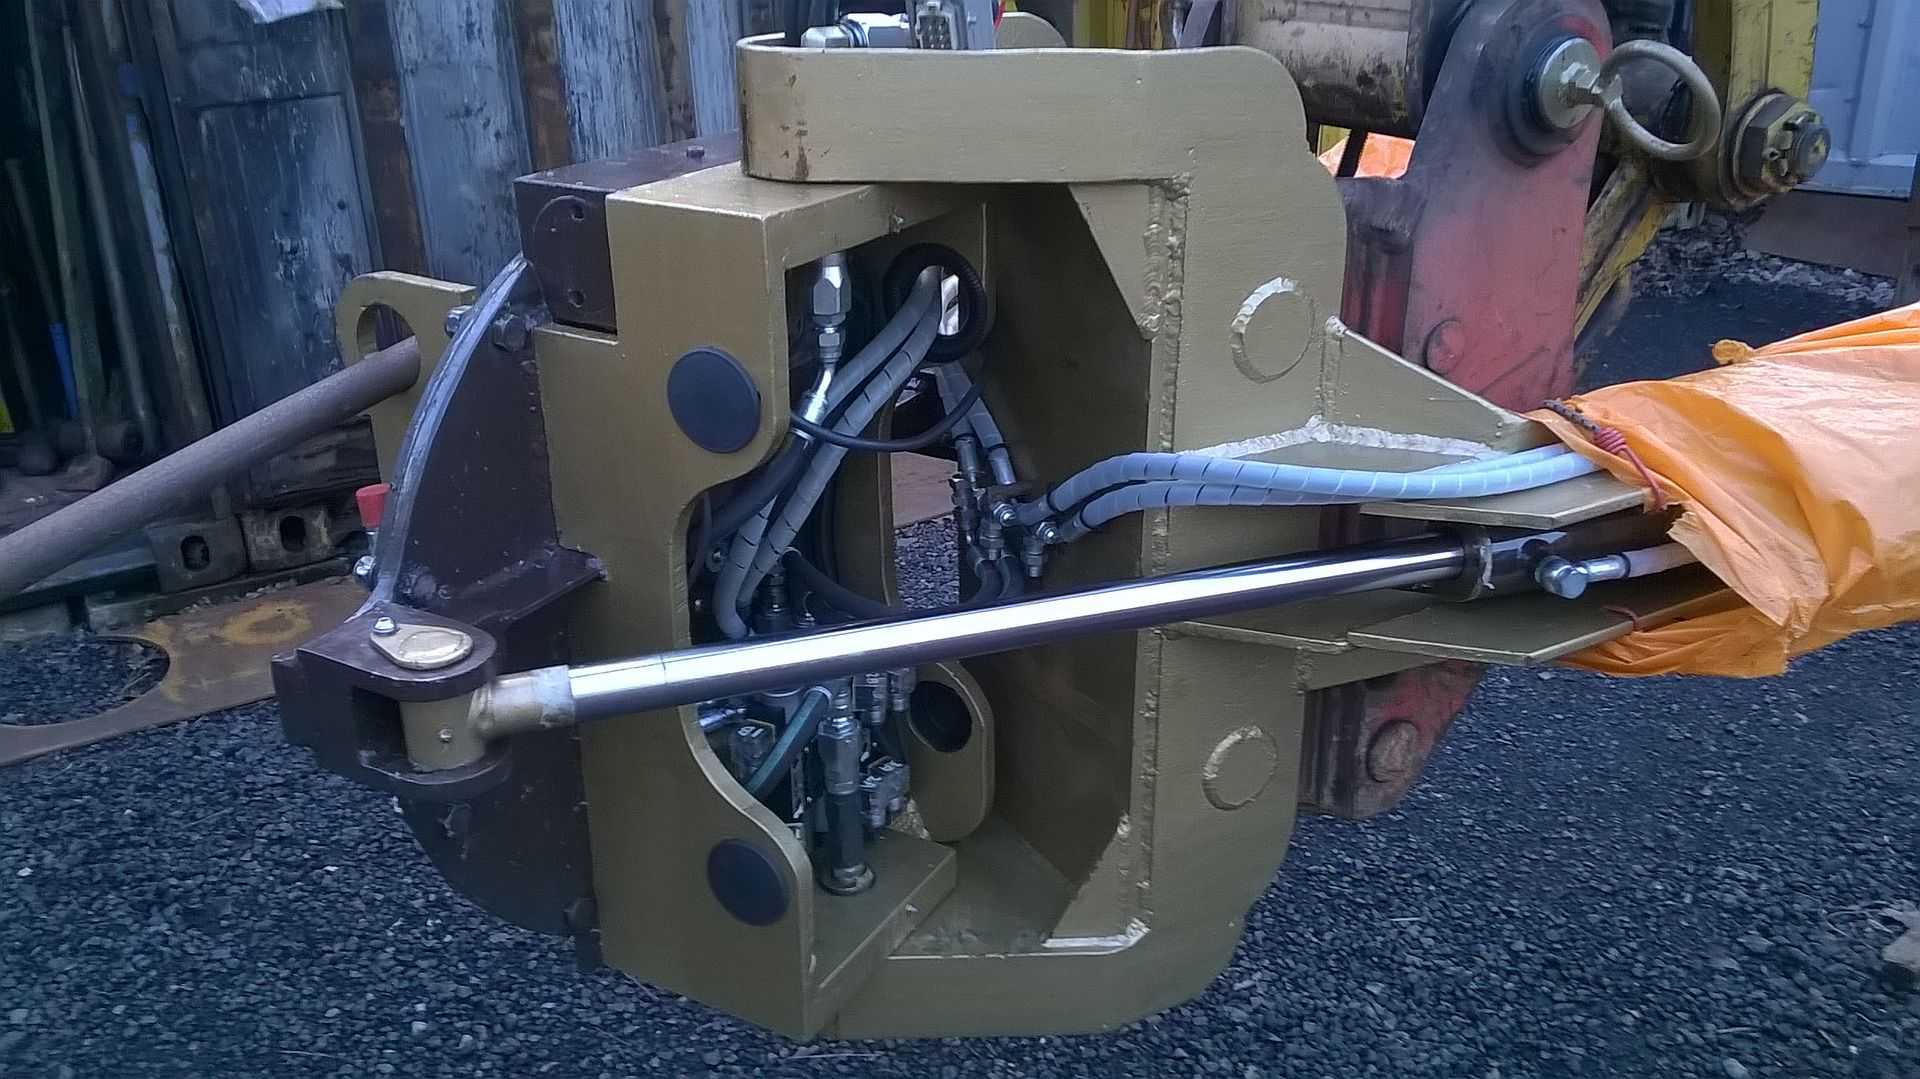
The black marks were where the centre of the fittings needed to be!!!!!
Also got the chance to crowd it round, full tilt each way (with a 7 ft bar) and measure up the ram rod return stops, that I still had to get made up, which shouldn't be too much bother!
I knew what I was going to do with 'em, just had to do it!
Otherwise all looked hunky dory on clearances, etc. . Reset the motor pipes to clear the gussets and checked everything for tightness, just in time for tea!!
Went to get some different manifold to tilt tee pipes made up later that week - the right length and went down to 1/4", to get a bit more flexibility in the tilting dept. from full left to full right !!
here's the difference in the pipes ..........
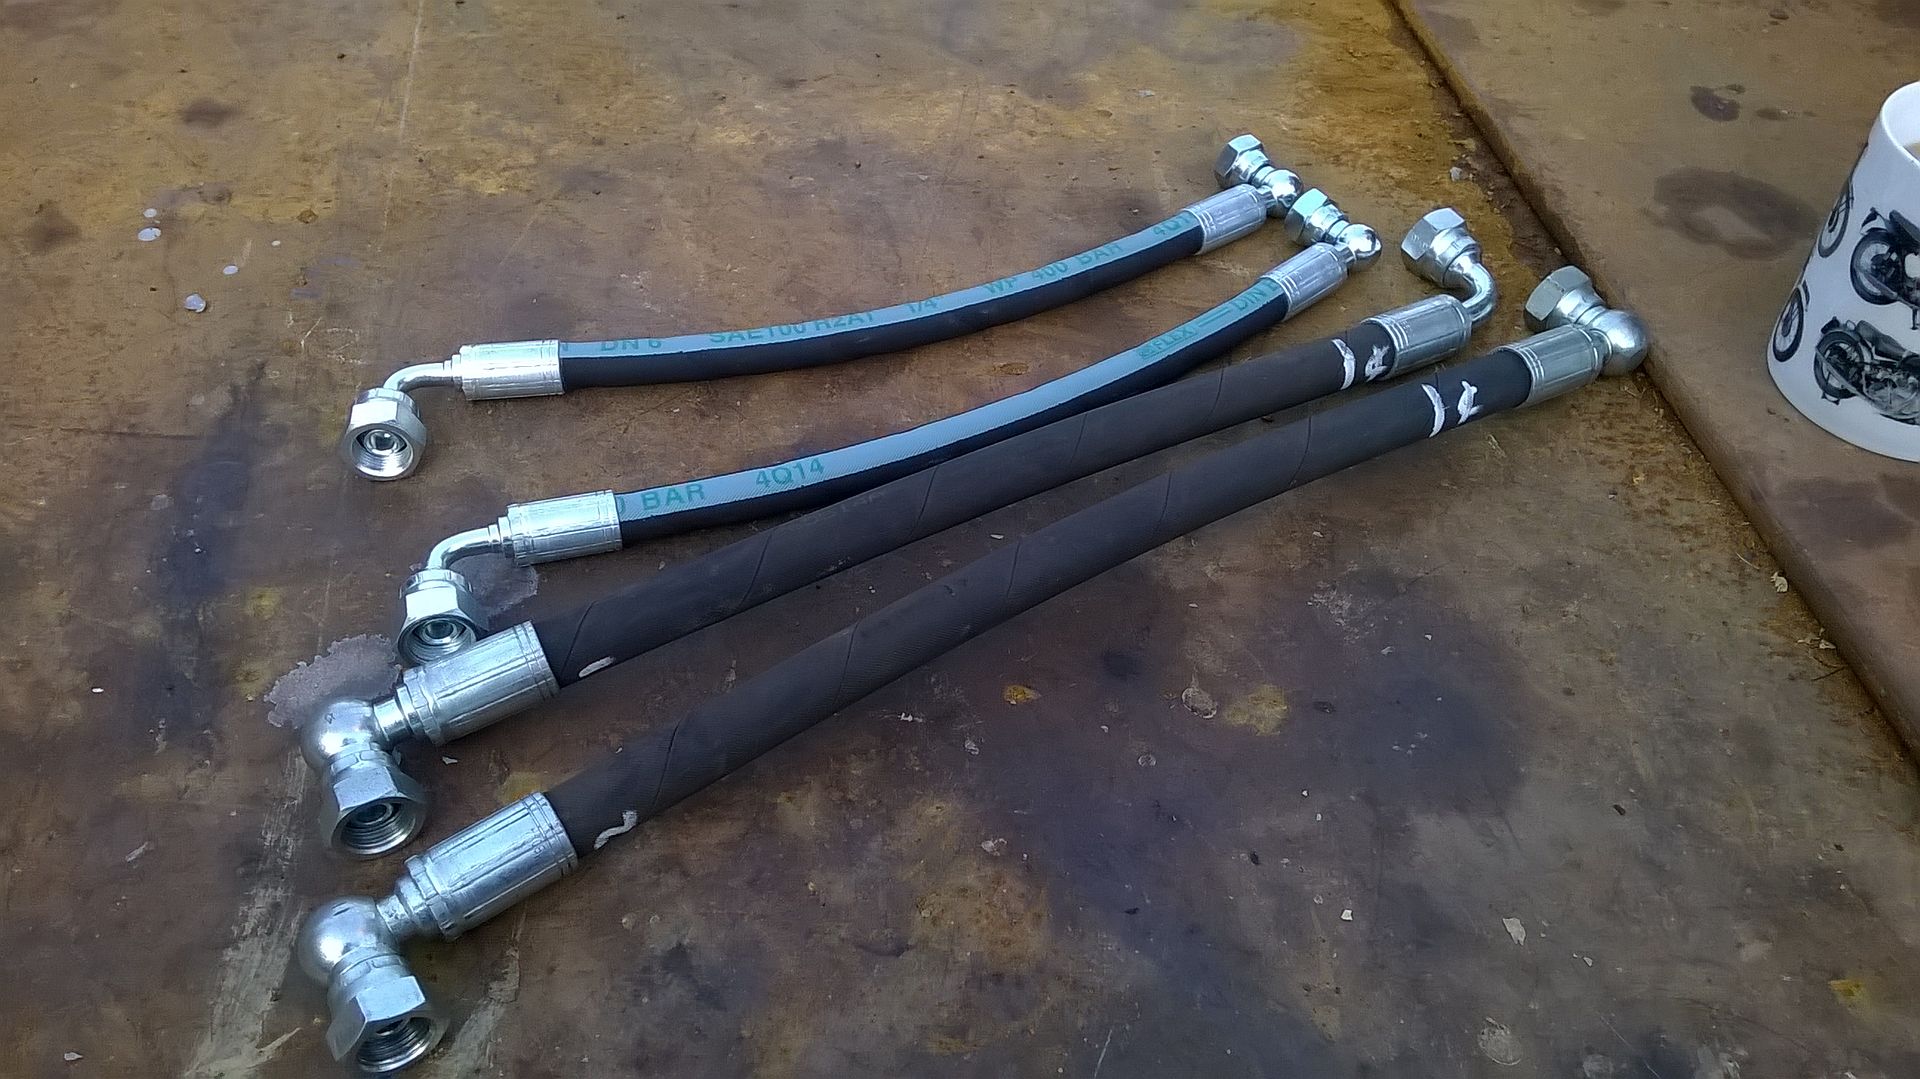
and with them installed.......
put some oil into the system and not a leak in sight!!
Didn't go full tilt as until I got the return stop blocks made and installed, I didn't want to chance ripping the bejeezus out of it with a return ram that's got 60 mm more to give, when the extend was on full stretch!!
I am ecstatically pleased to report that everything worked first go - tried the Cetops first with just ignition on and each plug lit up on demand!!
Then coupled up the plumbing and VERY carefully pressed the pedal after holding down the anti-clock button - and damn me it went anti-clockwise!!
Ditto the left tilt.
Only thing I didn't get right was the feed/return could do with being the other way round, so's I could use the back motion on the pedal - more comfortable and controllable than the forward motion.
Just needed to swap the pipes from the dipper and re-orientate the couplings on the VA-r !!
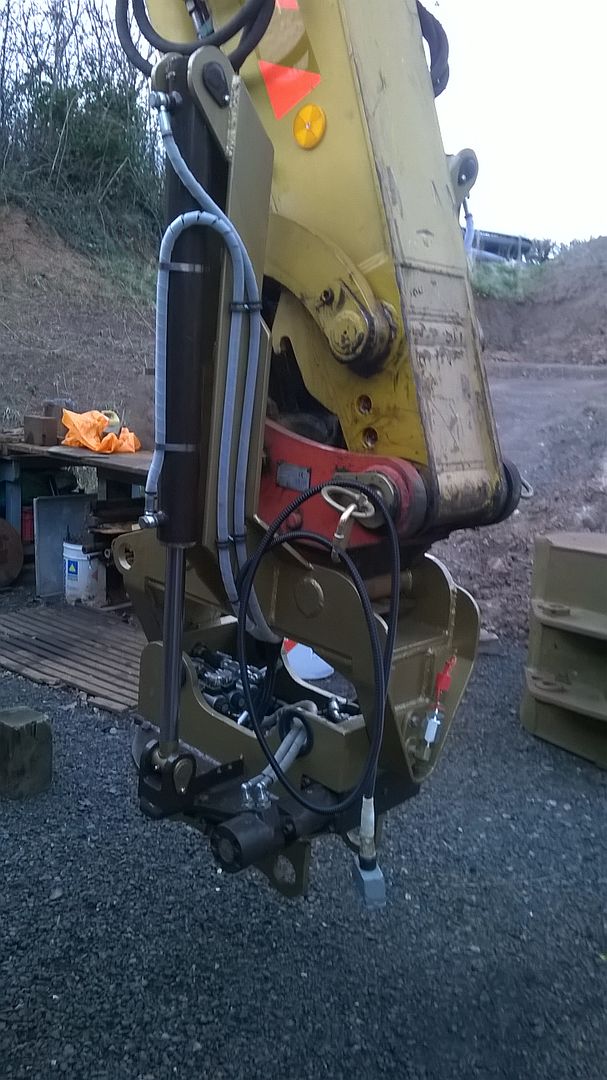
For the eagle eyed amongst you who may have already spotted the 'mistake of the day' - damned near chopped my control wire in half that morning, while bar-ing it left/right to get those hose lengths double checked - got caught up in the tilt hinge!!
Fortunately only nadgered the outer sheath, but had to strip it back to check the individual cores, which were OK!
New outer required and sealing up !!
Anyway, aside from that, the bit you've all been waiting to see ...............
To quote a certain Herr Doktor - the Baron von Frankenfurter - sorry I meant Stein - different story!!
"it lives!" and not a thunderbolt in sight - it took an hour to upload this !!!!
http://vid1275.photobucket.com/albums/y ... uloikn.mp4
It's a bit shaky as I'm holding phone with one hand - it will rotate and tilt simultaneously, but I needed one hand for the phone - hence the shaky bit in the middle where I swapped hands for the tilt.
I'll put my grab on shortly and see if it'll do all 3 together
I've an inline restrictor/reducer/whatever and not sure if it's full open, or closed - no instructions!! If it's open I didn't need it!!!
I'm still on the grab pipes, as I haven't had the dedicated ones made yet.
Plus there were still bits and pieces to do!If it's got tracks, wheels, t*ts, or an engine, at some point it's gonna give you trouble!!Comment
-
Had a couple of hours on time consuming 'fiddlies' on the VA-r.
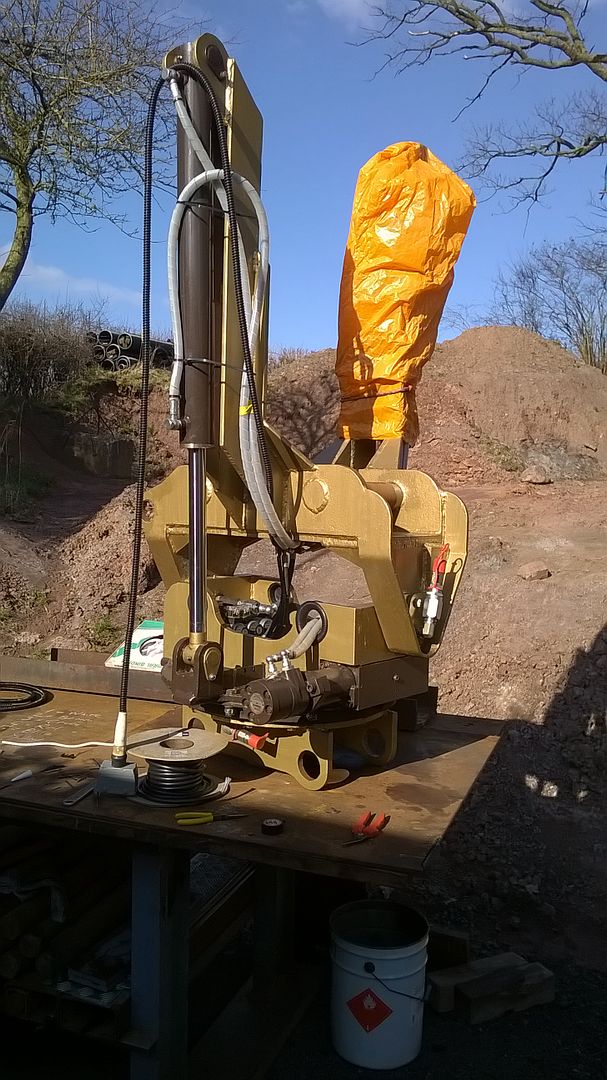
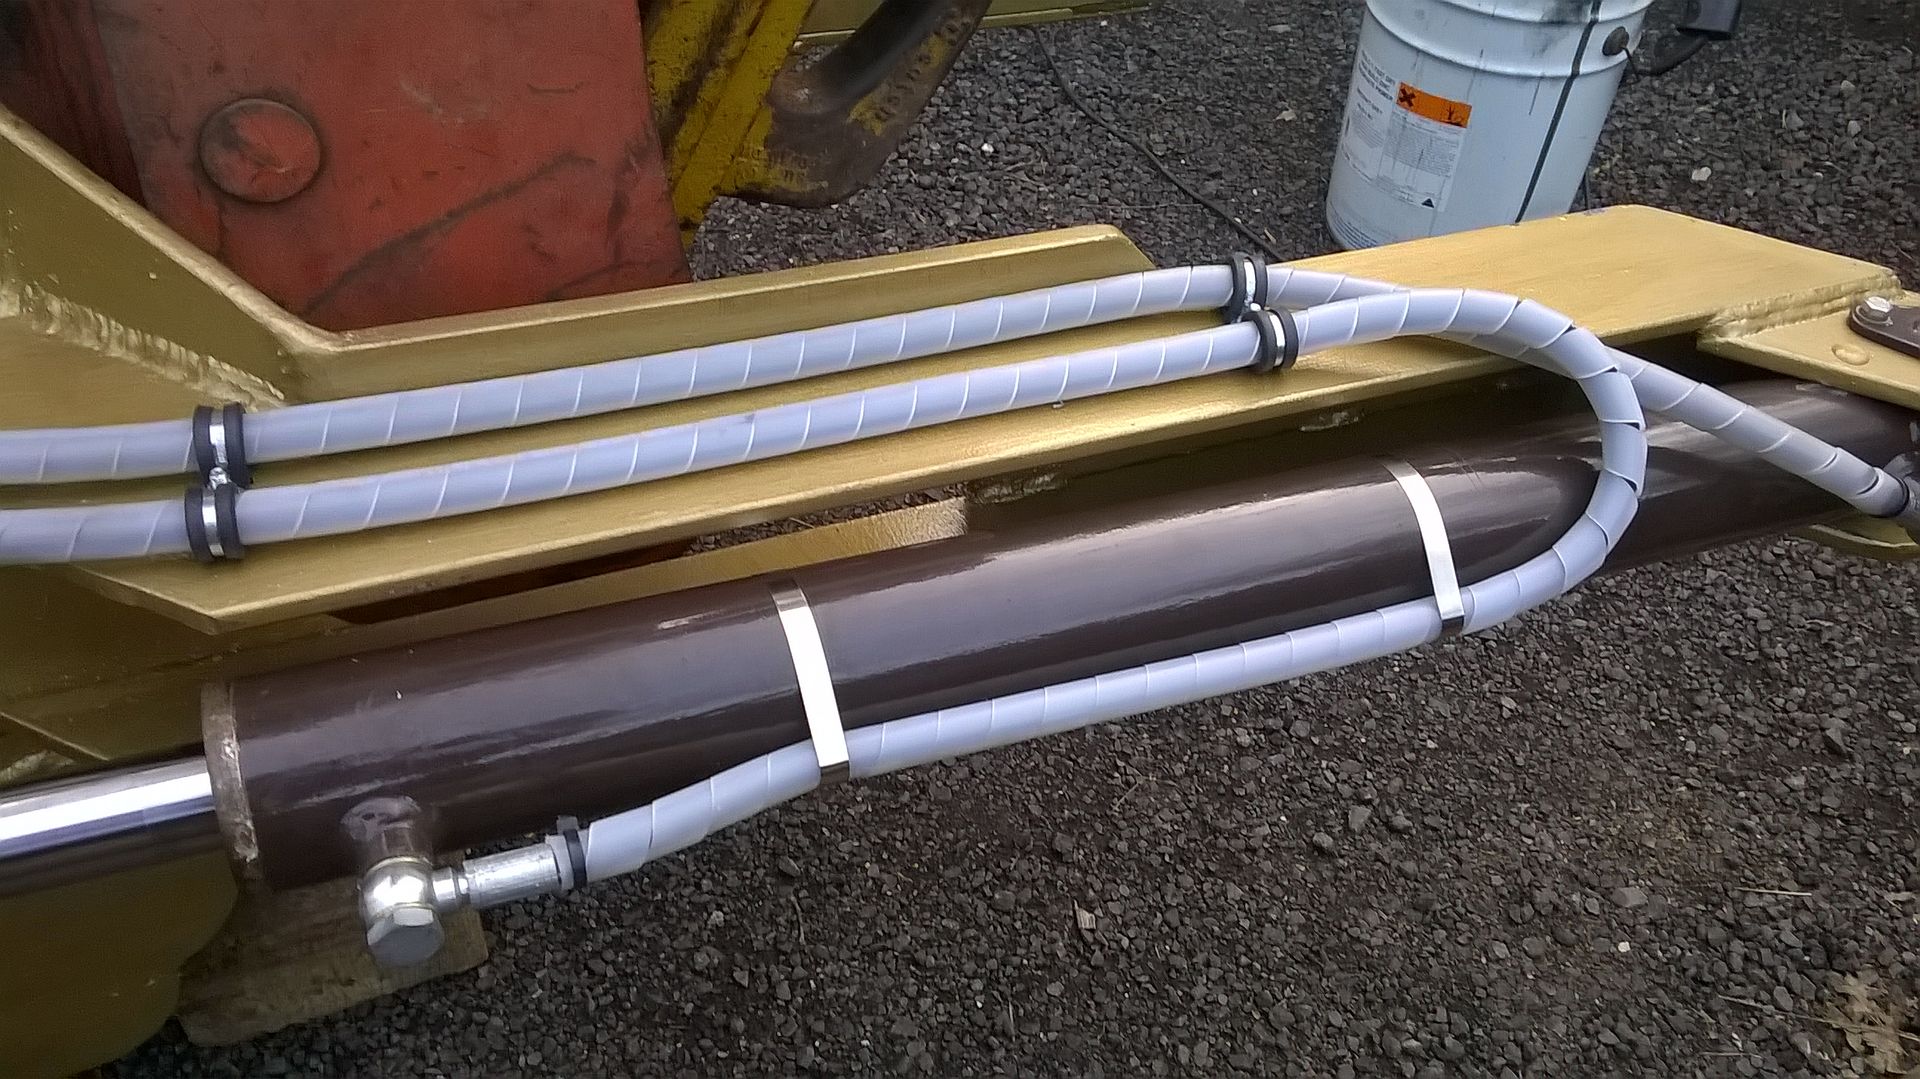
Got some spiral wrap around some of the loom wires on the right side, routed 'em and got a protector on the 7 core, before routing that too and cable tying it all into place - should guard against any chafing for some time.
Also got the protection, I bought a while back, onto the flying lead too.
then...............picked it down off the bench to a more convenient height and position to get the tilt ram pipes fixed in position finally.!!

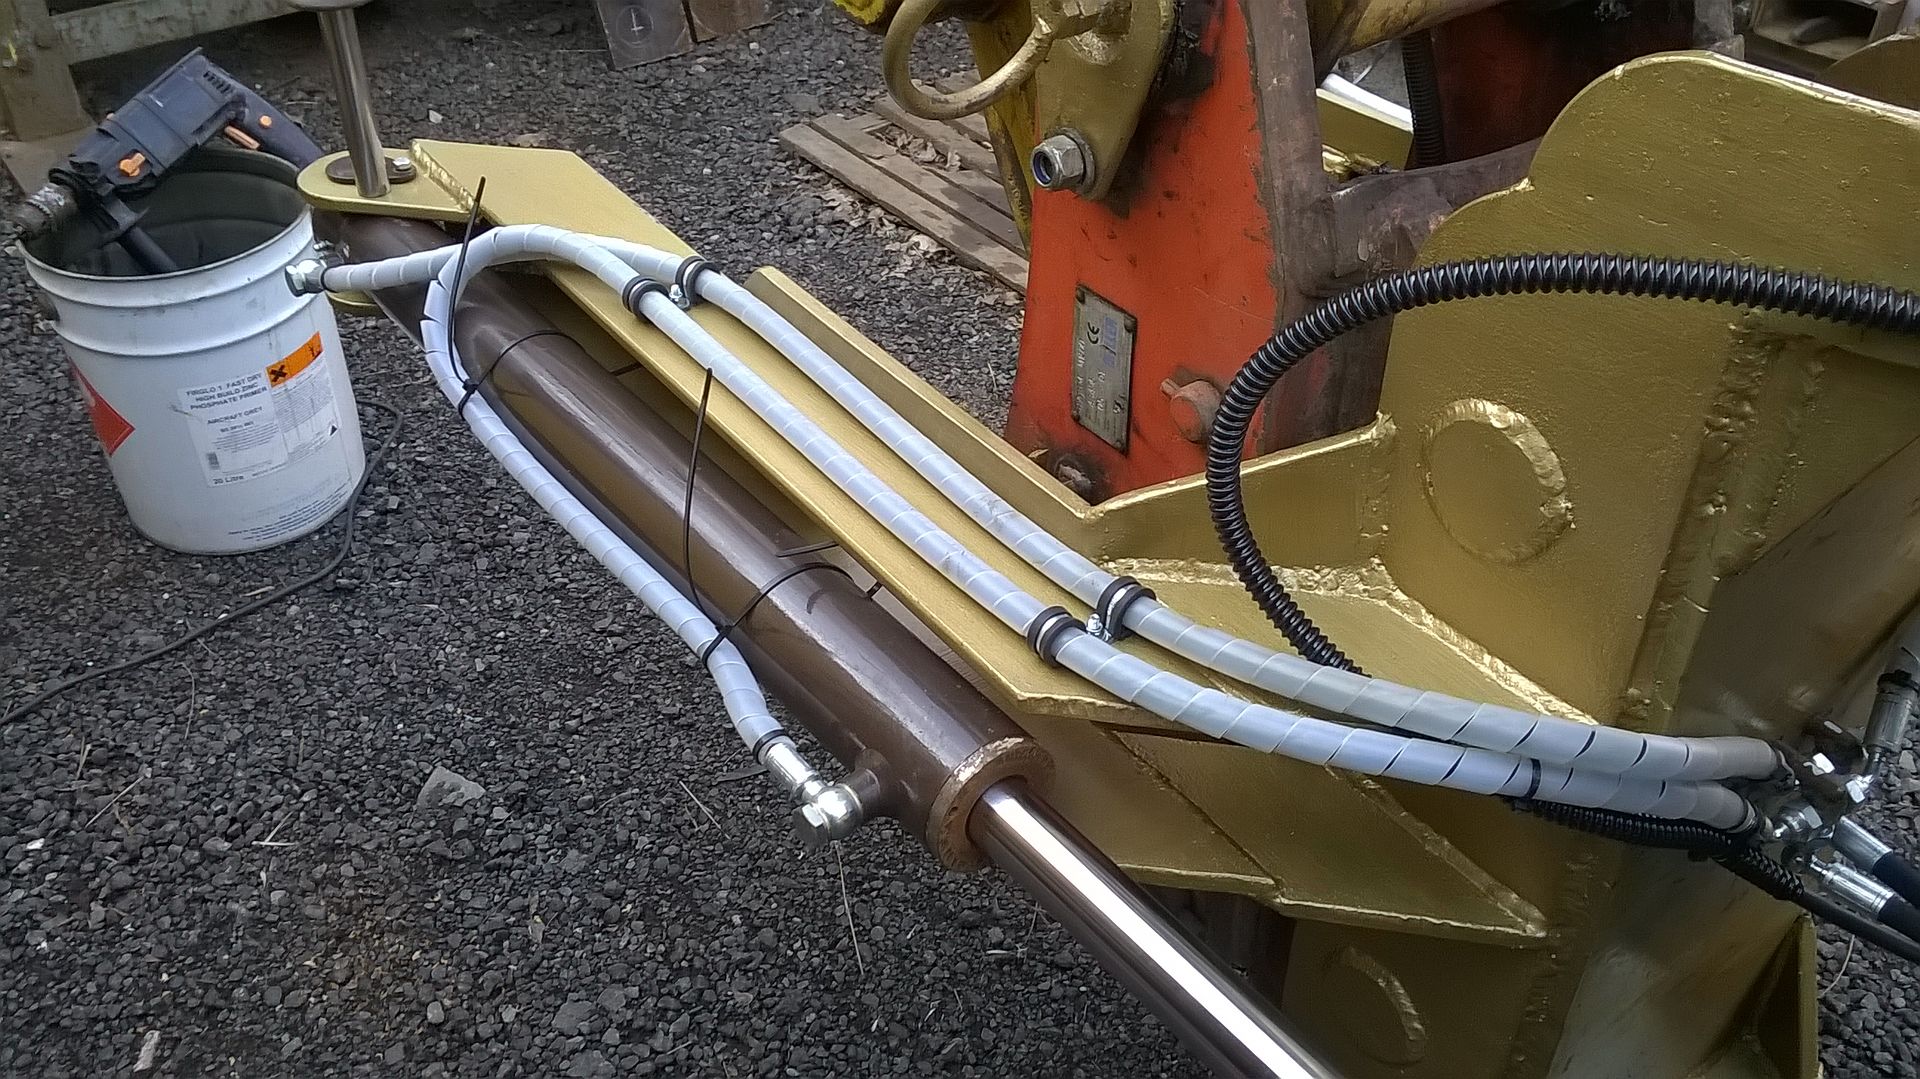
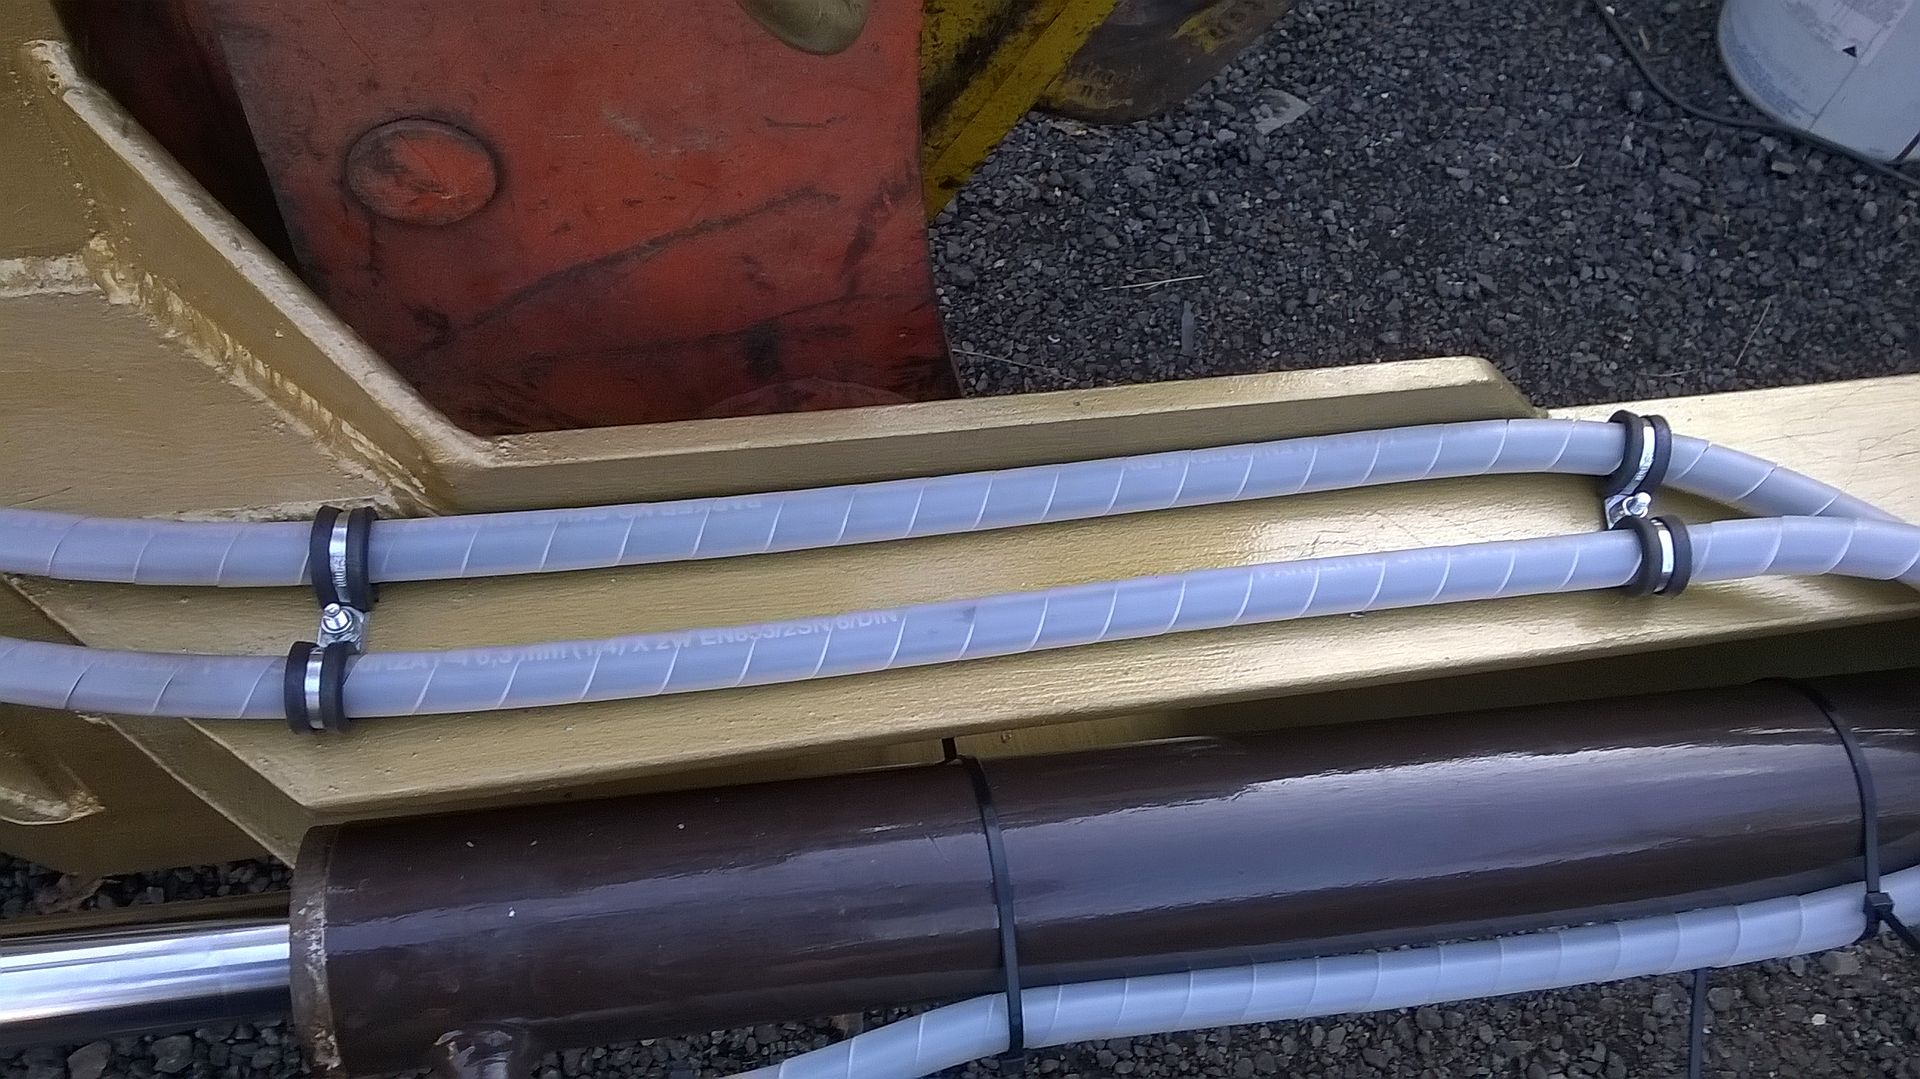
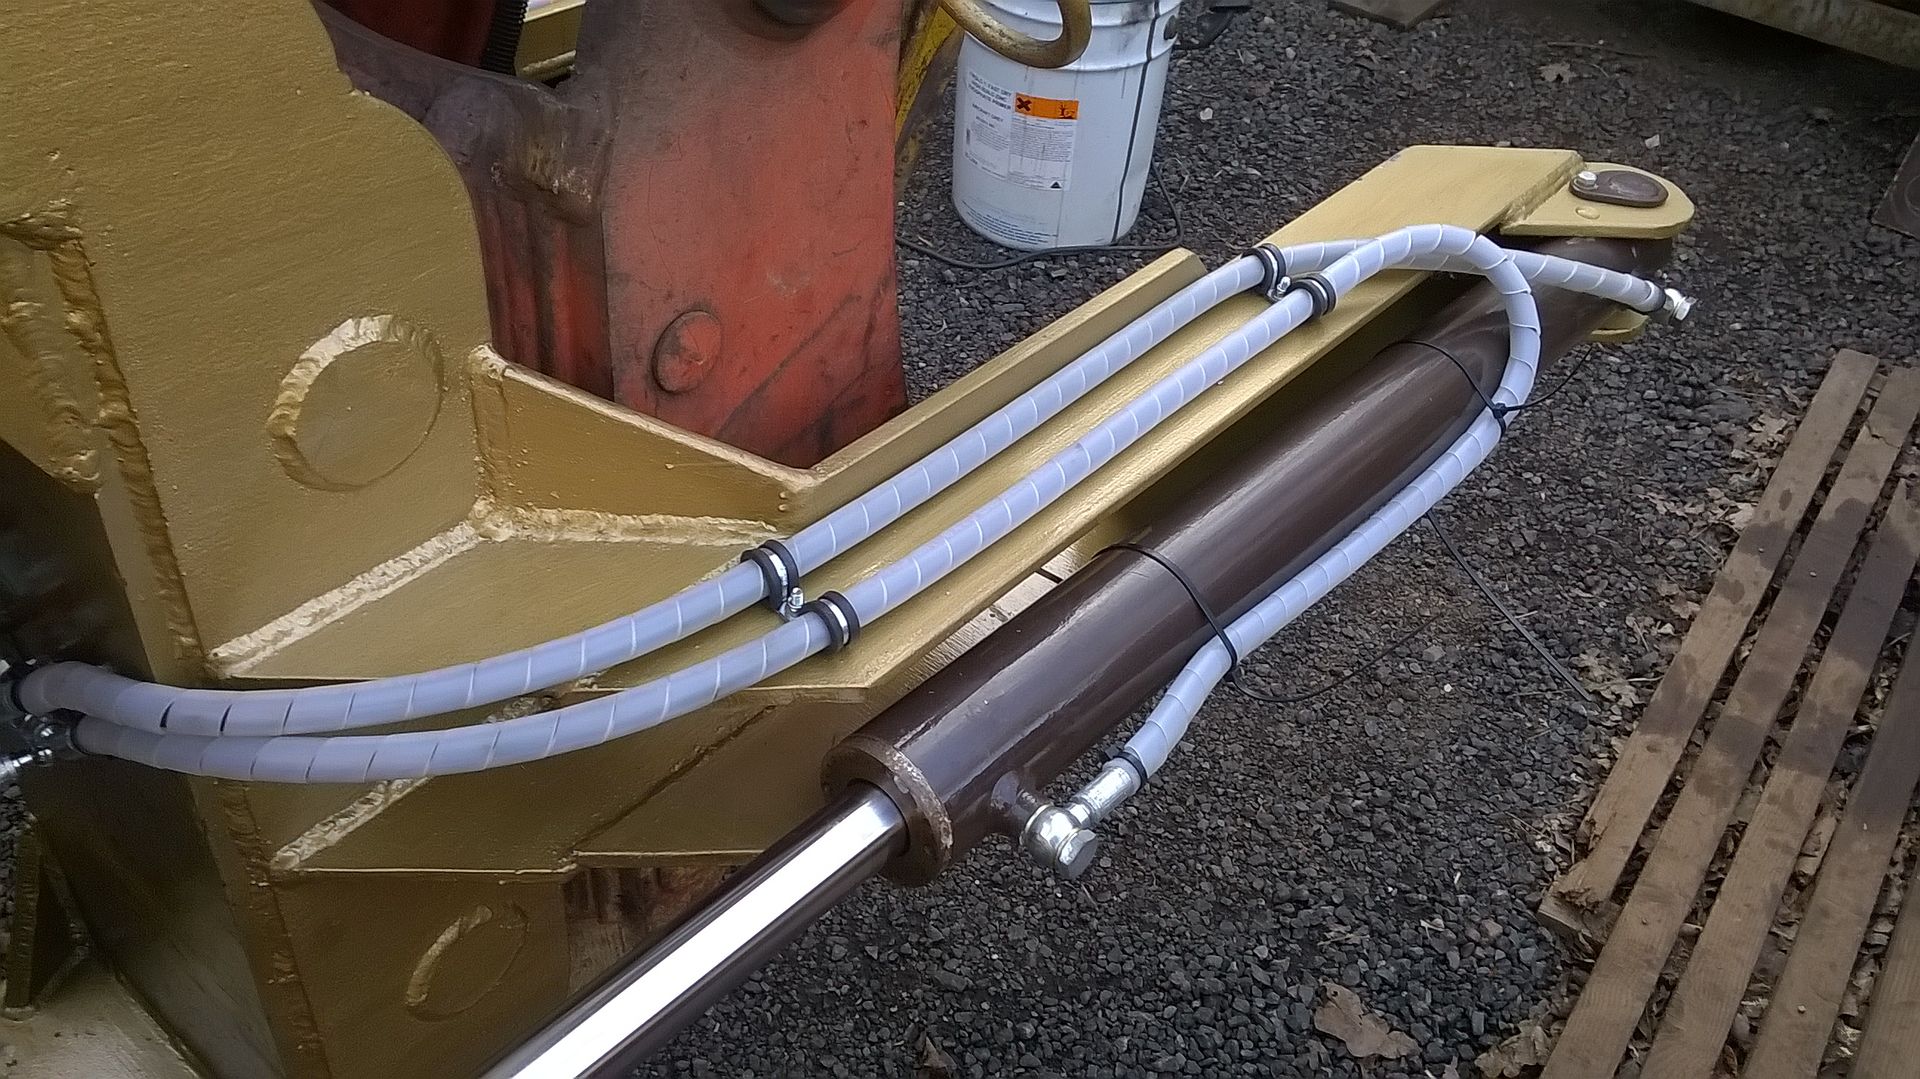
Followed by the stainless ties on the rams .........

They were right lil' bar stewards to get tight, with their ball grippers - had to get it to roll and needed gravitational assistance, so had to get 'em in just the right spot to grip !!!!!
Just got to measure up for those dedicated 1/2" pipes and bolt 'em on and ....... it ........... is ............. there - apart from the tilt ram stops ........ just waiting on a Ying Tong cutter to remake some!!
I would like to put 'em internally and may well do ........ eventually, but I will need to find some suitable heavy wall tube first though.
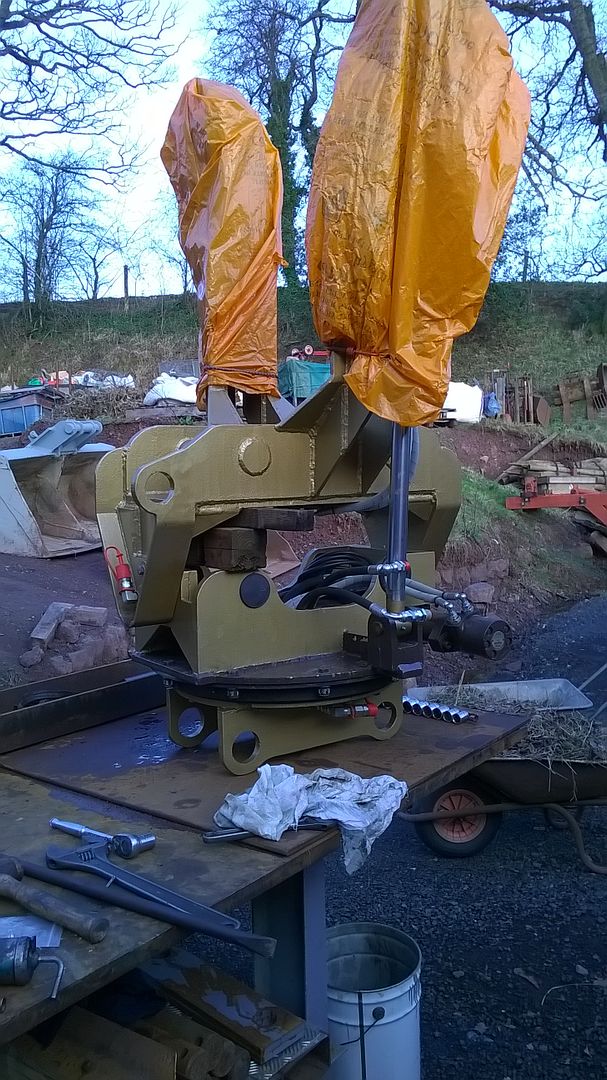
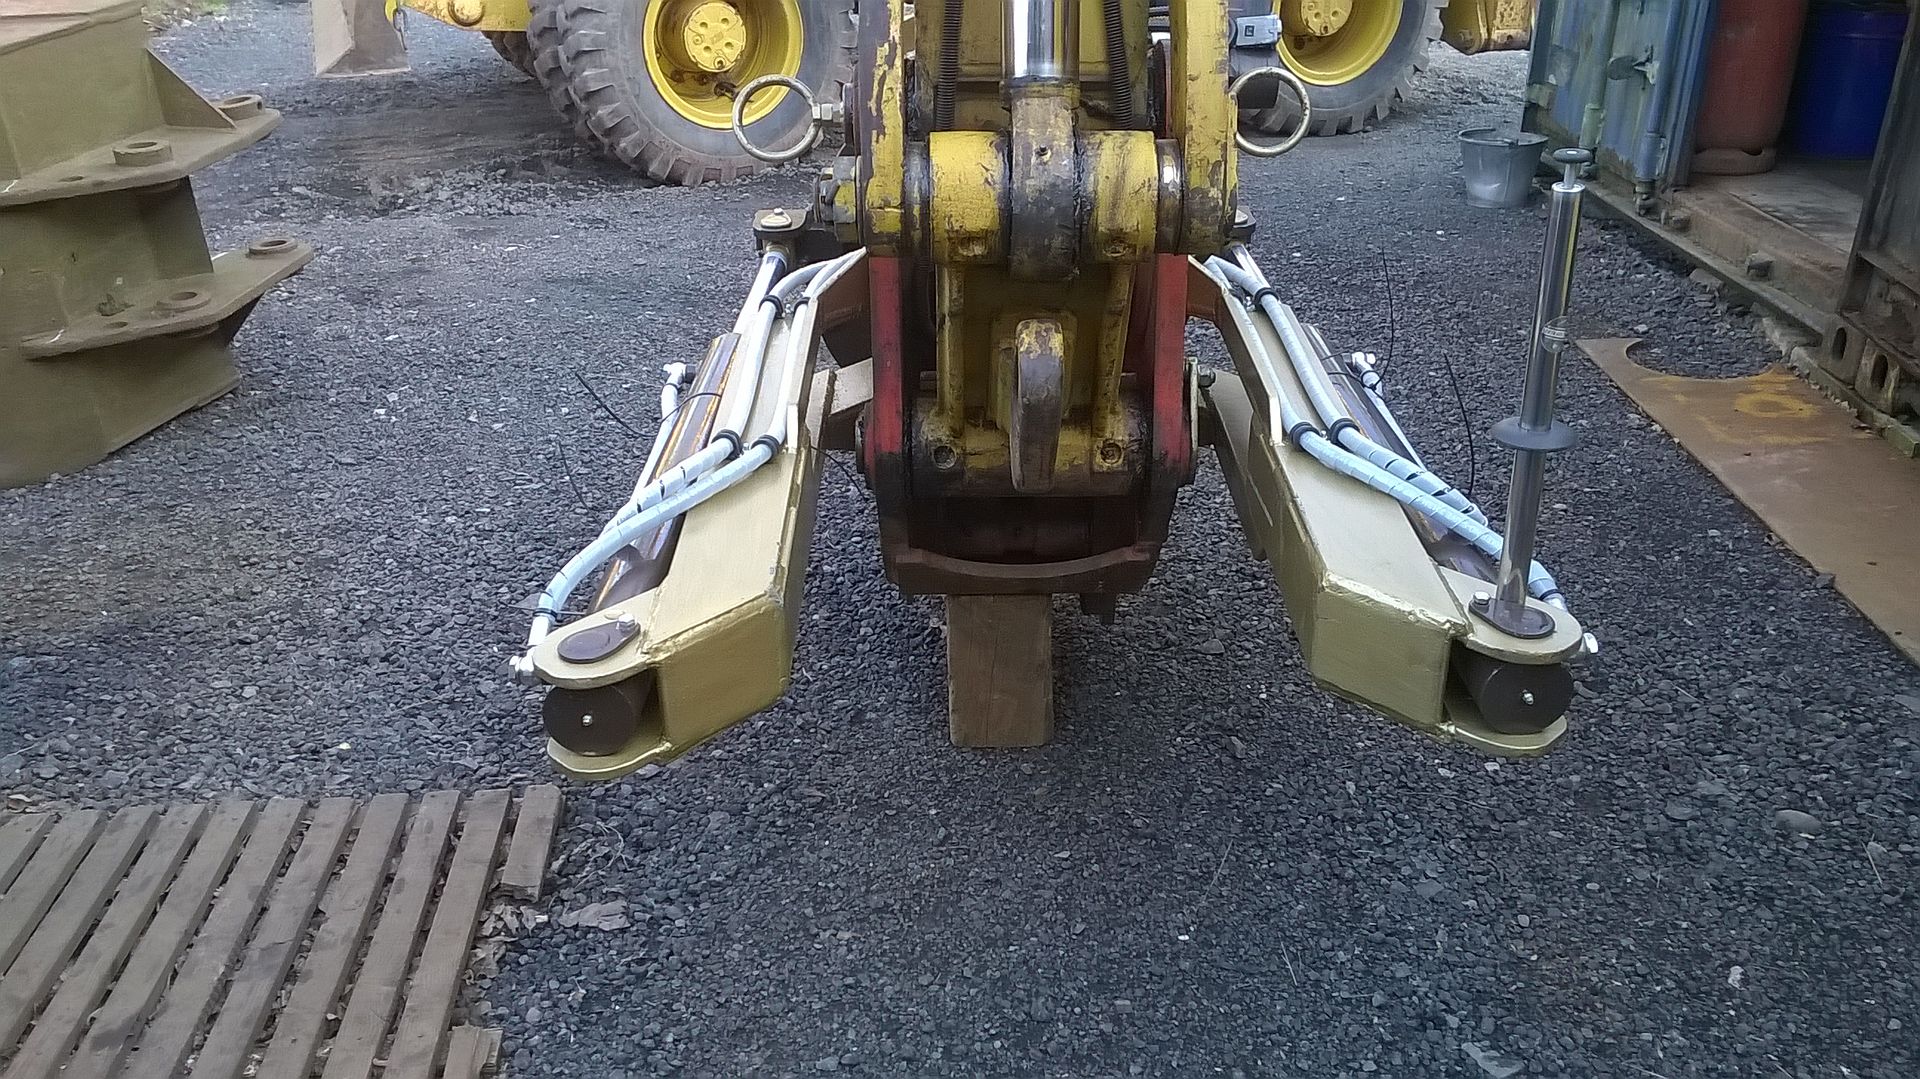
Finally for today, a few 'glamour shots' for yers all.
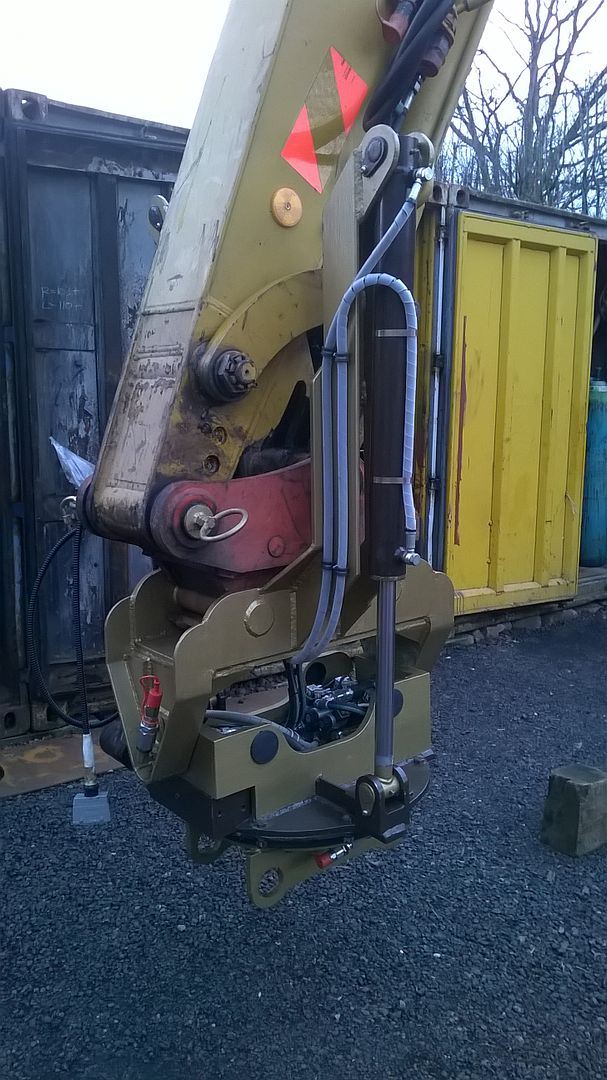
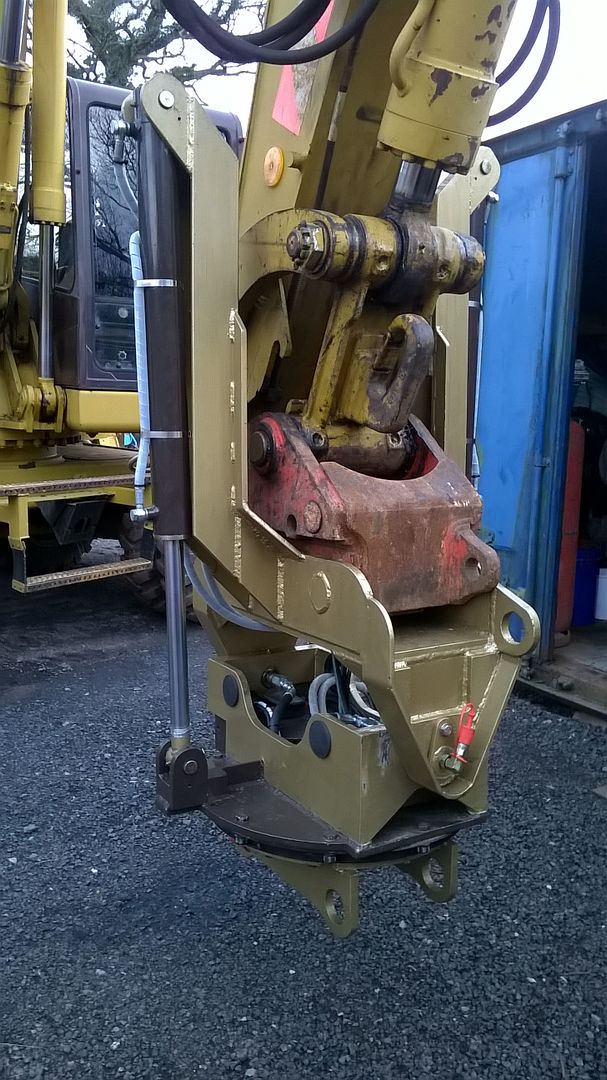
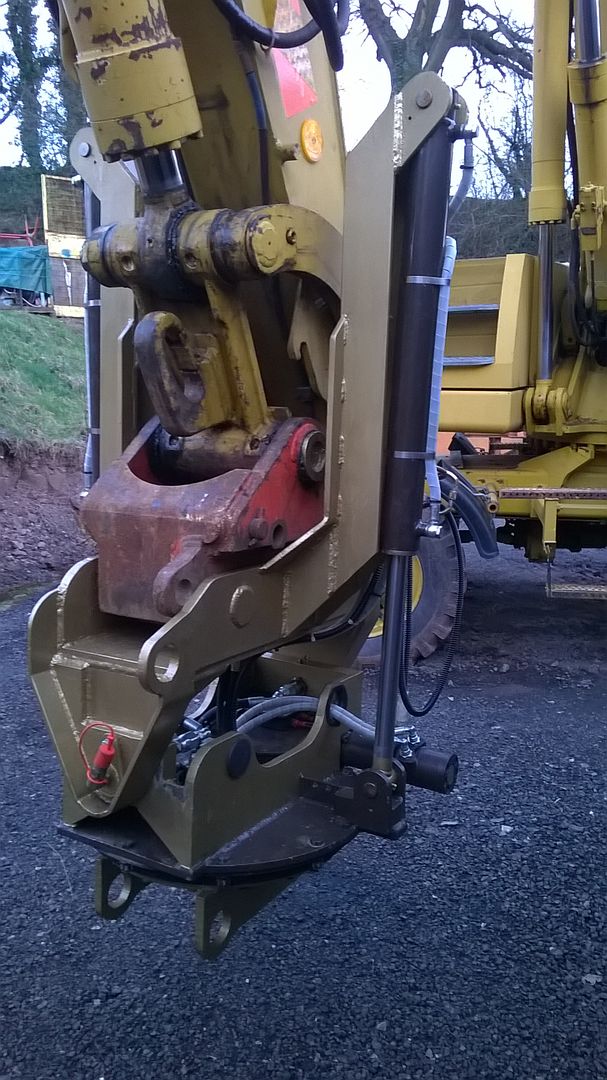
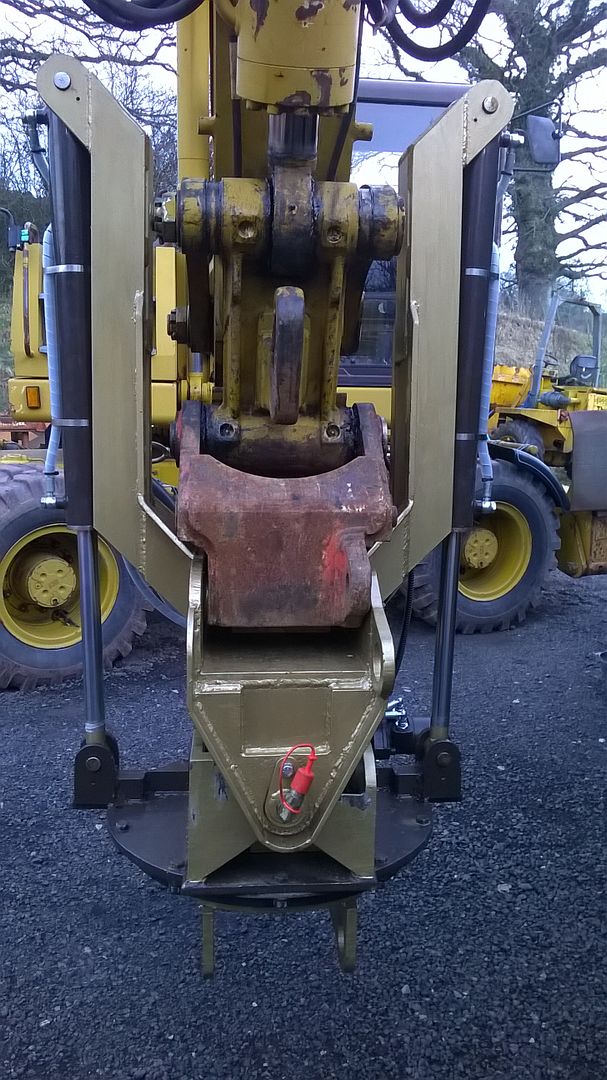
I think I'm pleased with the routing/fixings/etc. - shouldn't come adrift in a hurryIf it's got tracks, wheels, t*ts, or an engine, at some point it's gonna give you trouble!!Comment
-
So would it be safe to say 'It's ALIVE!'?
Comment
-
Originally posted by 245dlc View Post
You sure could Bert. There were a few more bits 'n bobs to do but it was functional at least and did what I expected it would when I pressed the buttons and pedal !!  If it's got tracks, wheels, t*ts, or an engine, at some point it's gonna give you trouble!!
Comment

.gif "wink2")
Comment